3.6. Email Client
The Email functionality is available only when the additional package dfx-webmail is installed.
The system allows you to work with email directly in the platform interface. This makes it possible to centrally receive, view, and process emails without switching to external email services. The built-in email client supports working with mailboxes via IMAP, SMTP, and Office365 accounts (via OAuth). You can connect one or multiple mailboxes, view incoming emails, create new messages, forward emails, and work with attachments.
To start using the Email functionality, you need to:
3.6.1. Create a Webmail Service
Only users with the Admin role can perform this action.
-
In the navigation pane, select the Administration workspace 1.
-
Select the Settings shortcut group 2, and then select the Webmail Services shortcut 3.
-
In the toolbar, select Create 4.
-
Fill in the fields using the guidance in the table below.
Field Name Description Title* The display name of the webmail service in the system. It is recommended to specify a clear name that helps distinguish between different services (for example, Gmail IMAP, Office365 SMTP). Server* The mail server address and port in the host:portformat. For example:imap.gmail.com:993for receiving emails orsmtp.office365.com:587for sending emails. The value depends on your email provider.Service Type* Defines the purpose of the service: - IMAP — used for receiving (downloading) emails from the mailbox.
- SMTP — used for sending emails.
Note:Fields marked with the "*" symbol are required.
-
In the toolbar, select Save.
3.6.2. Add a Mailbox
After creating webmail services, you need to add a mailbox so that the system can connect to it and download emails. You can configure a mailbox either for your own use or for another user. After adding the account, the system will start receiving emails and allow you to work with them directly in the platform interface.
There are two methods:
- Method 1: The user creates a mailbox for themselves.
- Method 2: The administrator creates a mailbox for a user.
Method 1: Created by User
To configure a mailbox, sign in to the system using the user account.
-
In the navigation pane, select the Documents workspace 1.
-
Select the Email shortcut 2.
-
In the toolbar, select the icon.
-
Select the icon to create a new profile.
-
Fill in the fields using the guidance in the table below.
Field Name Description Title The display name of the account in the system. It is recommended to specify a name that helps quickly identify the mailbox (for example, Support Inbox, HR Mailbox). Full Name The name that will be displayed as the sender name in emails (for example, Support Team or John Smith). Email Address The email address that will be displayed as the sender address. This field is optional, but it is recommended to fill it in to avoid incorrect sender display in emails. Login The login used to authenticate the mailbox. Usually, this is the full email address (for example, support@company.com), but it may differ depending on the mail server configuration.Password The password used to authenticate the email account. It must match the credentials configured in your email service. Mail Receiving Service Select the webmail service used to receive emails (type IMAP). This service must be created beforehand during the webmail service configuration step. Mail Sending Service Select the webmail service used to send emails (type SMTP). This service must also be created beforehand in the system. -
Select Add.
Method 2: Created by Administrator
-
In the navigation pane, select the Administration workspace 1.
-
Select the Settings shortcut group 2, and then select the Webmail Credentials shortcut 3.
-
In the toolbar, select + 4.
-
Fill in the fields similarly to the previous method.
-
In the toolbar, select Save.
After adding the account, the system downloads messages from the mailbox. The Email Client functionality allows you to perform standard actions such as Creating Emails, Viewing Emails, Forwarding Emails, and Viewing and Saving Attachments.
3.6.3. View Received Emails
-
In the navigation pane, select the Documents workspace 1.
-
Select the Email shortcut 2.
-
Select an account if you have multiple accounts:
-
In the toolbar, select the icon.
-
Next to the required account, select the icon.
-
-
On the main screen, the table displays all received emails. You can view them by selecting the required email in the table.
3.6.4. Send an Email
-
In the navigation pane, select the Documents workspace 1.
-
Select the Email shortcut 2.
-
Select an account if you have multiple accounts:
-
In the toolbar, select the icon.
-
Next to the required account, select the icon.
-
-
Select the icon to create a new email.
-
Fill in the required email fields.
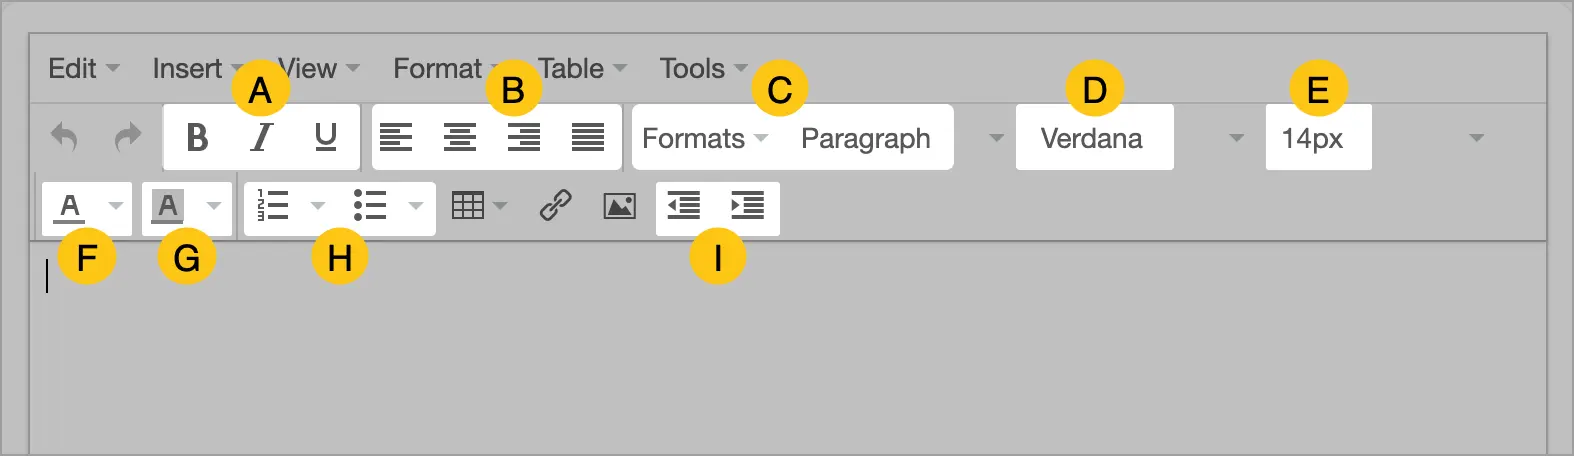
The editor provides flexible text formatting options, including:
- A text styles
- B alignment
- C styles
- D font
- E font size
- F font color
- G background color
- H numbered and bulleted list formatting
- I left indentation
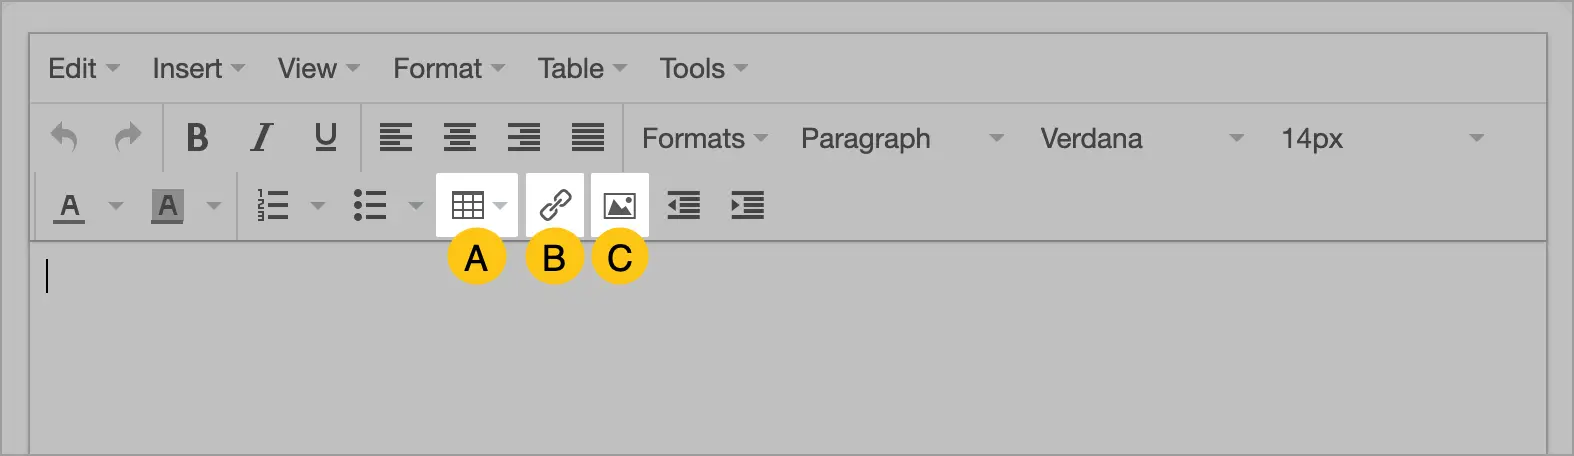
You can also add tables A, links B, and images C.
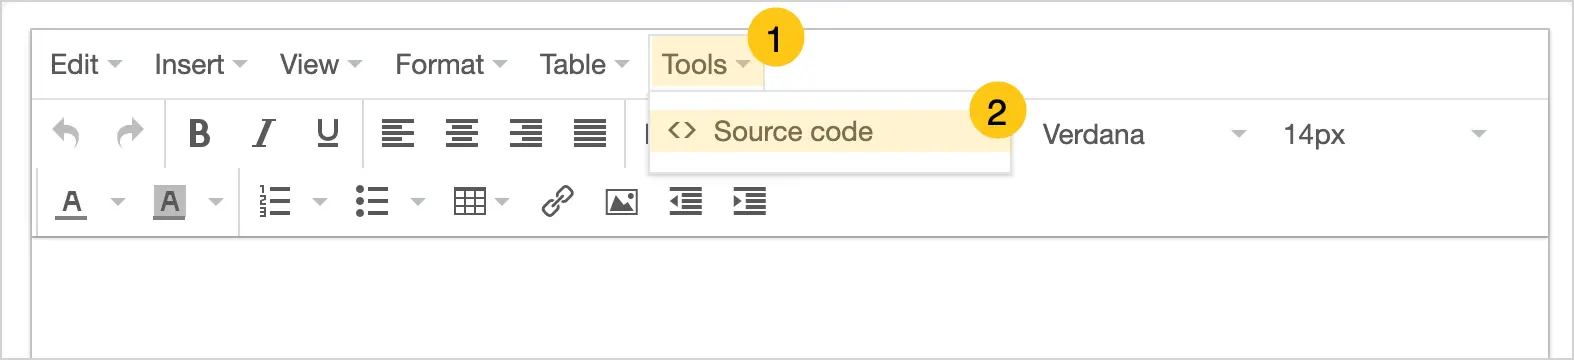
If necessary, you can view and edit the HTML content through the Tools 1 > Source Code 2 menu.
To add an attachment, select the + icon, select a file on your device, and confirm the selection.
After the attachment is added, its name is displayed below the email subject field. You can select the required attachment and then select the A icon to download the file to your device. If the attachment is in PDF format, you can select the B icon to preview it.
-
Select Send.
If you want to send the email later, select the 1 icon. After saving, the email will be available in the Drafts tab 2.