3.14. Scanner Configuration
3.14.1. Prerequisites
Before installing the scanner extension, make sure the following requirements are met:
-
Your operating system is Windows.
Tip:If you use macOS or Linux, install UBExtension using a virtual machine. You can use Parallels to install Windows on your device.
-
The Google Chrome browser is installed on your device.
3.14.2. Install the Scanner Extension
-
Open the Google Chrome browser.
-
Install UBExtension using the following link: UBExtension
-
In the upper-right corner, select the
 icon 1 to open the download history, and then select the UBExtension.crx file 2.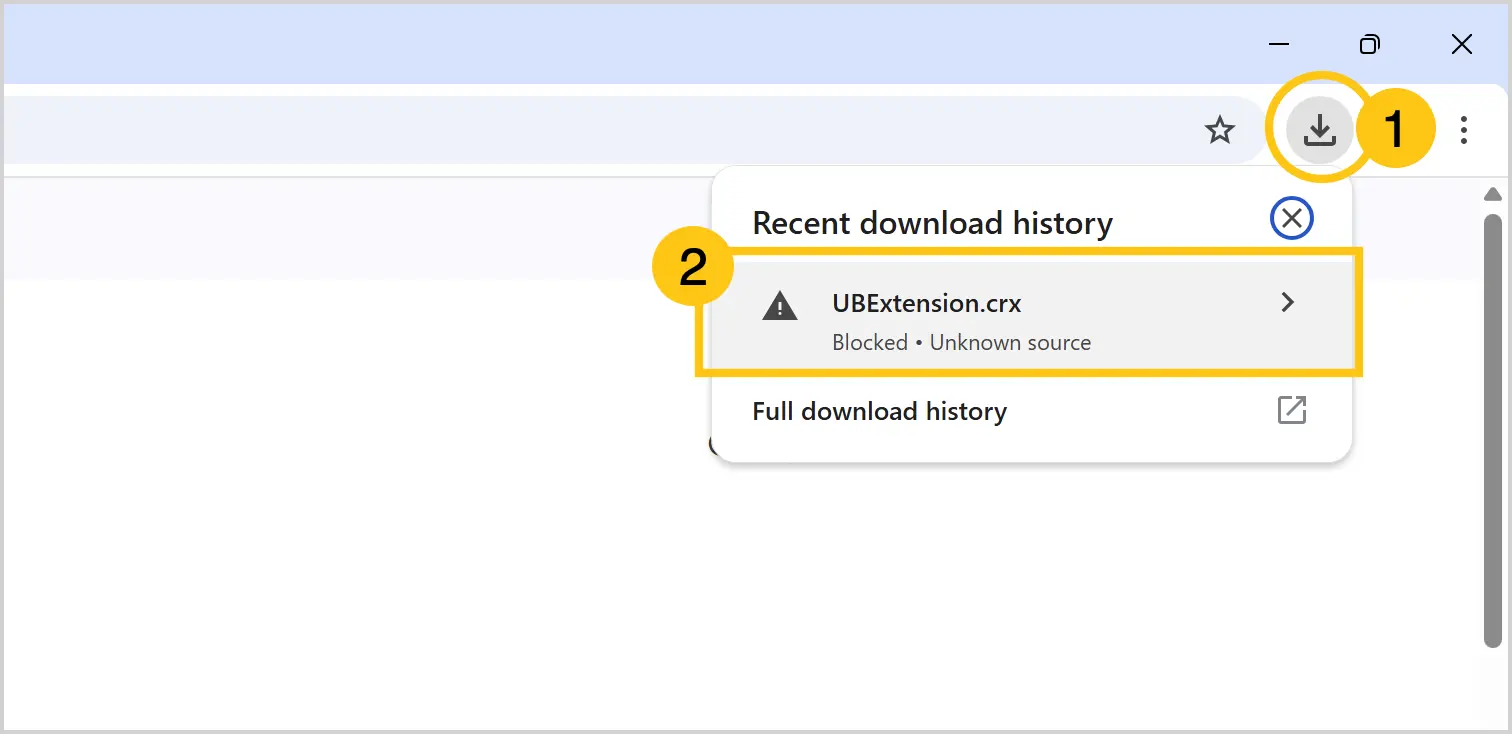
-
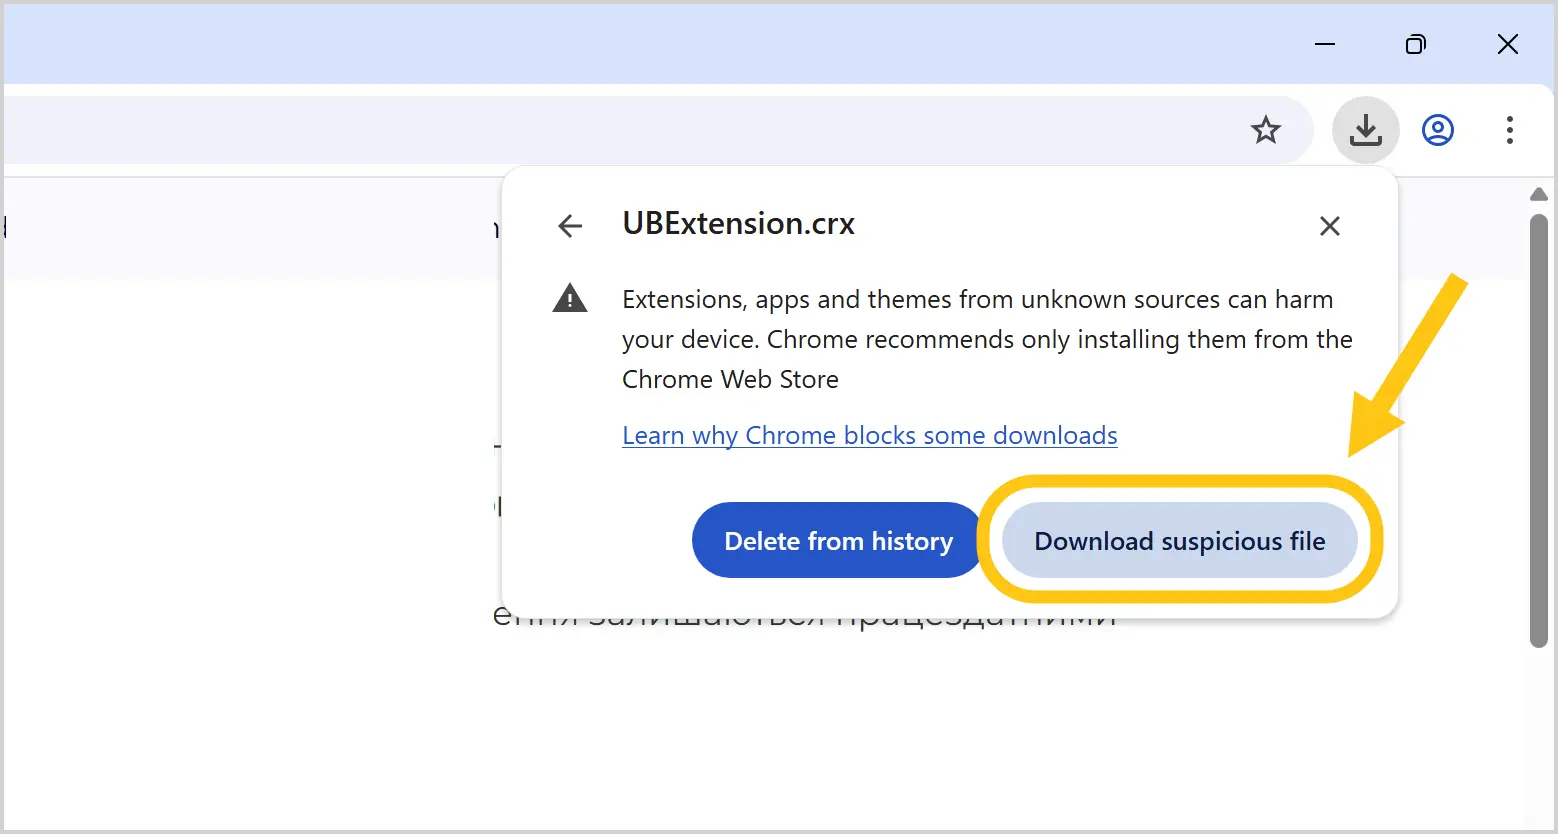
Select Download suspicious file.
-
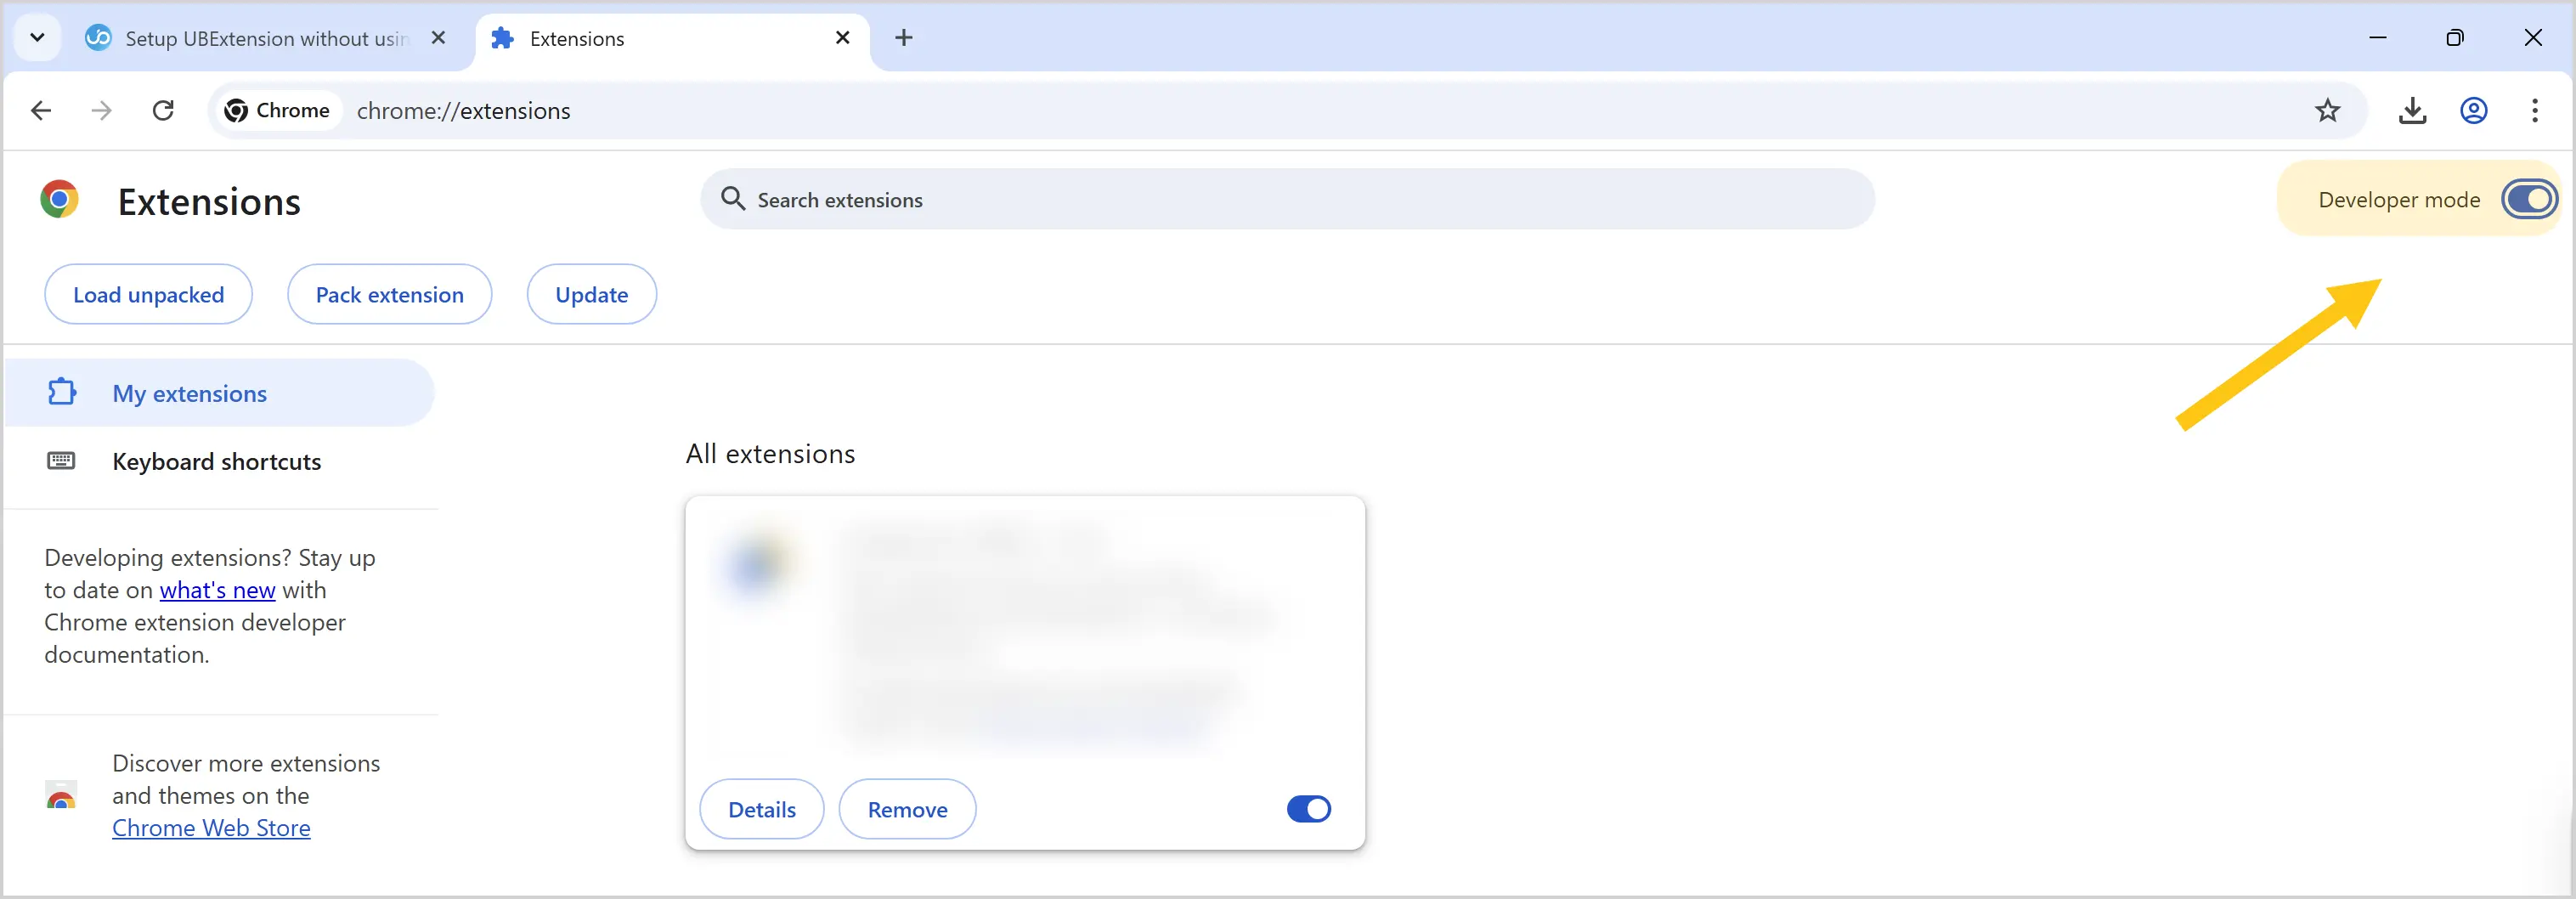
In the address bar, enter
chrome://extensions/. -
In the upper-right corner, enable the Developer mode toggle.
-
In the upper-right corner, select the
icon to open the recent download history.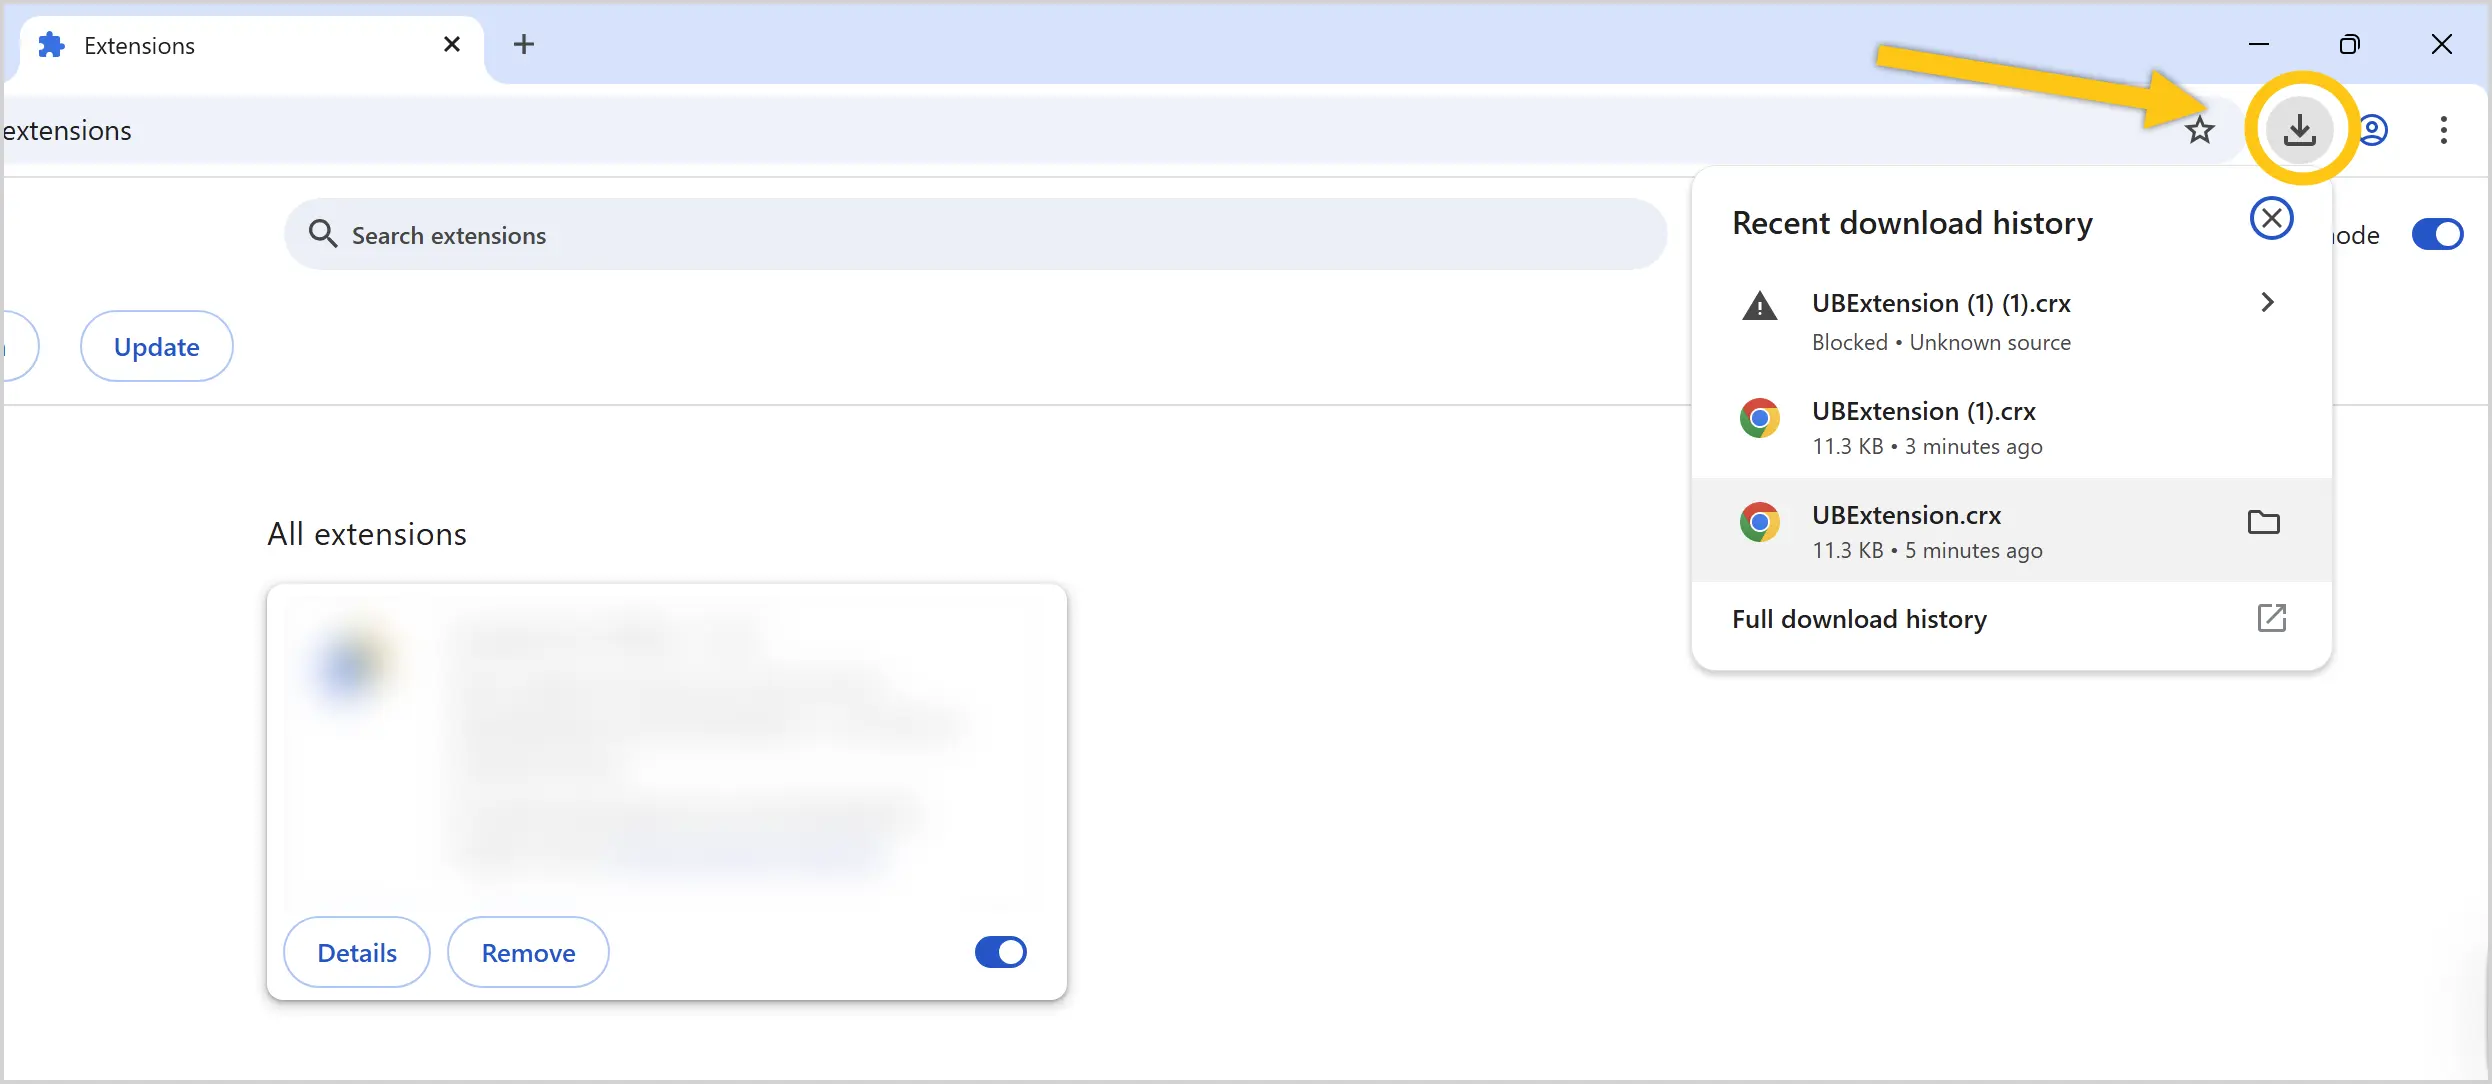
-
Drag the UBExtension.crx file into the All Extensions section.
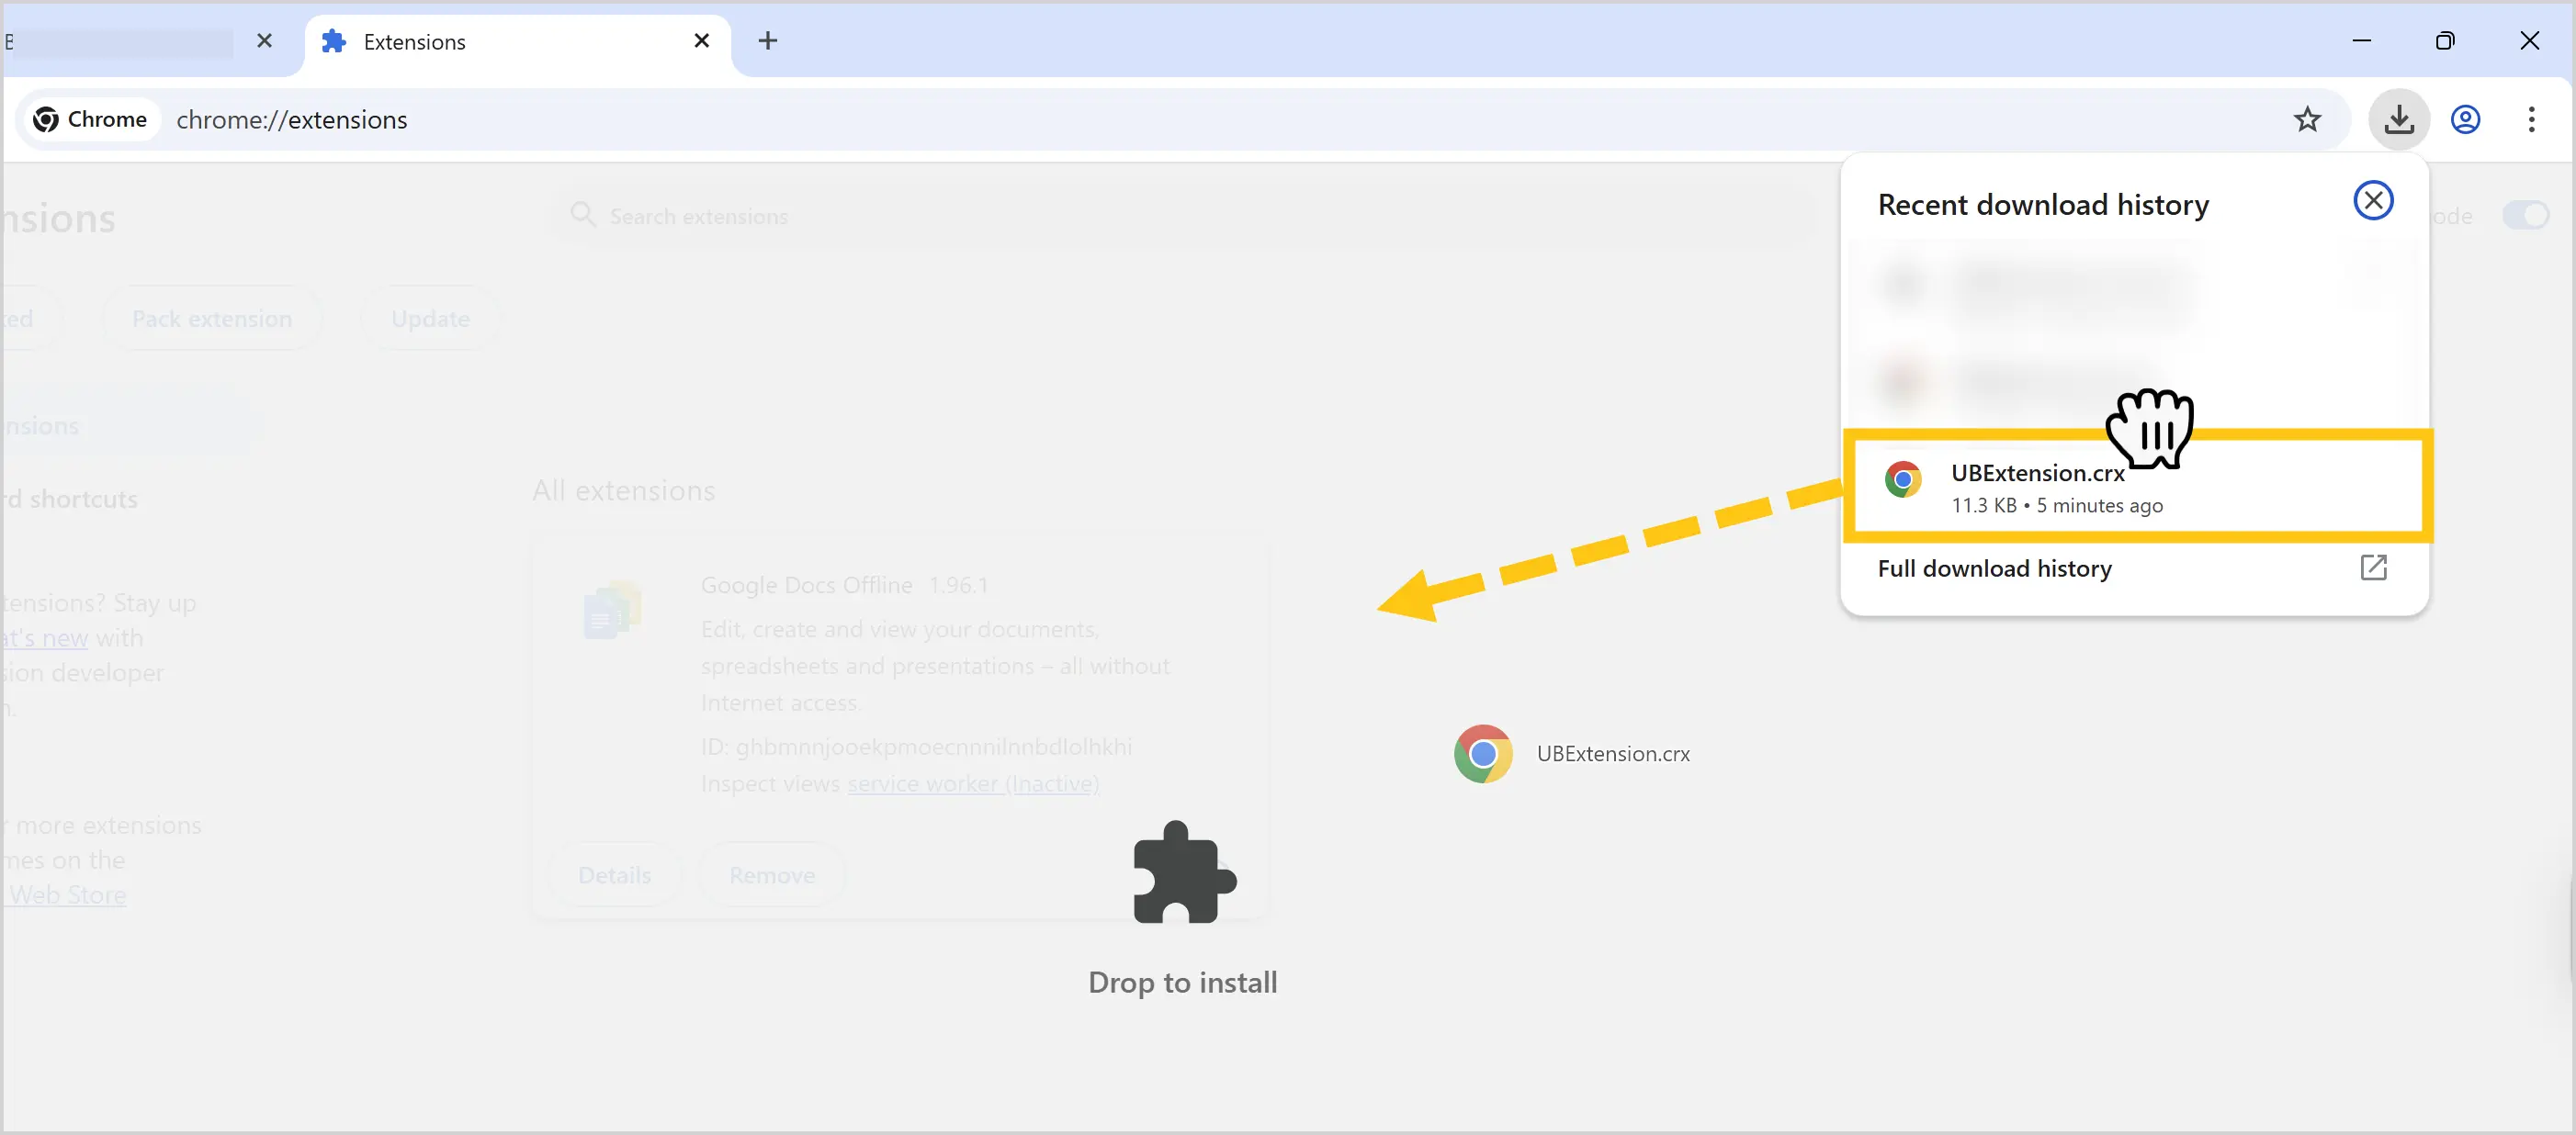
-
Select Add Extension.
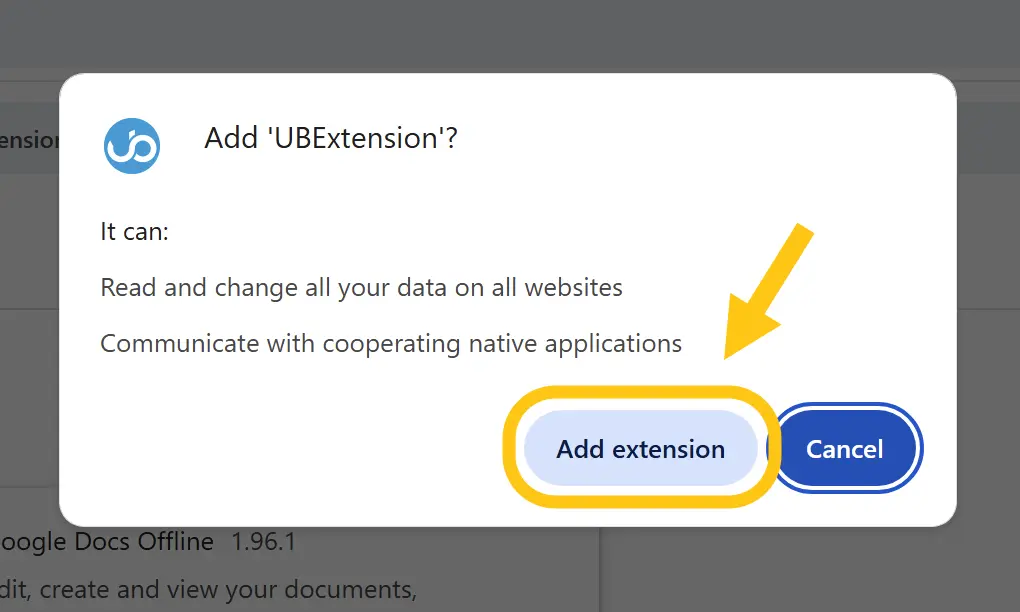
-
Open the Nectainium platform.
-
In the upper-right corner, select the profile picture 1.
-
Select Settings 2, and then select Scanner Settings 3.
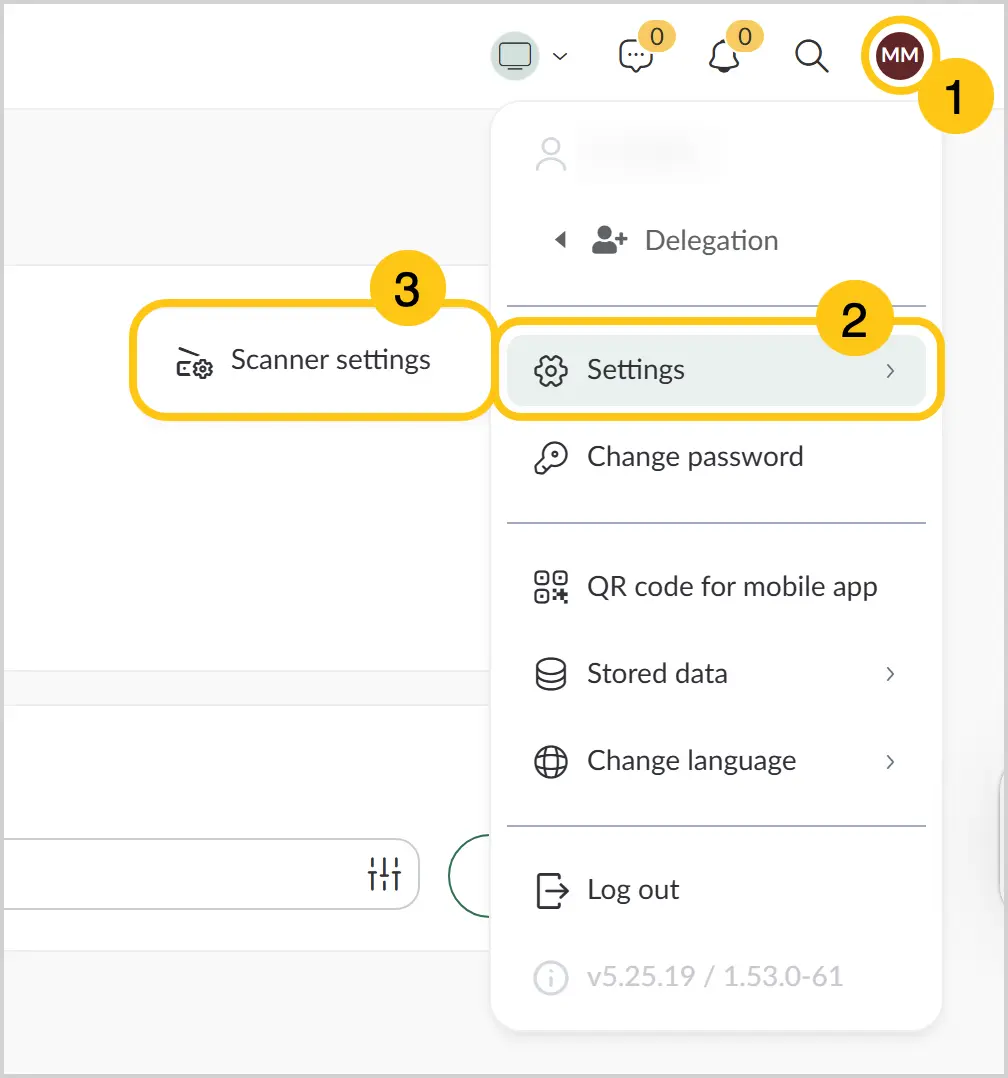
-
In the displayed window, select Error → DOWNLOAD INSTALLER.
-
In the displayed window, select ubhostscanner.msi.
-
Sign out of your Nectainium account.
a. In the upper-right corner, select the profile picture 1.
b. Select Sign Out 2. -
Sign in to your Nectainium account again.
-
In the upper-right corner, select the profile picture 1.
-
Select Settings 2, and then select Scanner Settings 3.
-
If all steps were completed correctly, the Scanner Settings window will appear.
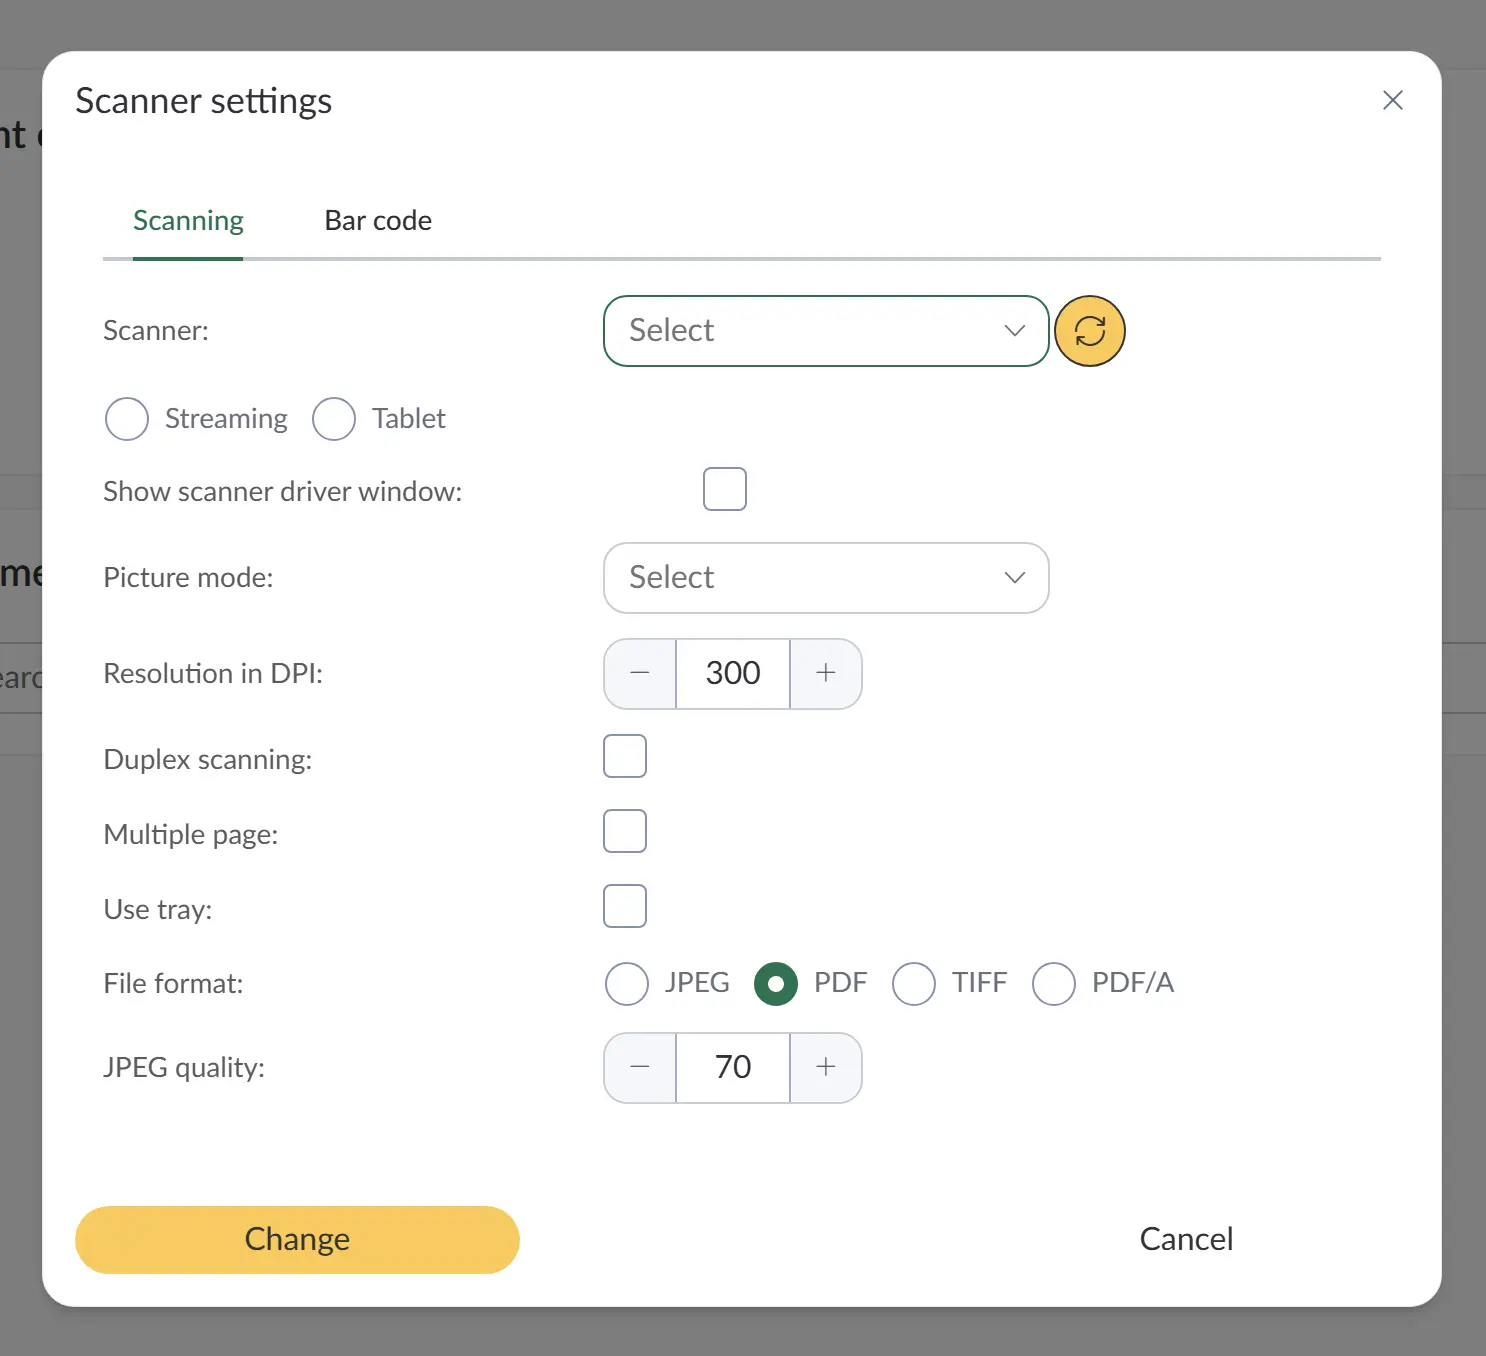
Configured scanner settings are applied only to the current device. However, you can switch between different Nectainium profiles and continue using the same scanner settings.