1.7. User Groups
User groups can be used to grant access to various elements of the platform such as document types, search templates, shortcuts, and more.
1.7.1. Create a User Group
Only users with the Supervisor role can create user groups.
To create a user group, follow these steps:
-
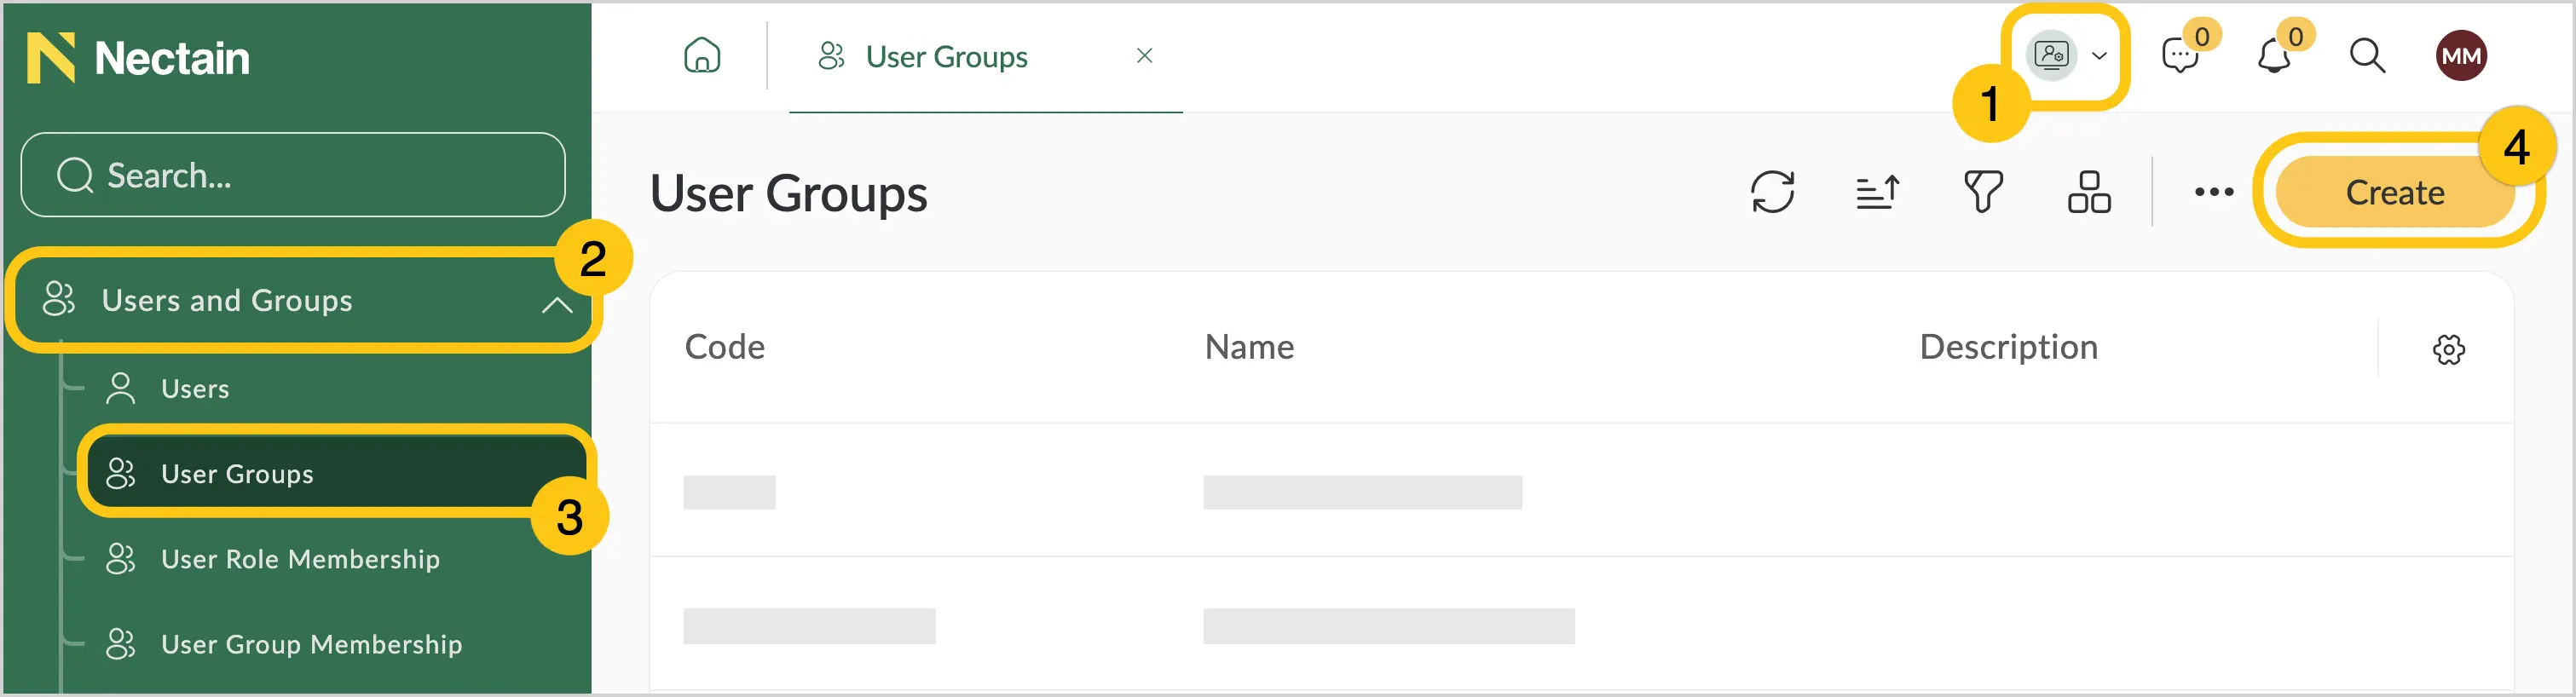
In the navigation panel, select the Administration desktop 1.
-
Select the Users and Groups shortcut group 2, and then choose the User Groups shortcut 3.
-
In the toolbar, select Create 4.
-
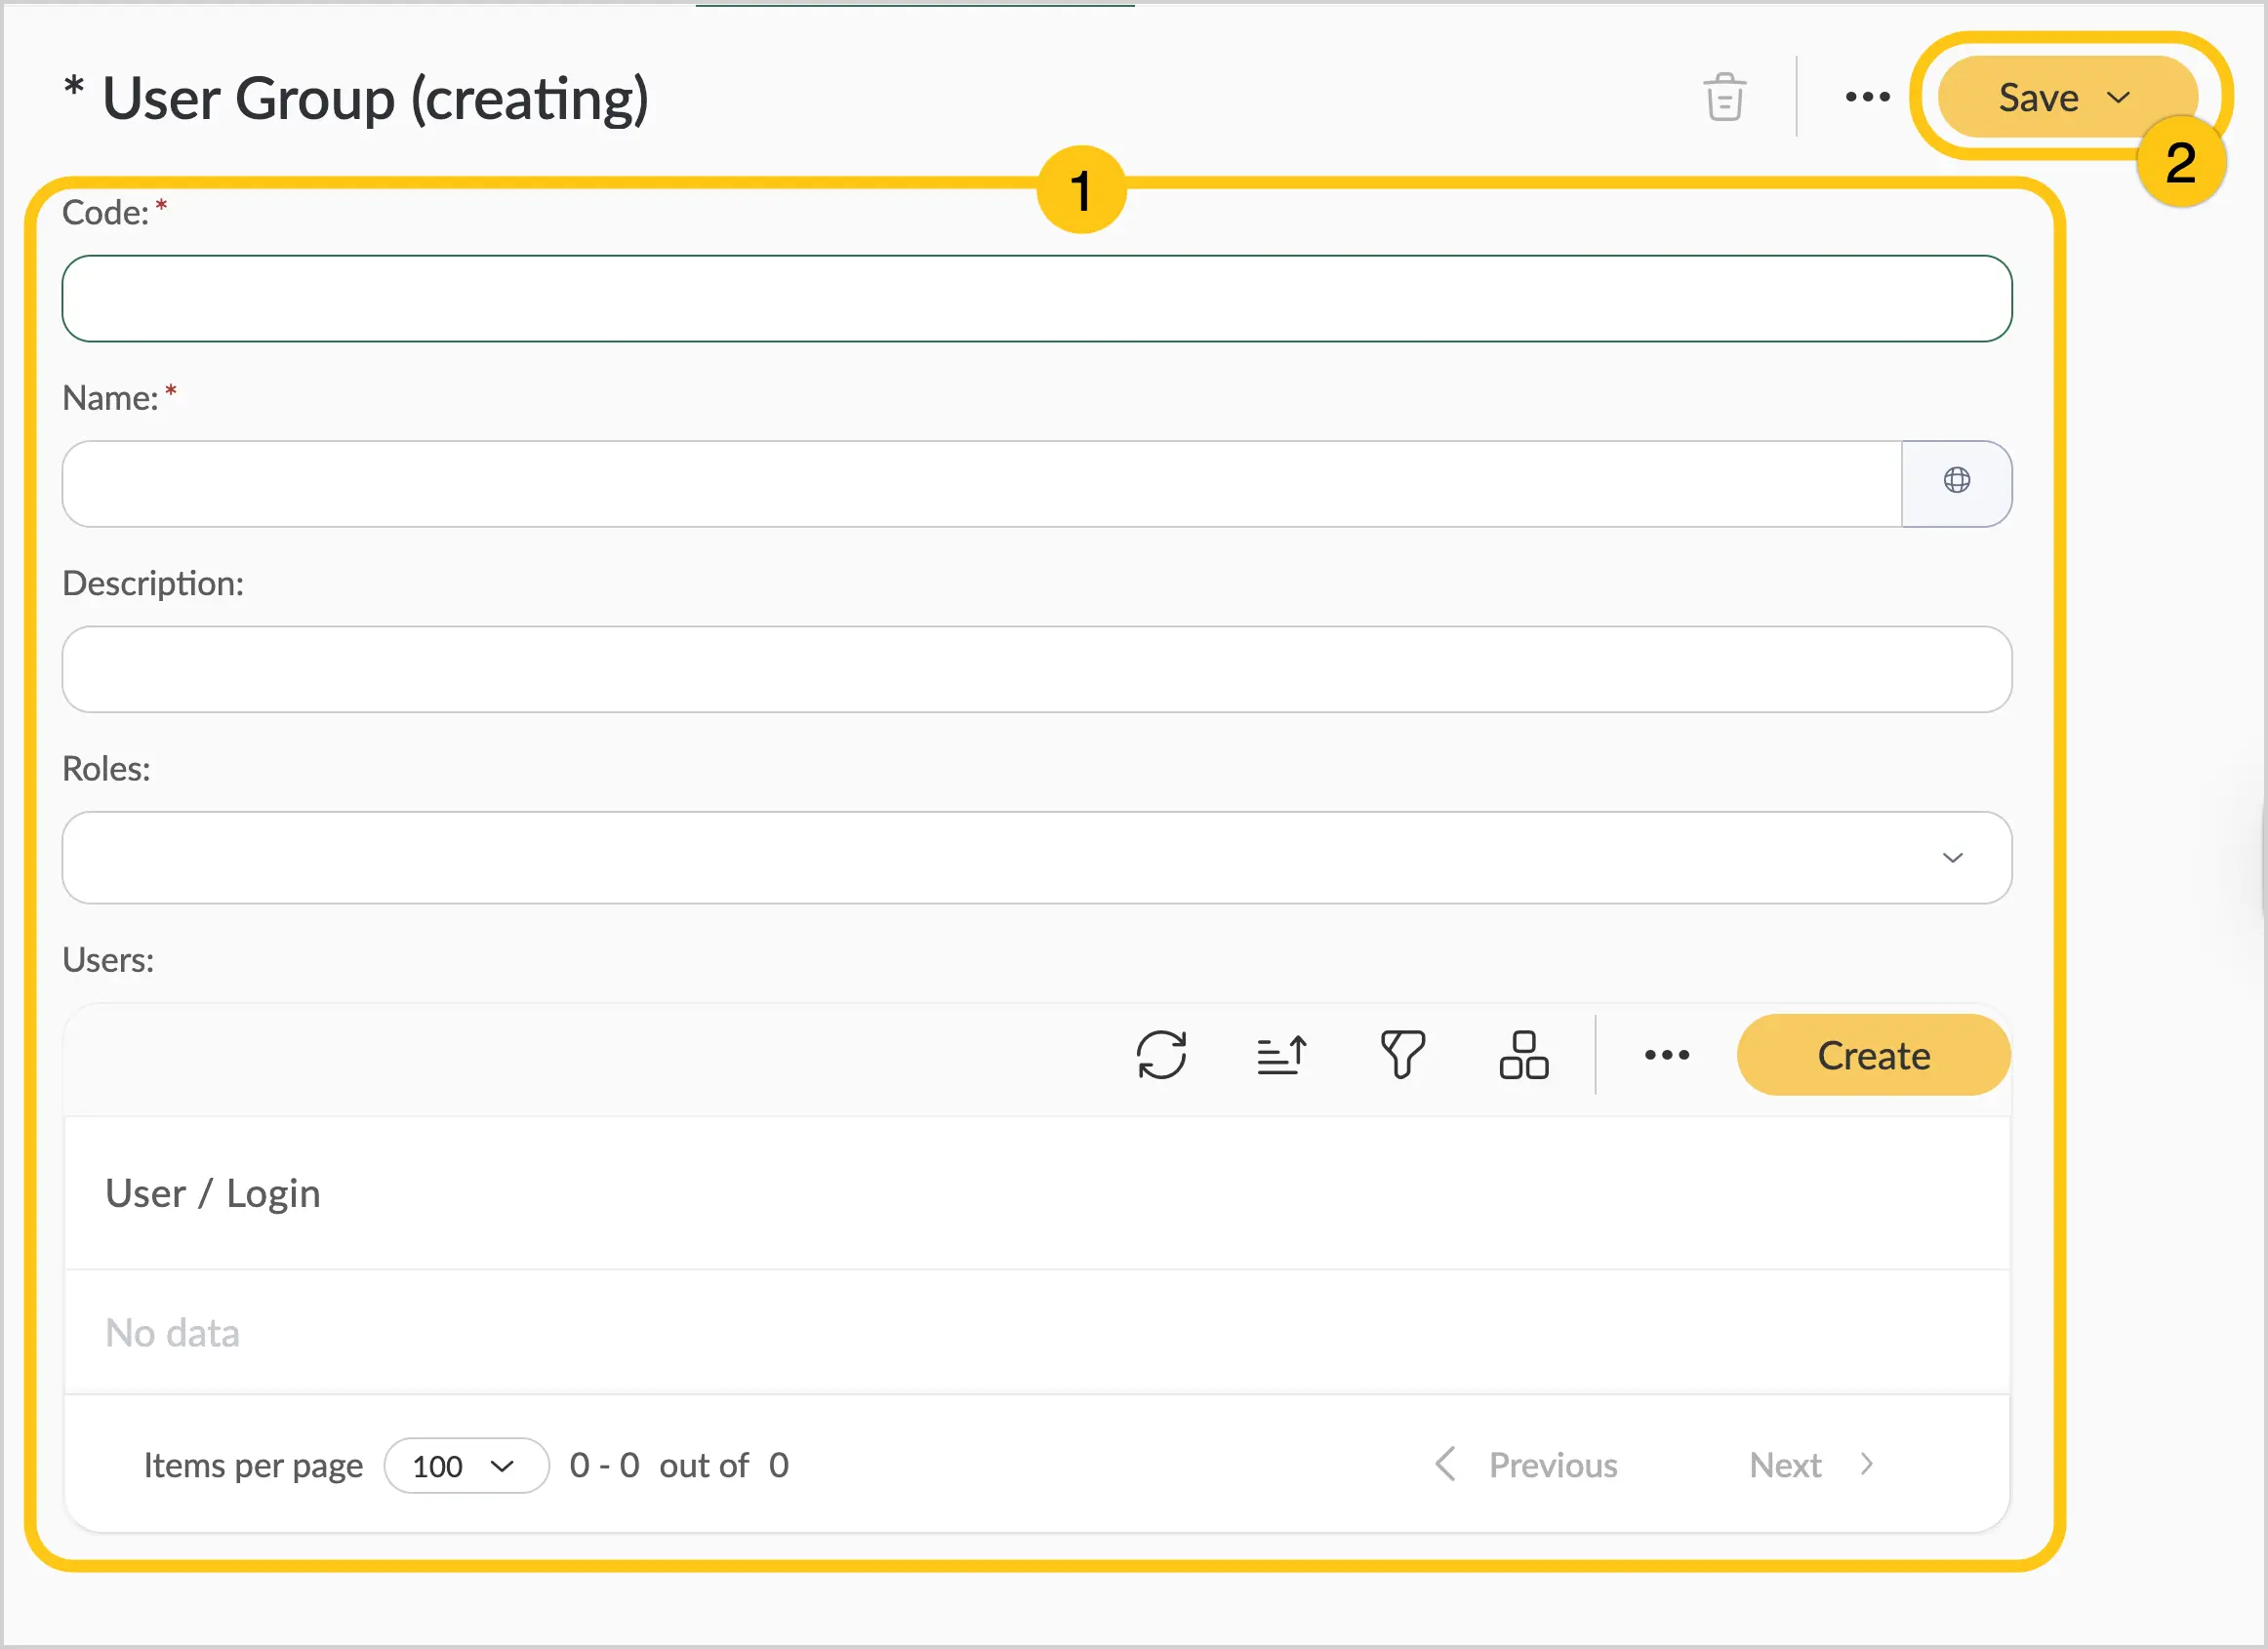
Fill in the required fields (marked with an asterisk *) 1, using the table below as a guide. Then, in the toolbar, select Save 2.
| Field Name | Description |
|---|---|
| Code* |
|
| Name* | Display name of the group. ℹ️ Note: You can set alternative names for different languages. To do this, select the icon and fill in the fields for other languages. |
| Description | Enter a short description to help system users understand the group’s purpose and functions. Example: “Financial department analysts. Access to financial reports and forecasting tools.” |
| Roles | Select one or more roles to assign to this user group. You can choose from system roles or create your own custom ones. |
Fields marked with an asterisk (*) are required.
1.7.2. View the User Groups Registry
To view the registry of groups to which system users belong, follow these steps:
-
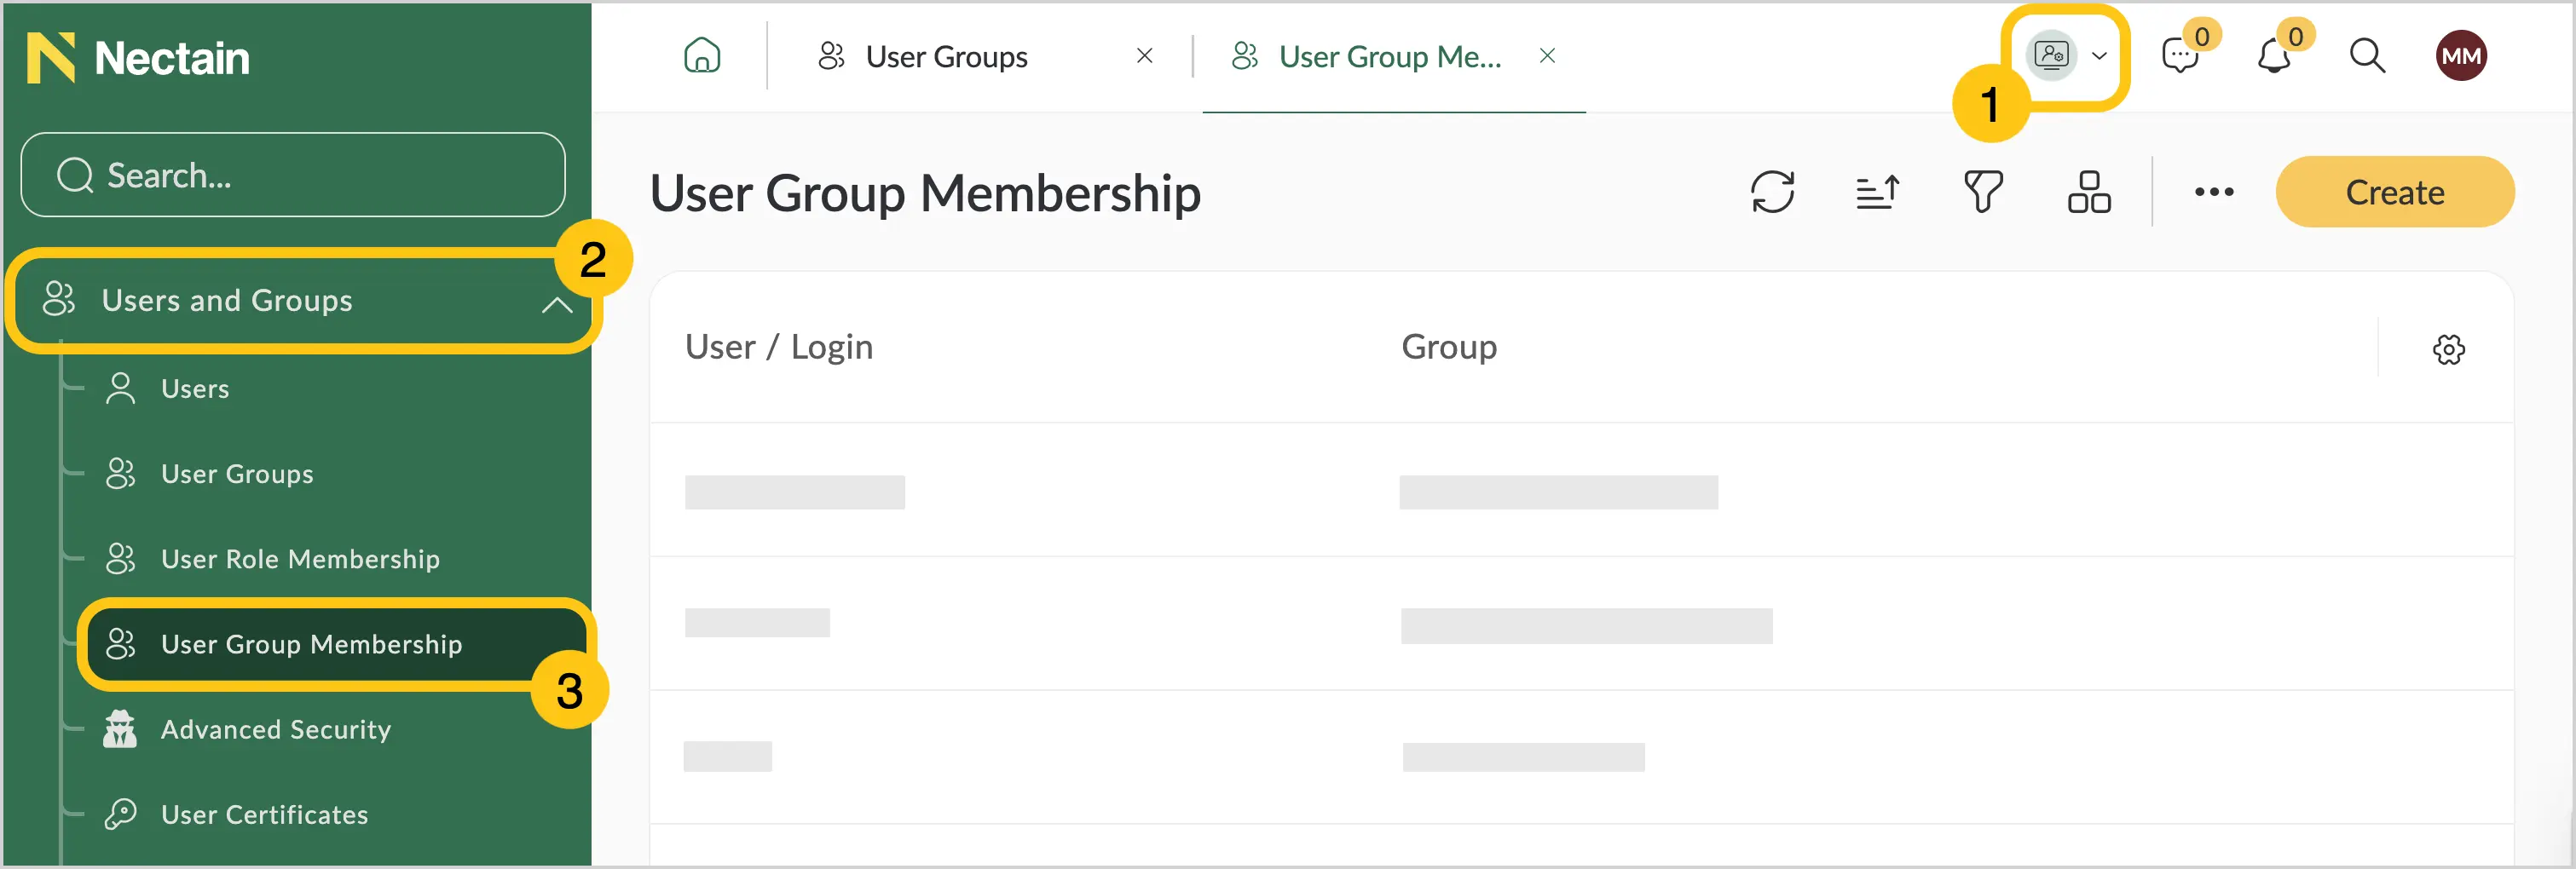
In the navigation panel, select the Administration desktop 1.
-
Select the Users and Groups shortcut group 2, and then choose the User Group Memberships shortcut 3.
1.7.3. Add a User to an Existing Group
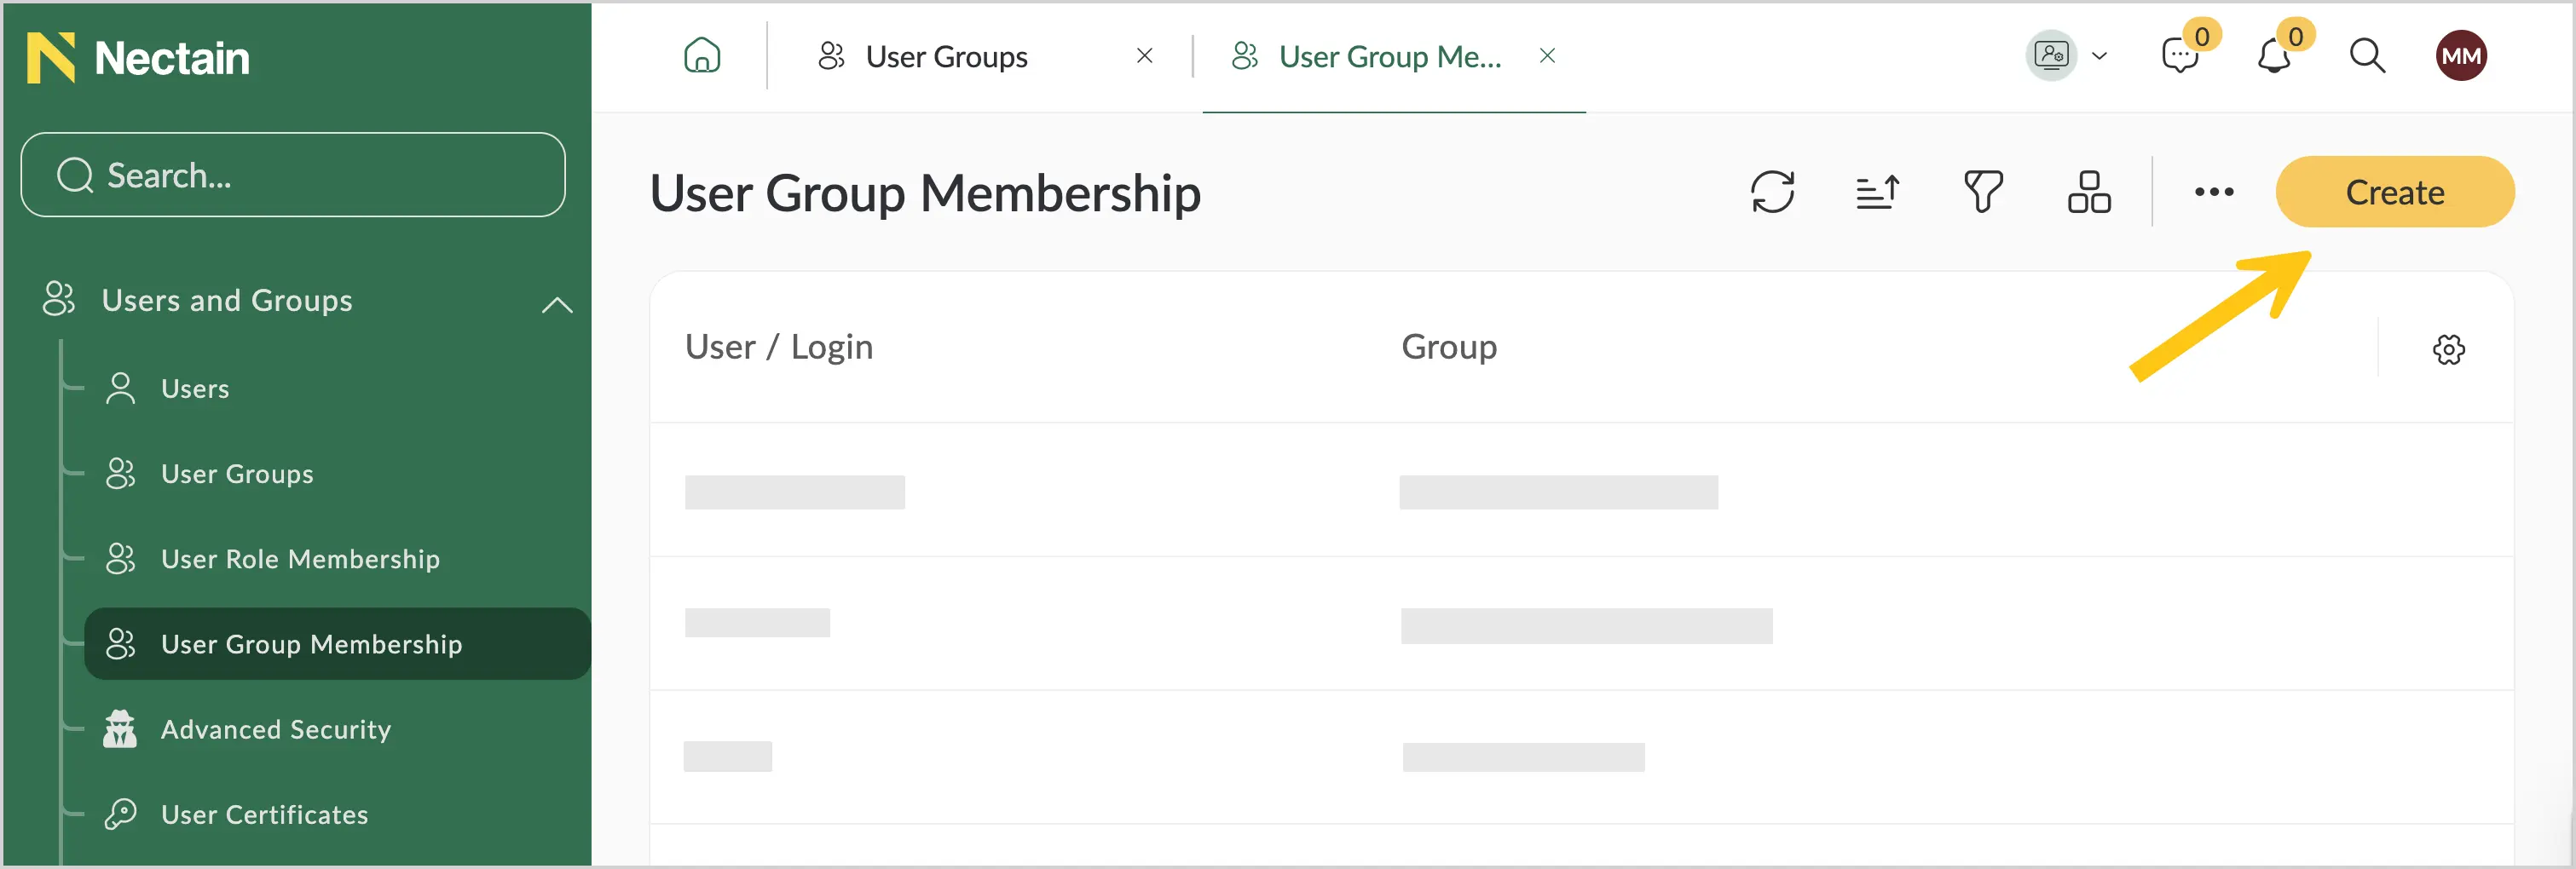
In the user group registry, you can also add a user to an existing group.
First, complete the steps in the View the User Groups Registry section, and then follow these steps:
-
In the toolbar, select Create.
-
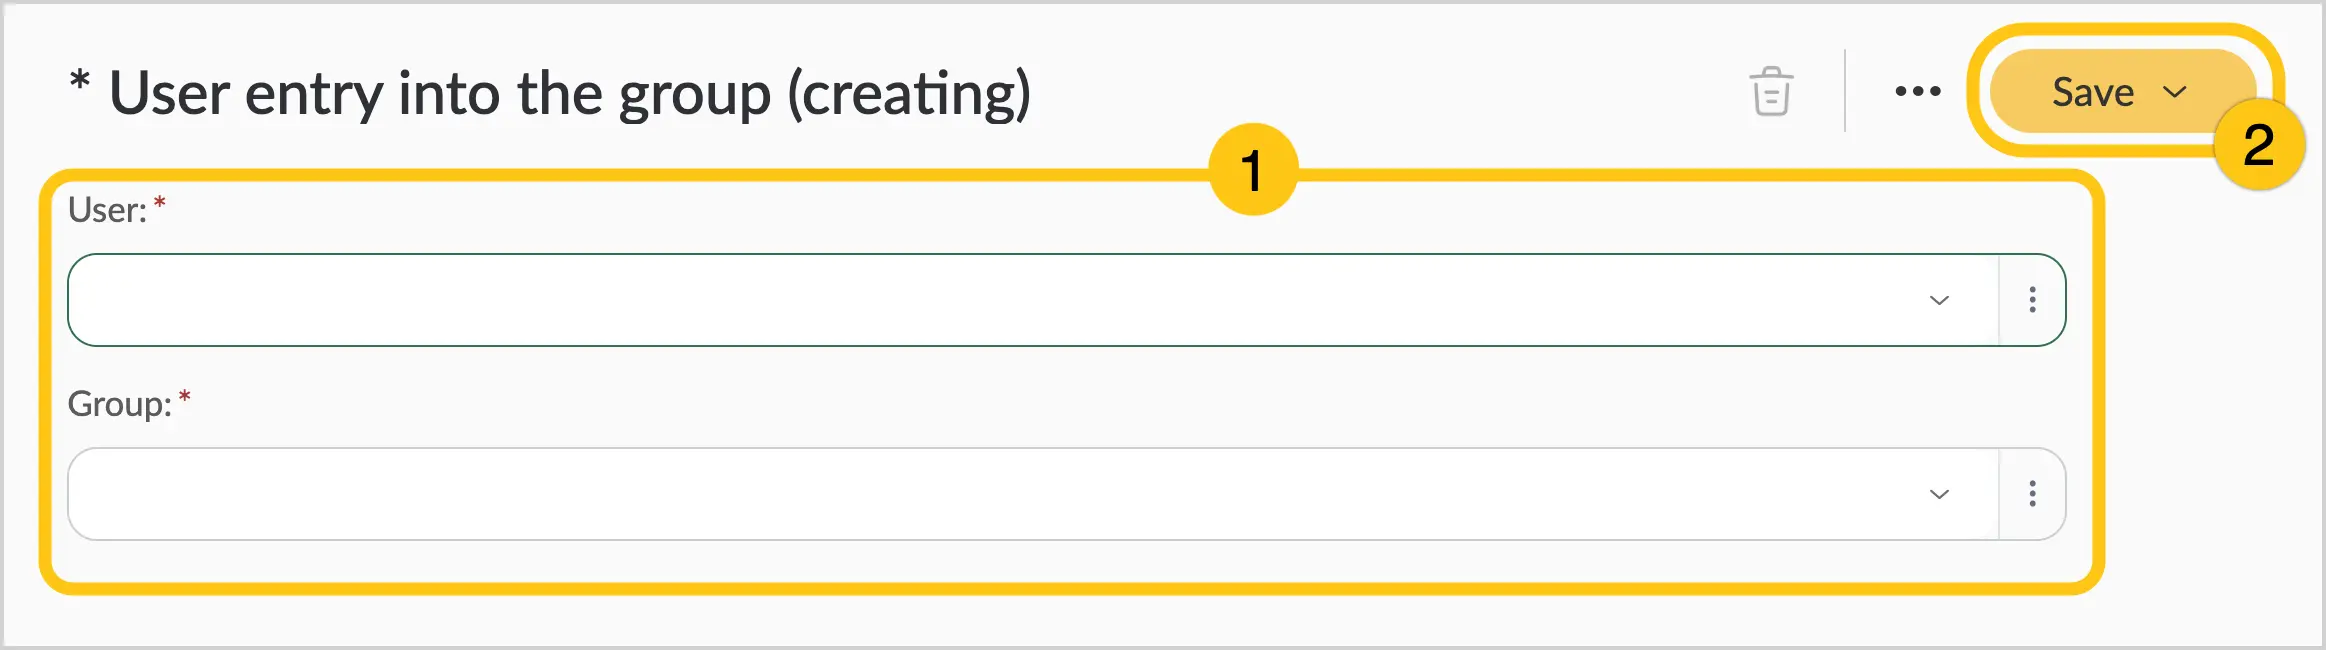
Fill in the required fields (marked with an asterisk *) 1, using the table below as a guide. Then, in the toolbar, select Save 2.