1.4. Users
1.4.1. Create a User
Users can only be created under an account with the Supervisor role.
To create a user, follow these steps:
-
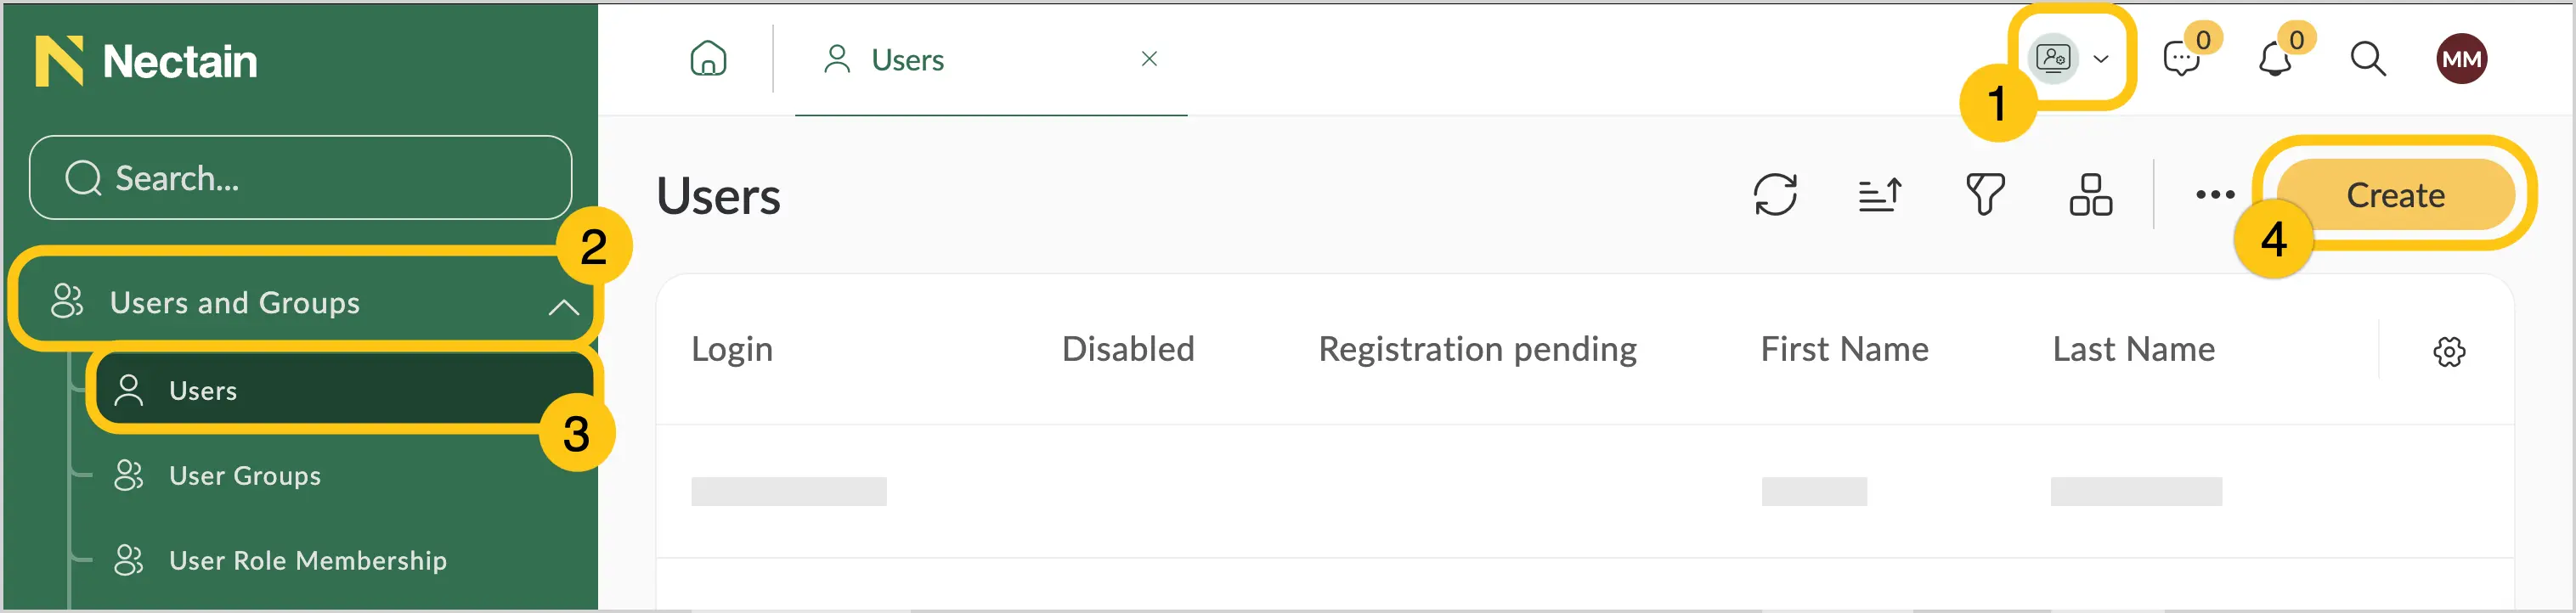
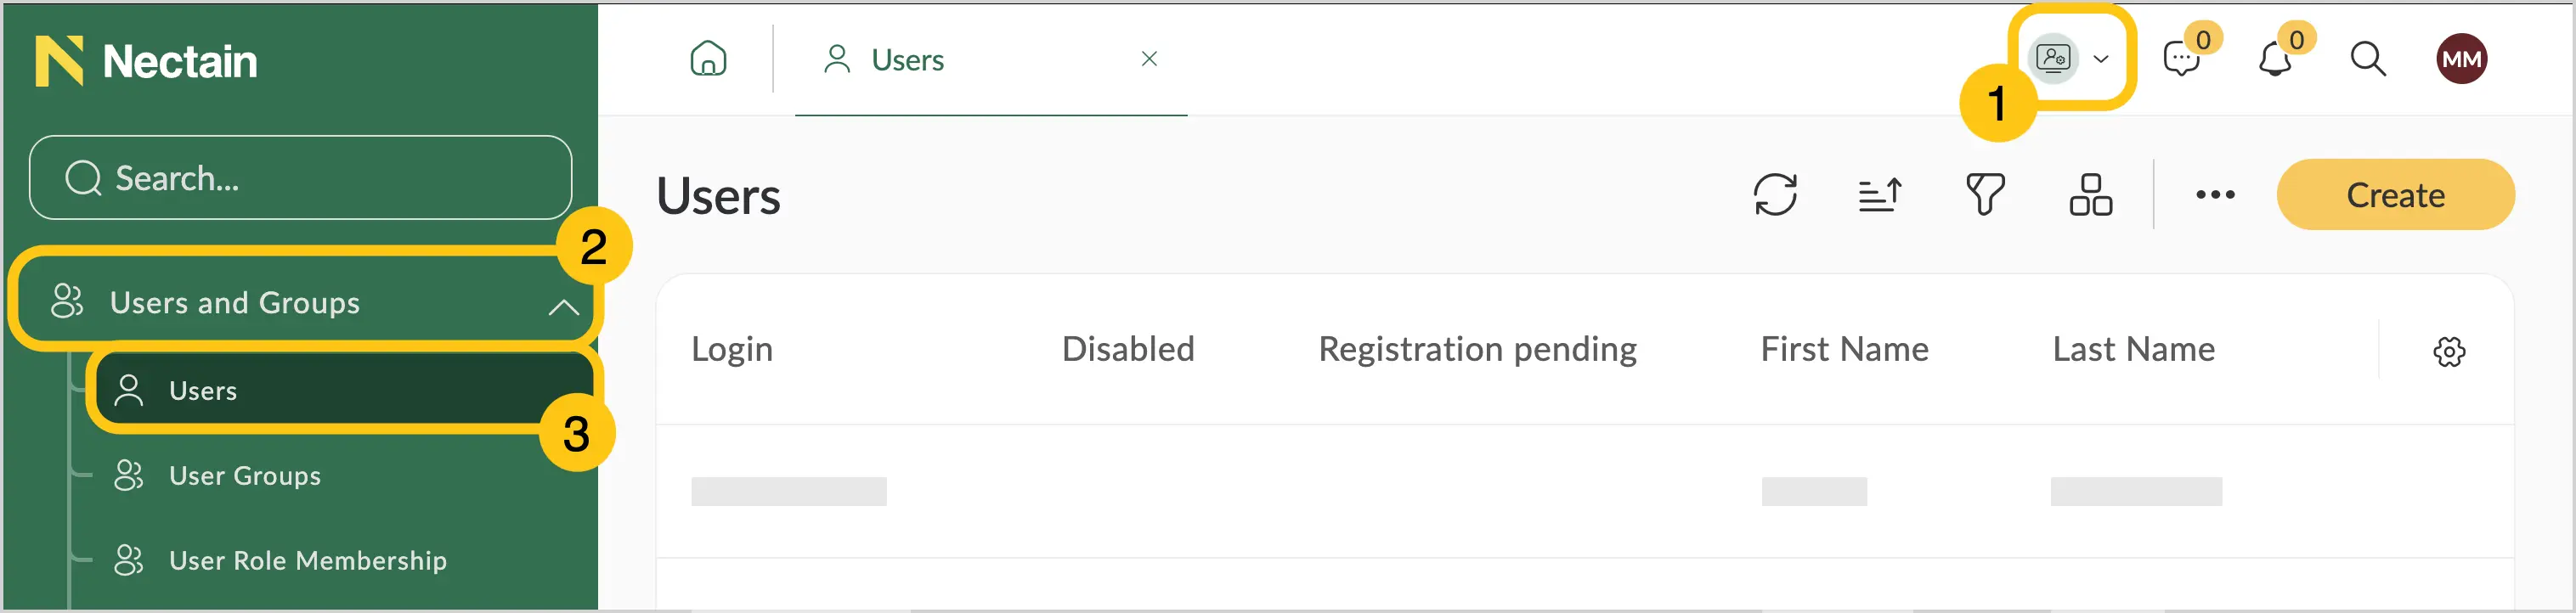
In the navigation panel, select the Administration desktop 1.
-
Select the Users and Groups shortcut group 2, then select the Users shortcut 3.
-
In the toolbar, select Create 4.
-
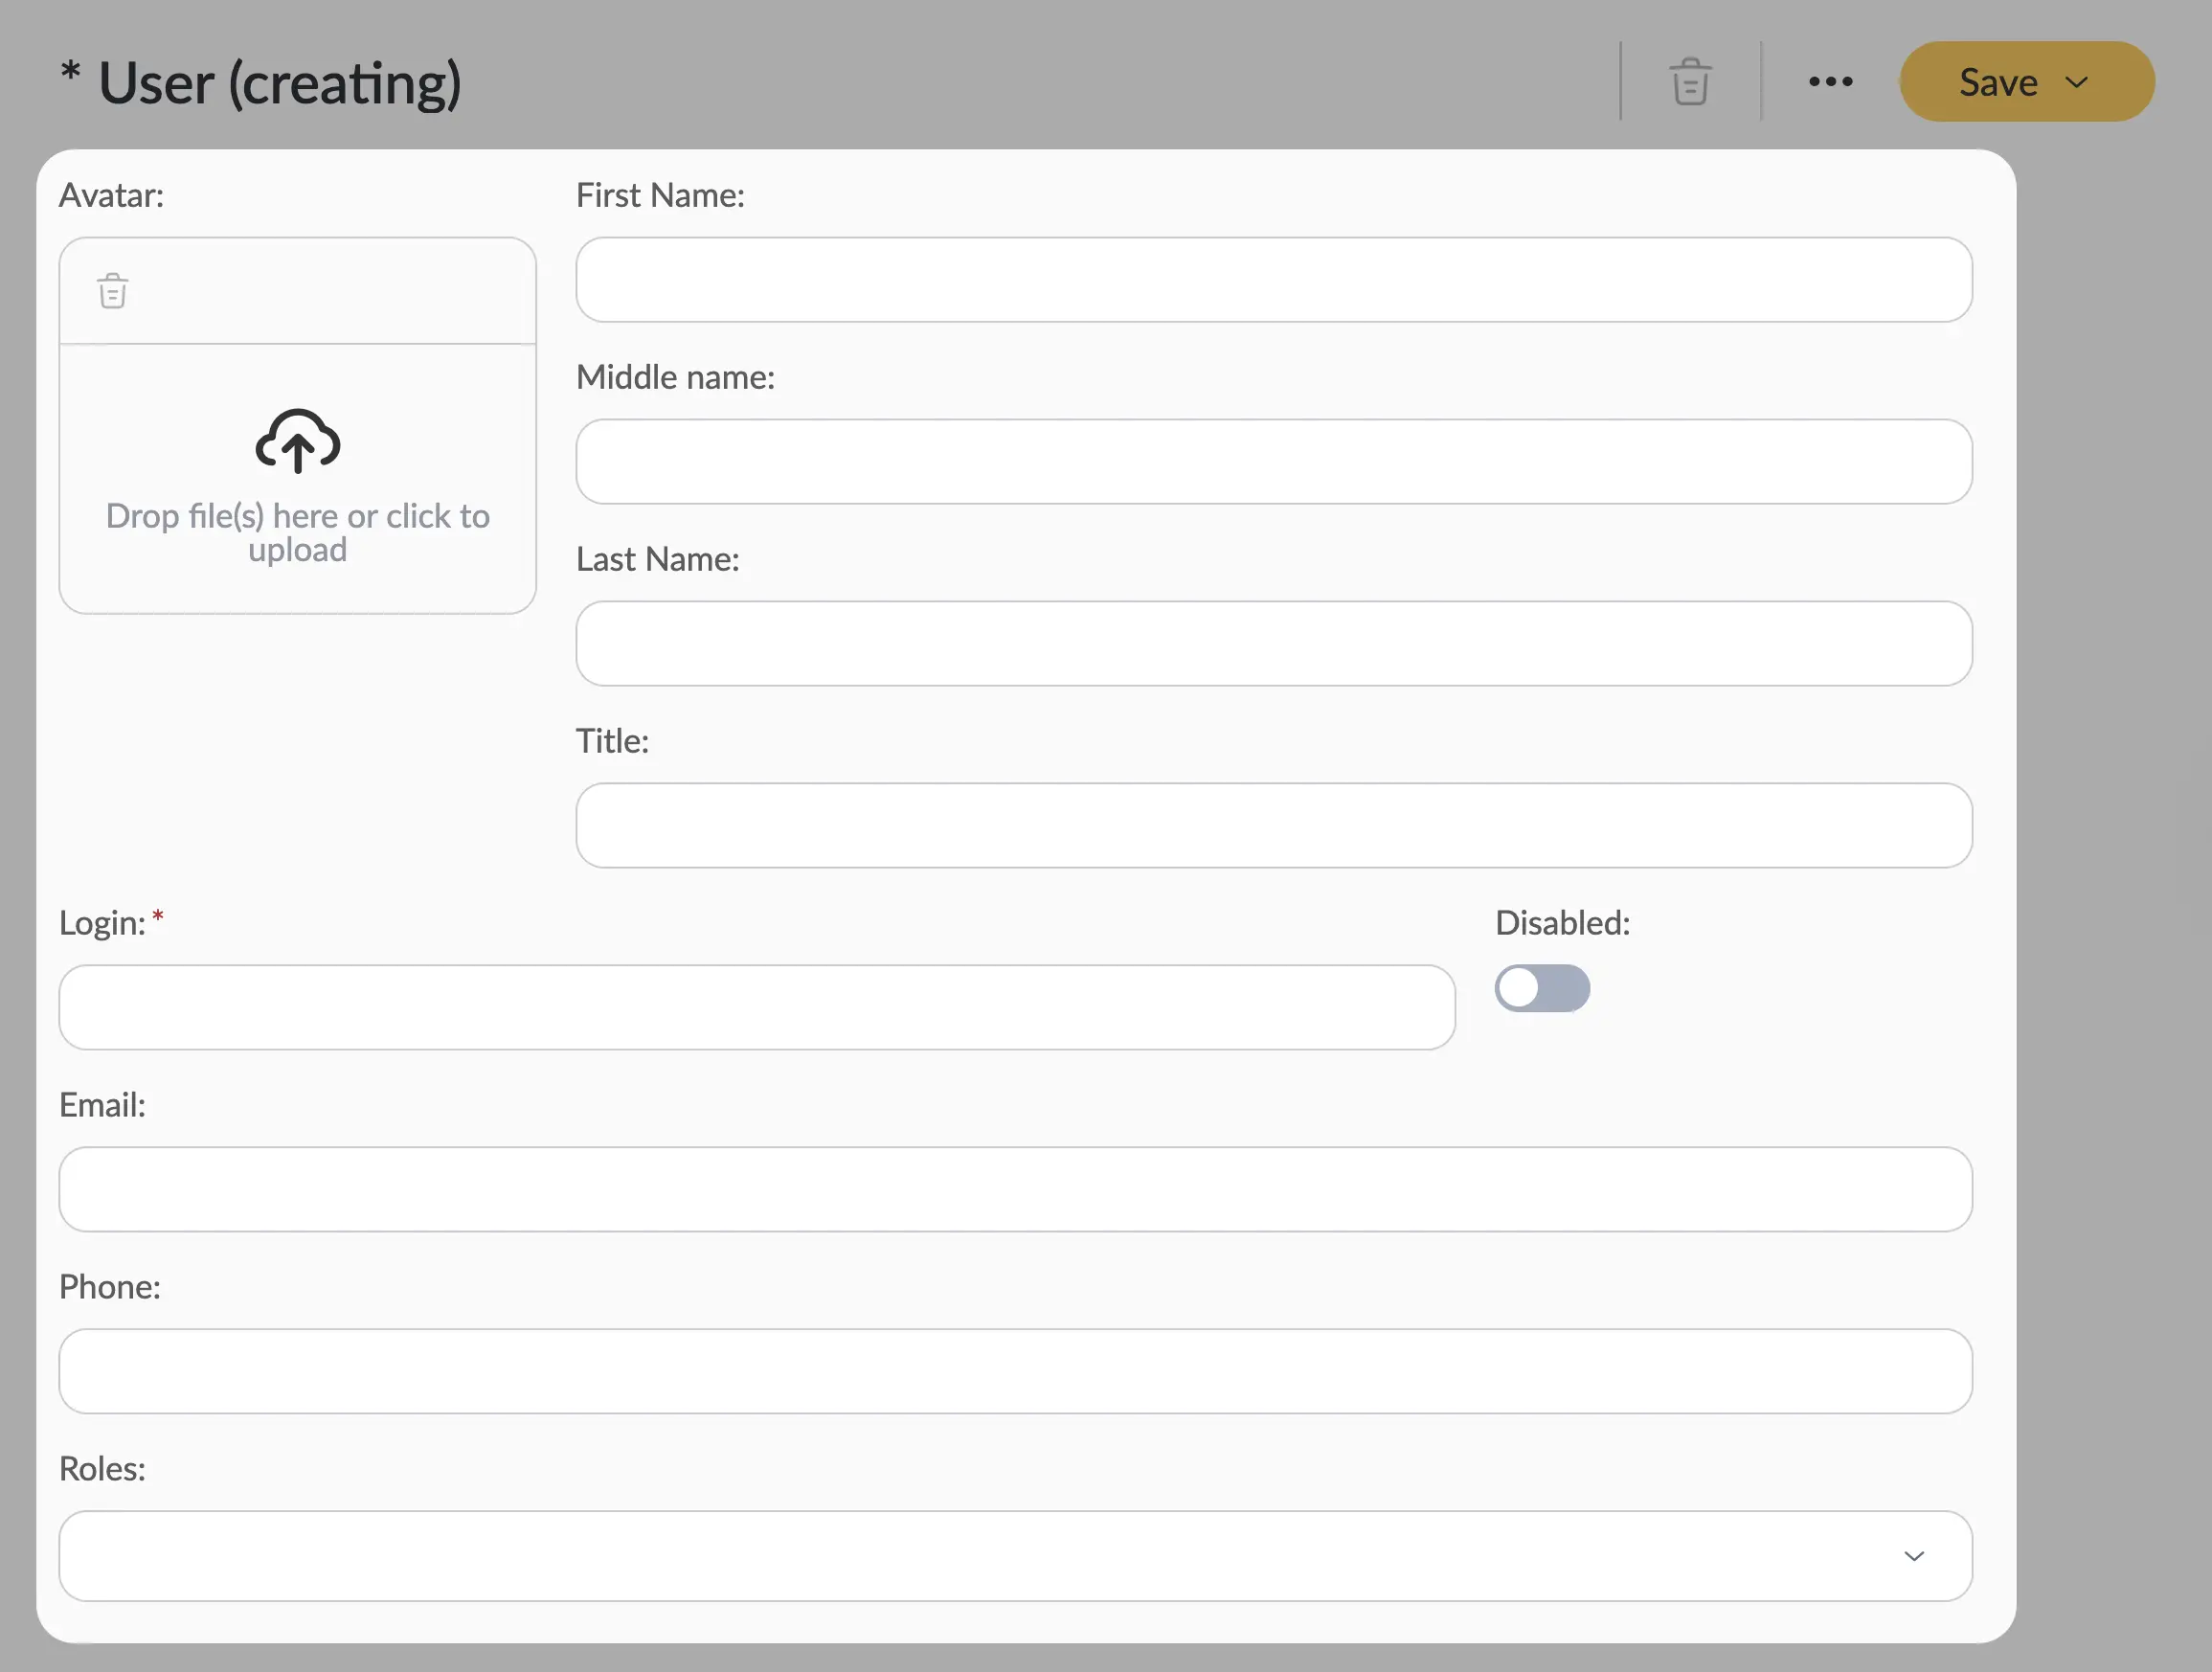
Fill in the fields with user information using the hints in the table below.
| Field name | Description |
|---|---|
| Avatar | Upload a photo of the user. Recommended format: JPG or PNG, up to 2 MB. A square image is preferred for better display; size should be close to 200 × 200 px. |
| First Name | Enter the user's official first name. For example: "Oleksandr". Use the full name, avoid diminutive forms. |
| Last Name | Enter the user's last name. |
| Middle Name | Enter the user's middle name. For example: "Ivanovych". If you do not want to apply a middle name, leave the field empty. |
| Salutation | Select the form of address: "Mr.", "Ms.", etc. This affects the automatic formation of salutations in documents. For example: "Mr. Oleksandr". |
| Login* | Create a unique login for system access. It is recommended to use a combination of first and last name or initials. For example: "m.kovalenko" or "maria2023". |
| Disabled | Check this box if you need to temporarily deactivate the account. A disabled user will not be able to log in to Nectainium. You can reactivate the account later by unchecking this box. |
| Enter the user's work email address. This address will be used for system notifications, alerts, and password recovery. | |
| Phone | Enter the user's work phone number. May be used for two-factor authentication or urgent notifications. For example: +380501234567. |
| Roles | Select user roles from the directory. ℹ️ Note: You can also create a new role. By default, the system role User is assigned to all users. |
| Groups | Select user groups from the directory. ℹ️ Note: You can also create a new user group. |
| Additional Authentication Parameters | If needed, enter a list of allowed IP addresses for the UBIP authentication scheme, separated by semicolons. For example: Single IP address: 192.168.1.1 Multiple IP addresses: 192.168.1.1;192.168.1.2;10.0.0.1 Or leave this field empty to allow access from any IP address. ℹ️ Note: We recommend using this feature only for IP addresses from the DMZ (demilitarized zone) of your network. This will provide an additional layer of security. |
Fields marked with "*" are required.
-
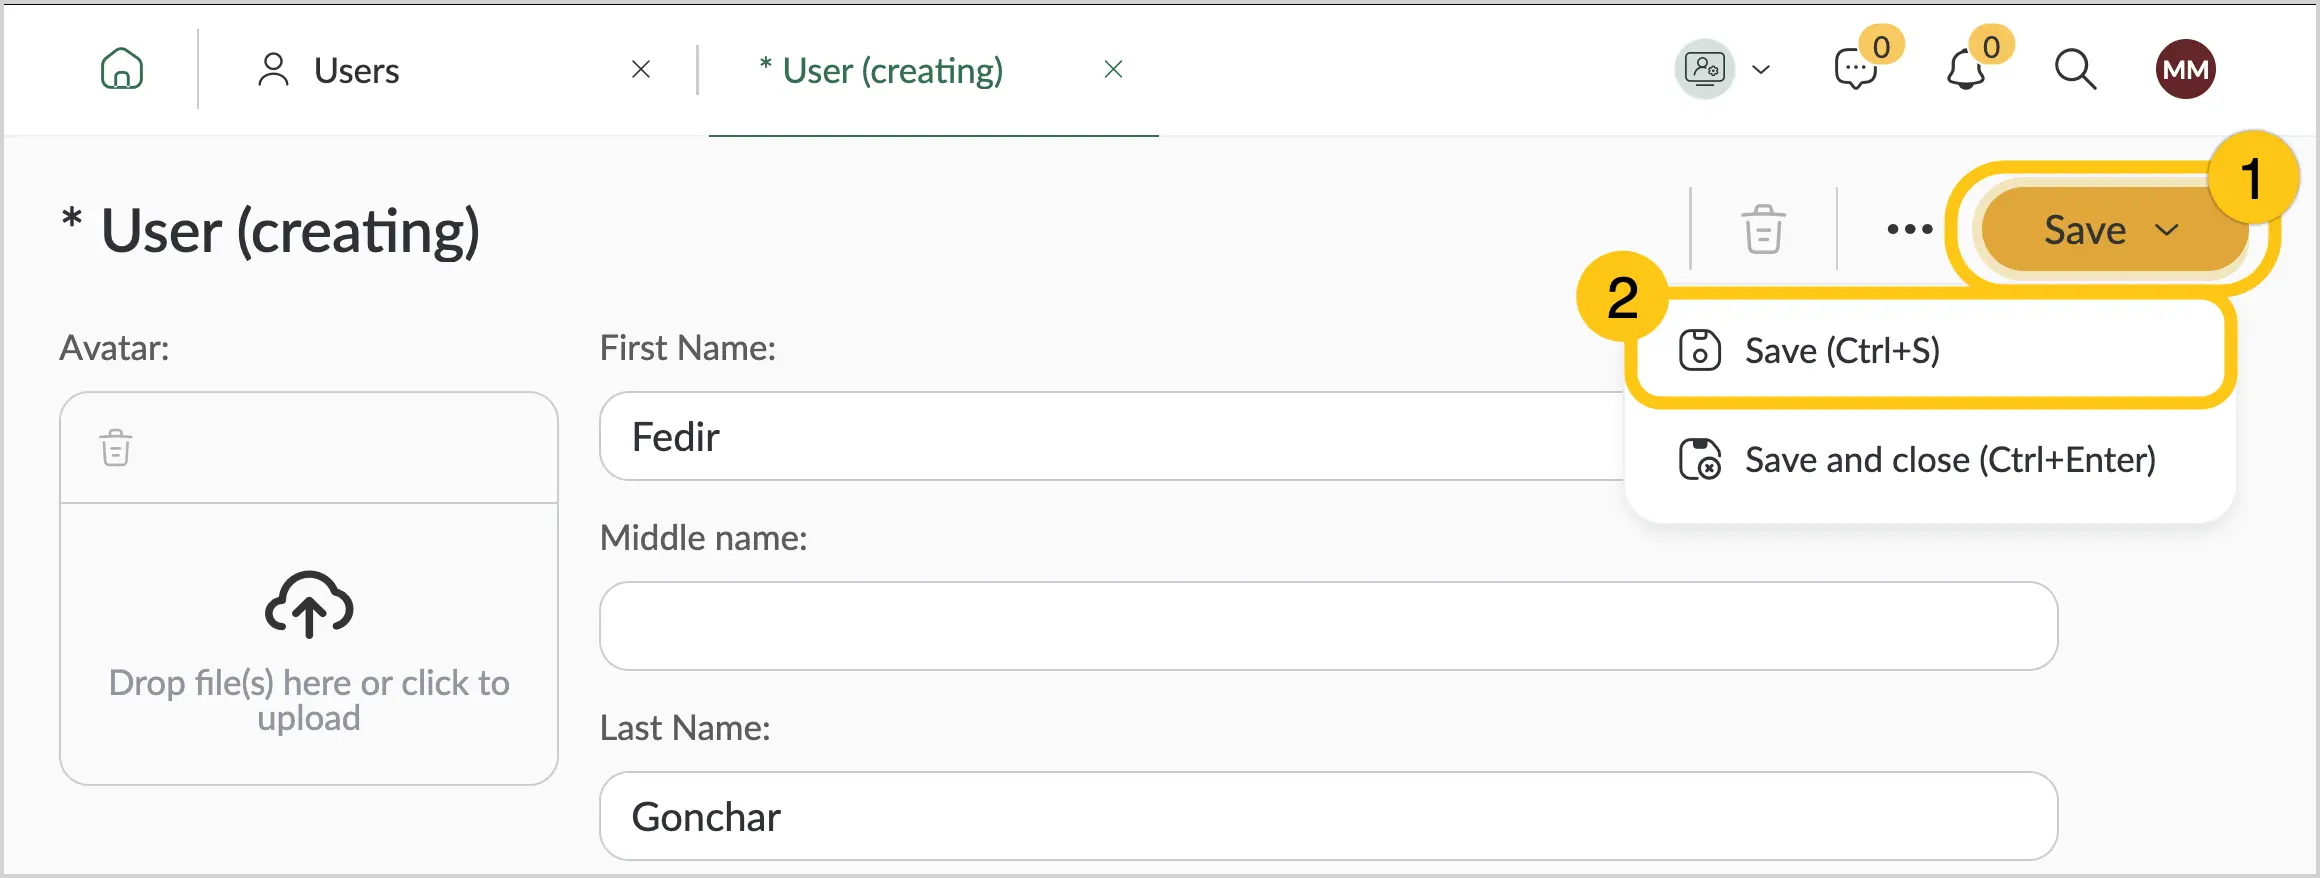
After filling in the data, in the top menu, select Save.
-
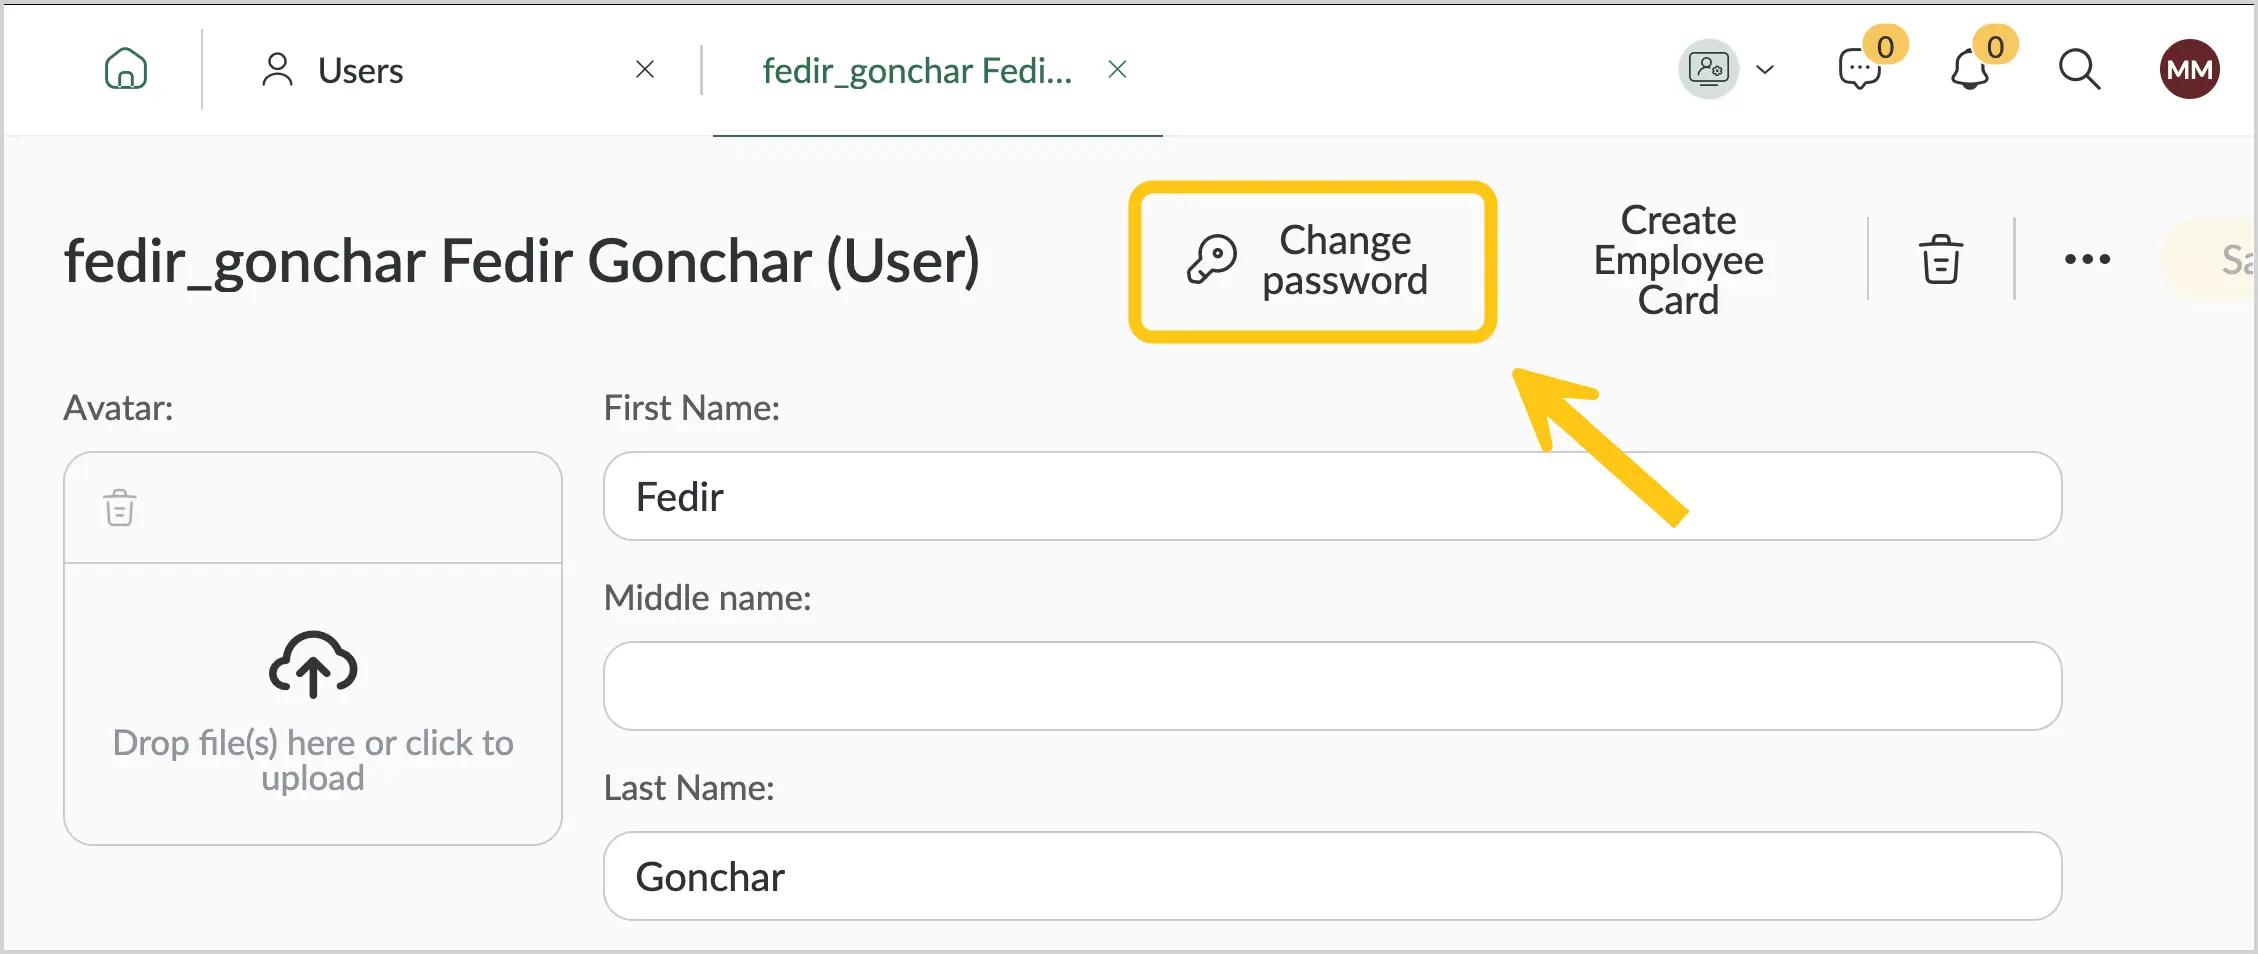
In the top menu, select Change Password.
-
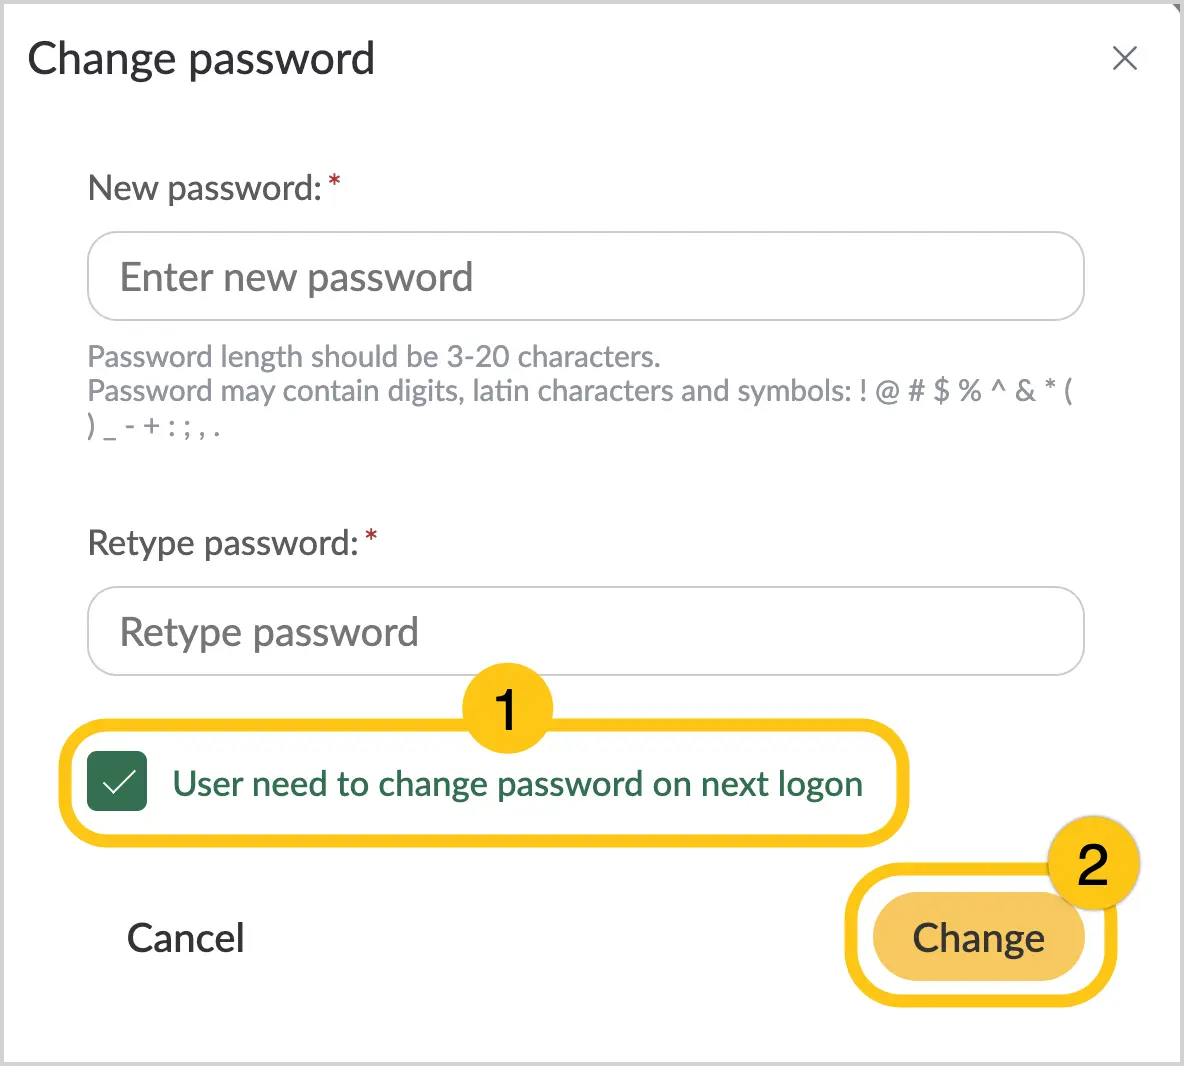
Set the desired password, then re-enter it in the Retype Password field.
Note:The password length must be 3–20 characters. You can use digits, Latin letters, and the following symbols: ! @ # $ % ^ & * ( ) _ - + : ; , . You can also configure the password length using the system setting with code "UBA.passwordPolicy.minLength" — Minimum Password Length.
-
Optionally, enable the User needs to change password on next logon option 1, then select the Change button 2.
A user's access to platform features depends on whether an organizational model exists in your environment:
- If an organizational model is present in your environment, for the user to work fully, you need to:
- Create an employee record
- Link the employee to the user
- If no organizational model is present, the user can work with the basic platform features immediately after registration.
1.4.2. View the User Registry
You can view all users created on the platform, as well as details about each user.
-
In the navigation panel, select the Administration desktop 1.
-
Select the Users and Groups shortcut group 2, then select the Users shortcut 3.
-
Select the record with the required user, then double-click the record.