Organize folders and documents
Labels
Labels can help you organize your folders and documents. You can create custom labels, assign them to folders or documents, and use them for easier content management and searching.
Labels must be created separately for folders and documents. A label created for documents cannot be used on folders.
Assign label to folder
-
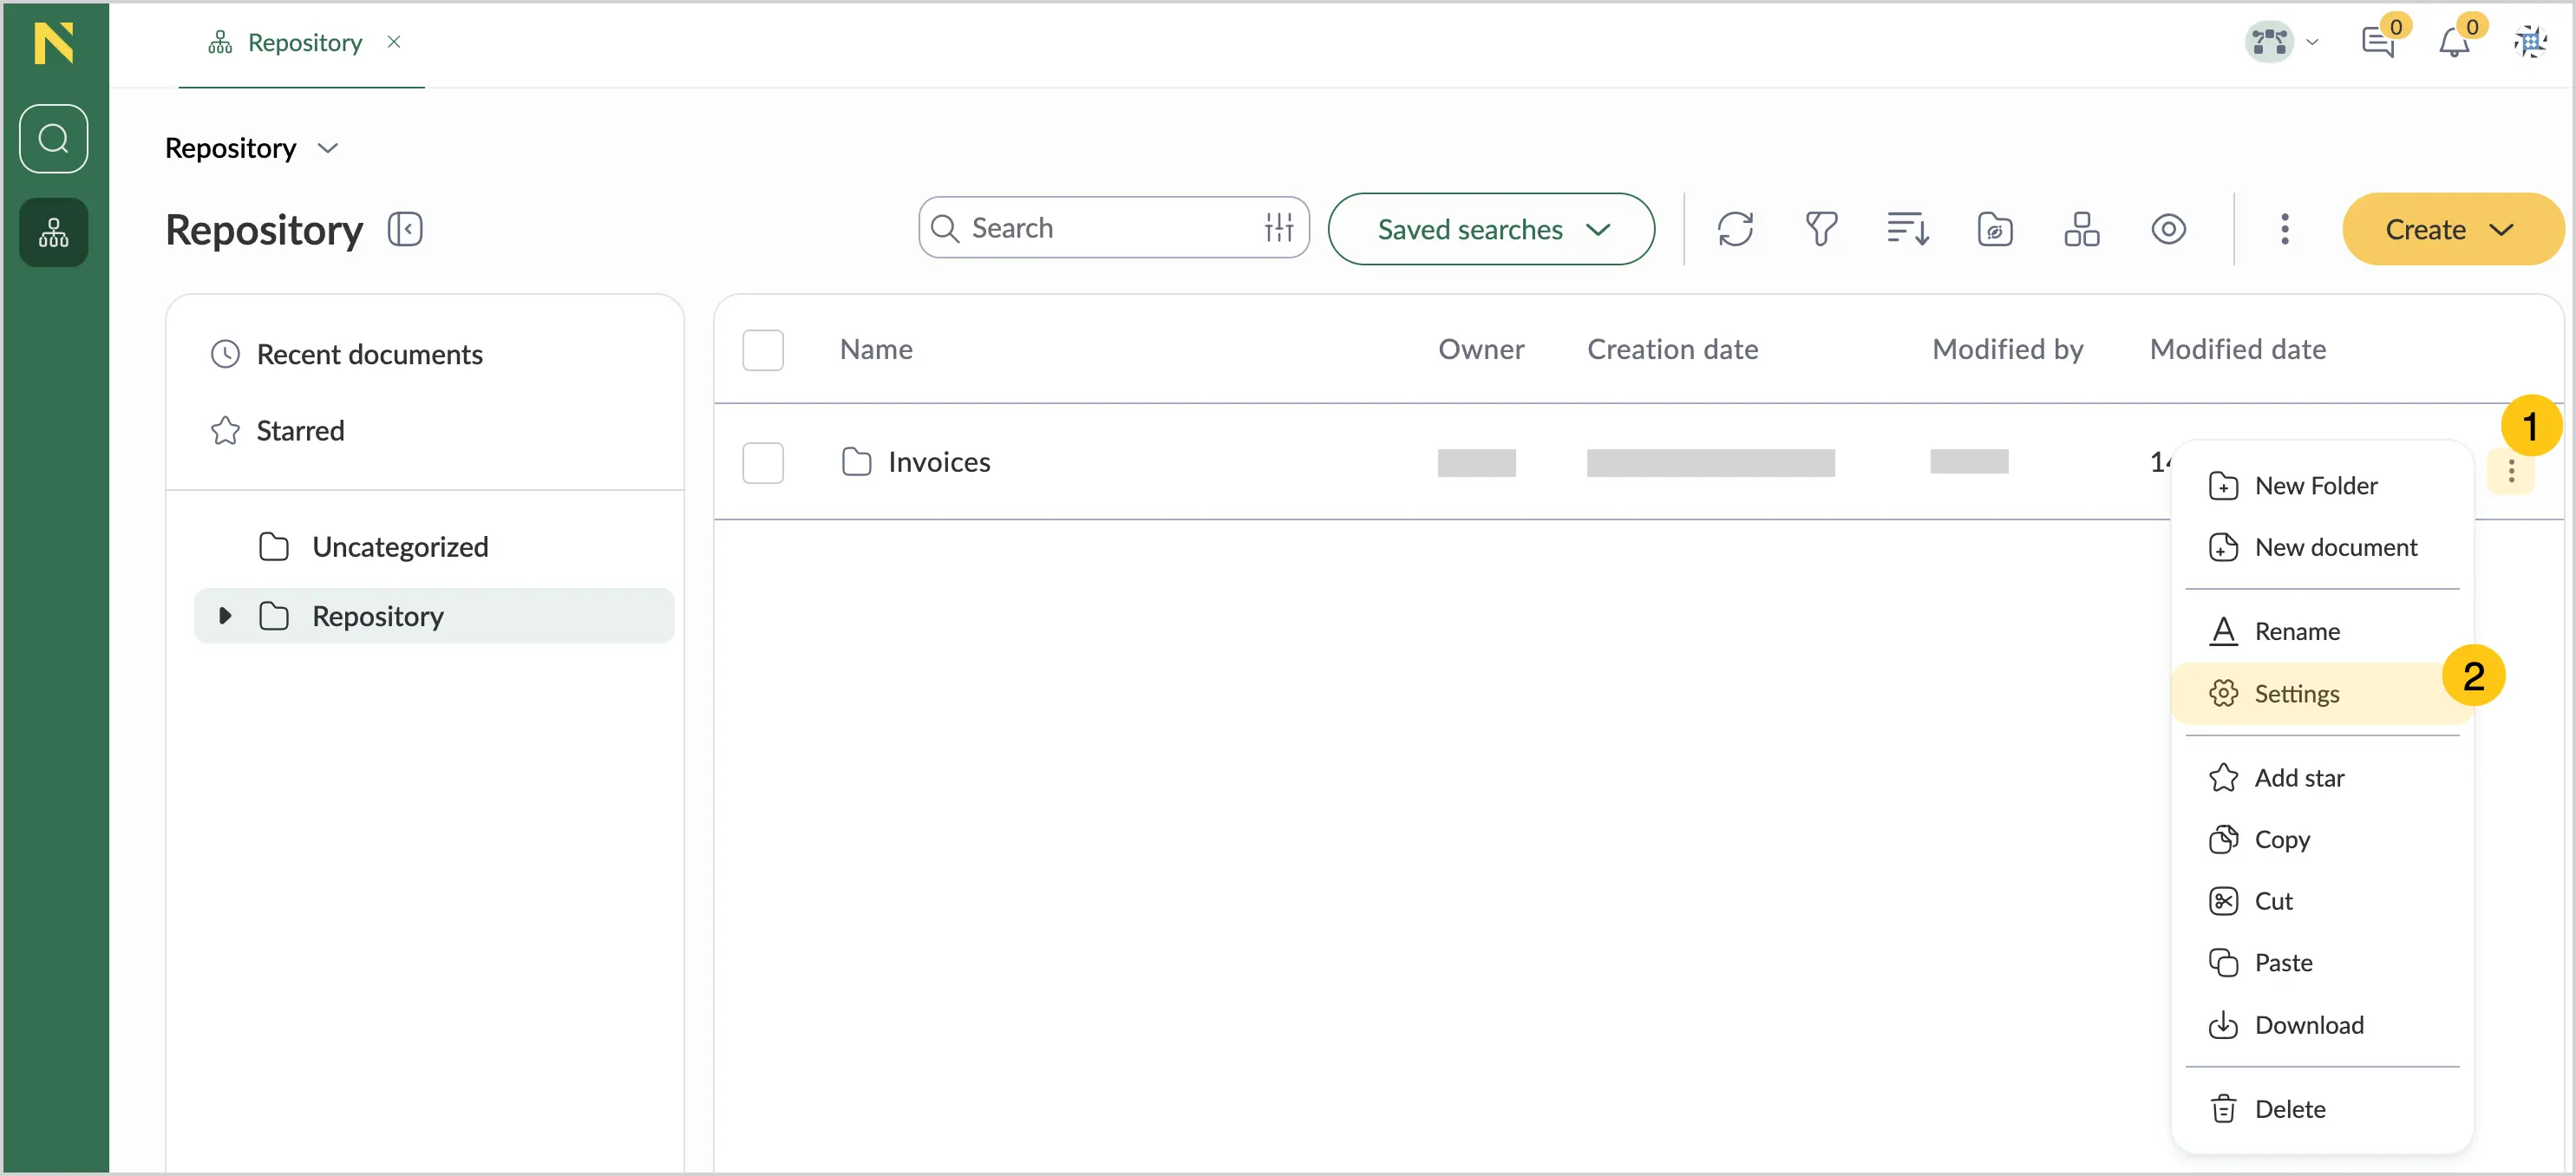
Go to the target folder.
-
Select 1, and then select Settings 2.
-
In the Labels box 1, select the needed label from the dropdown list, or start typing to create a new label.
-
Select Save 2.
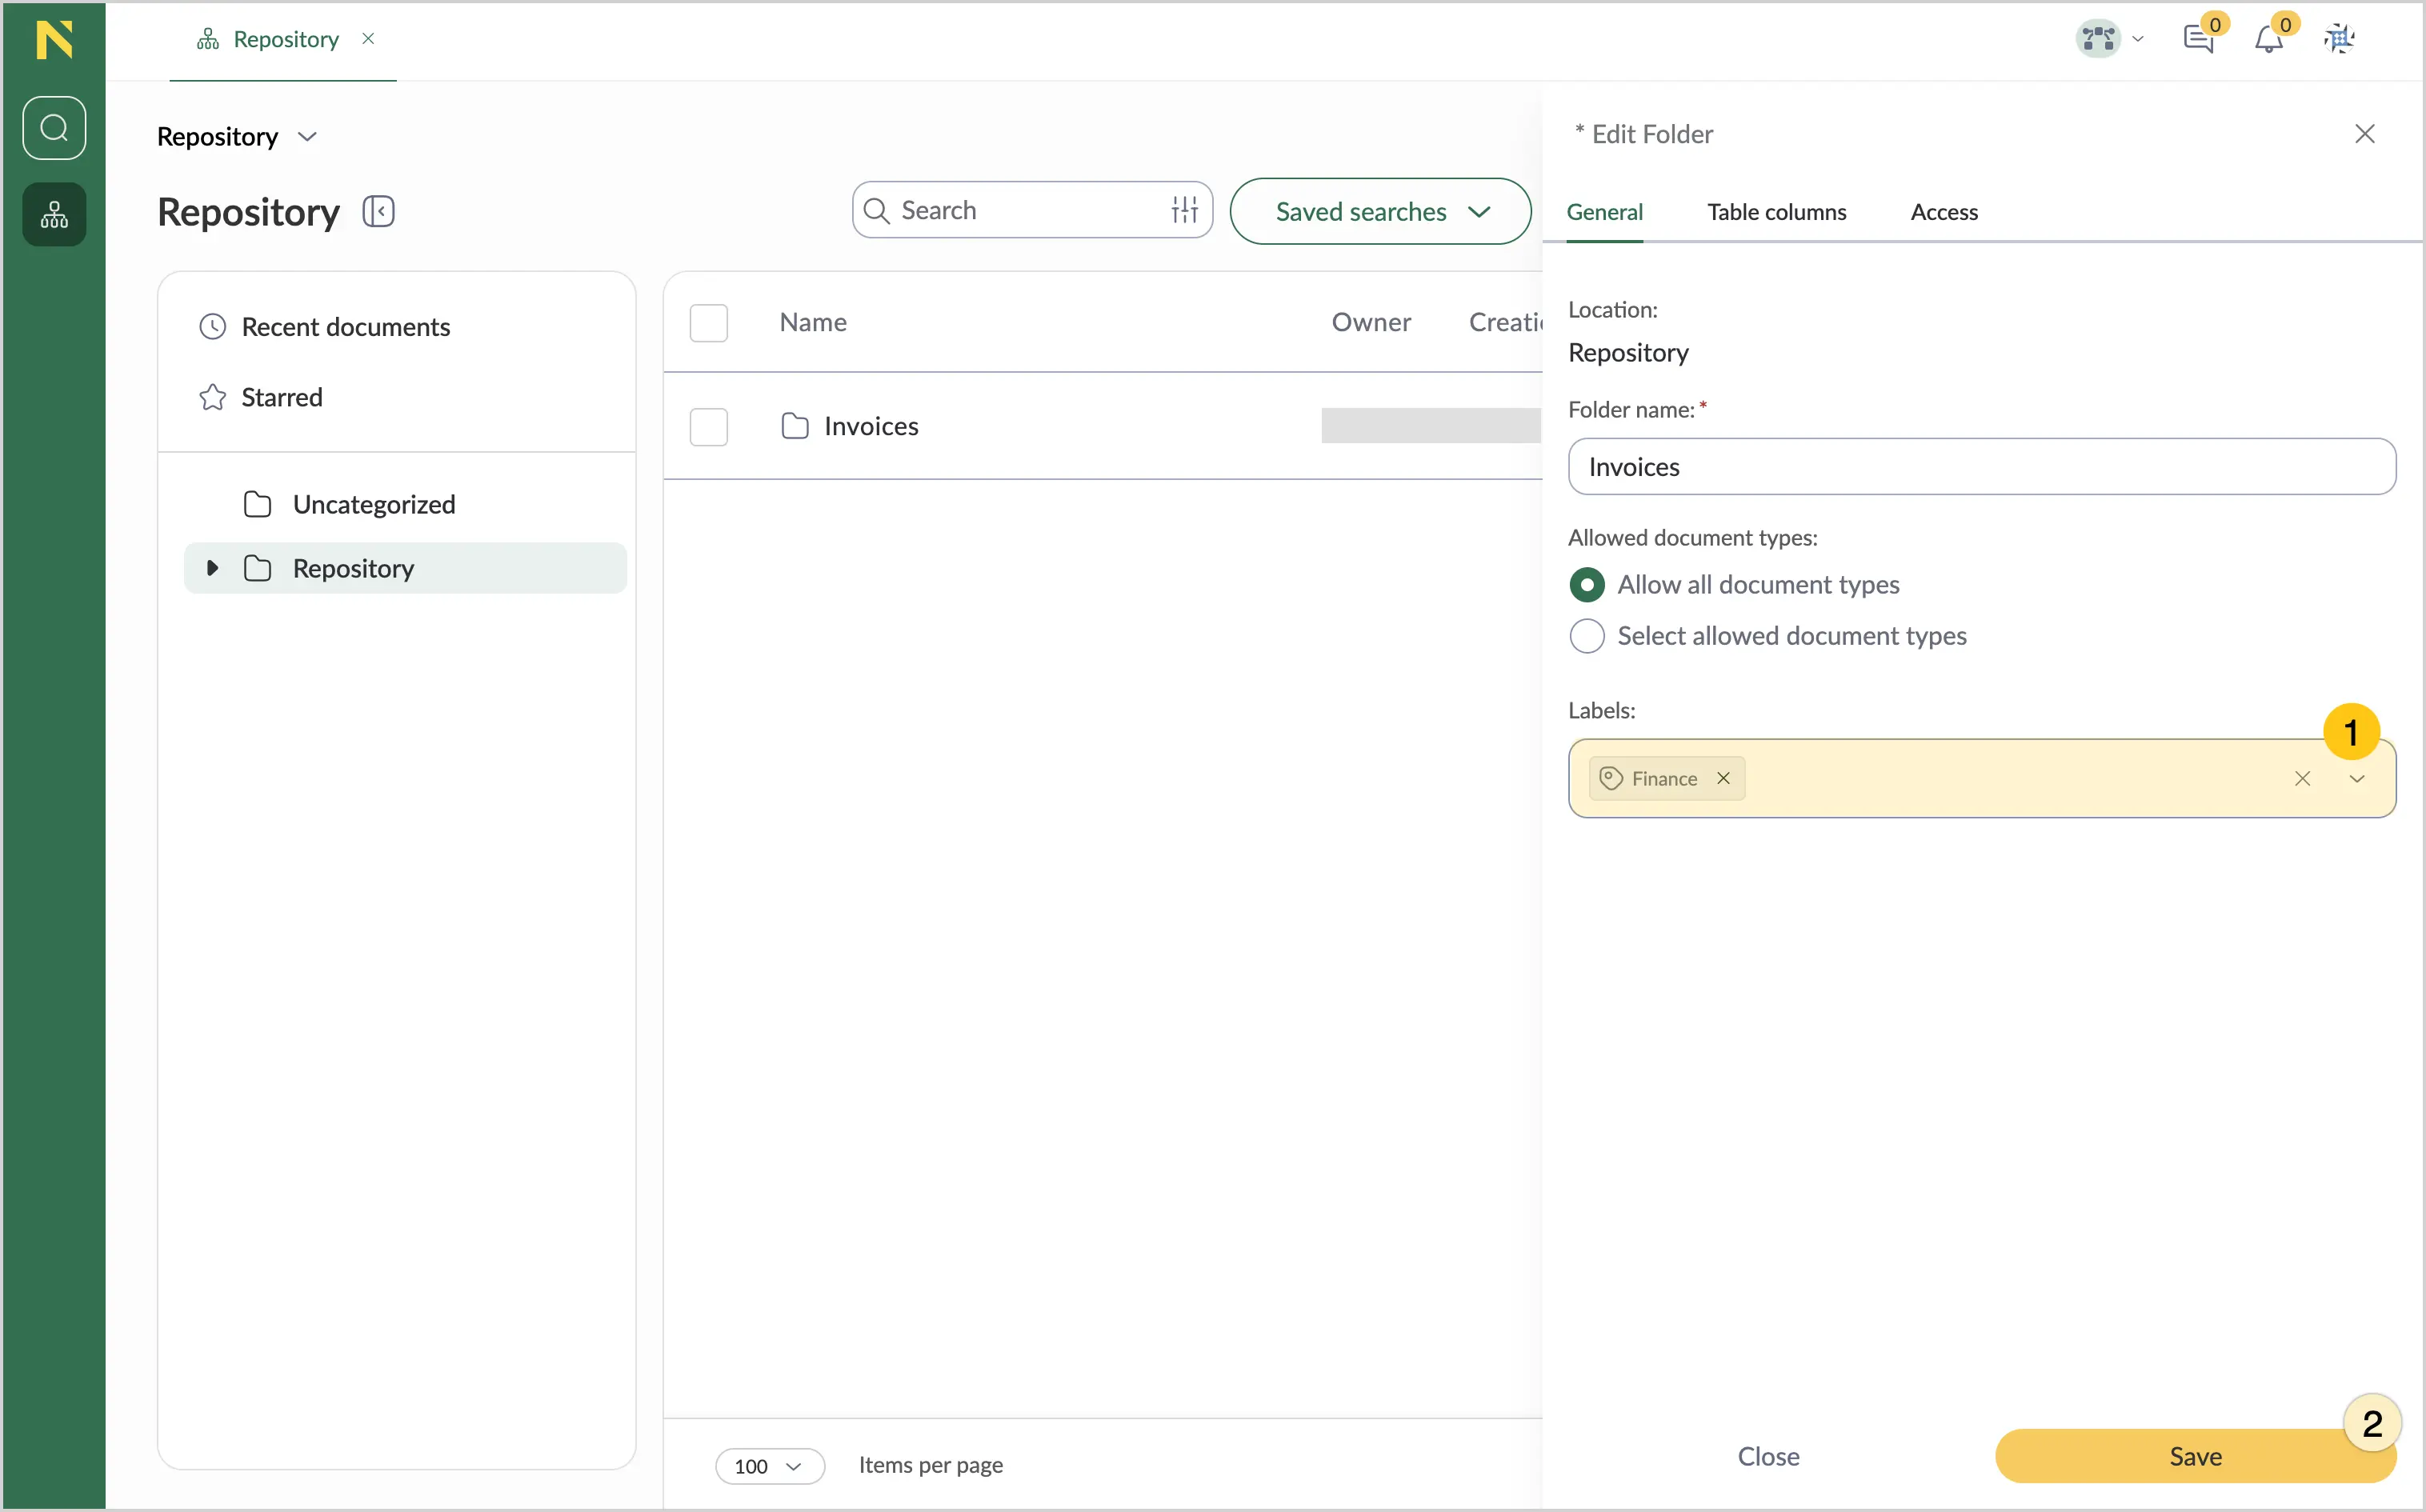
You can also apply a label through the Labels box when you create a new folder.
Assign label to document
-
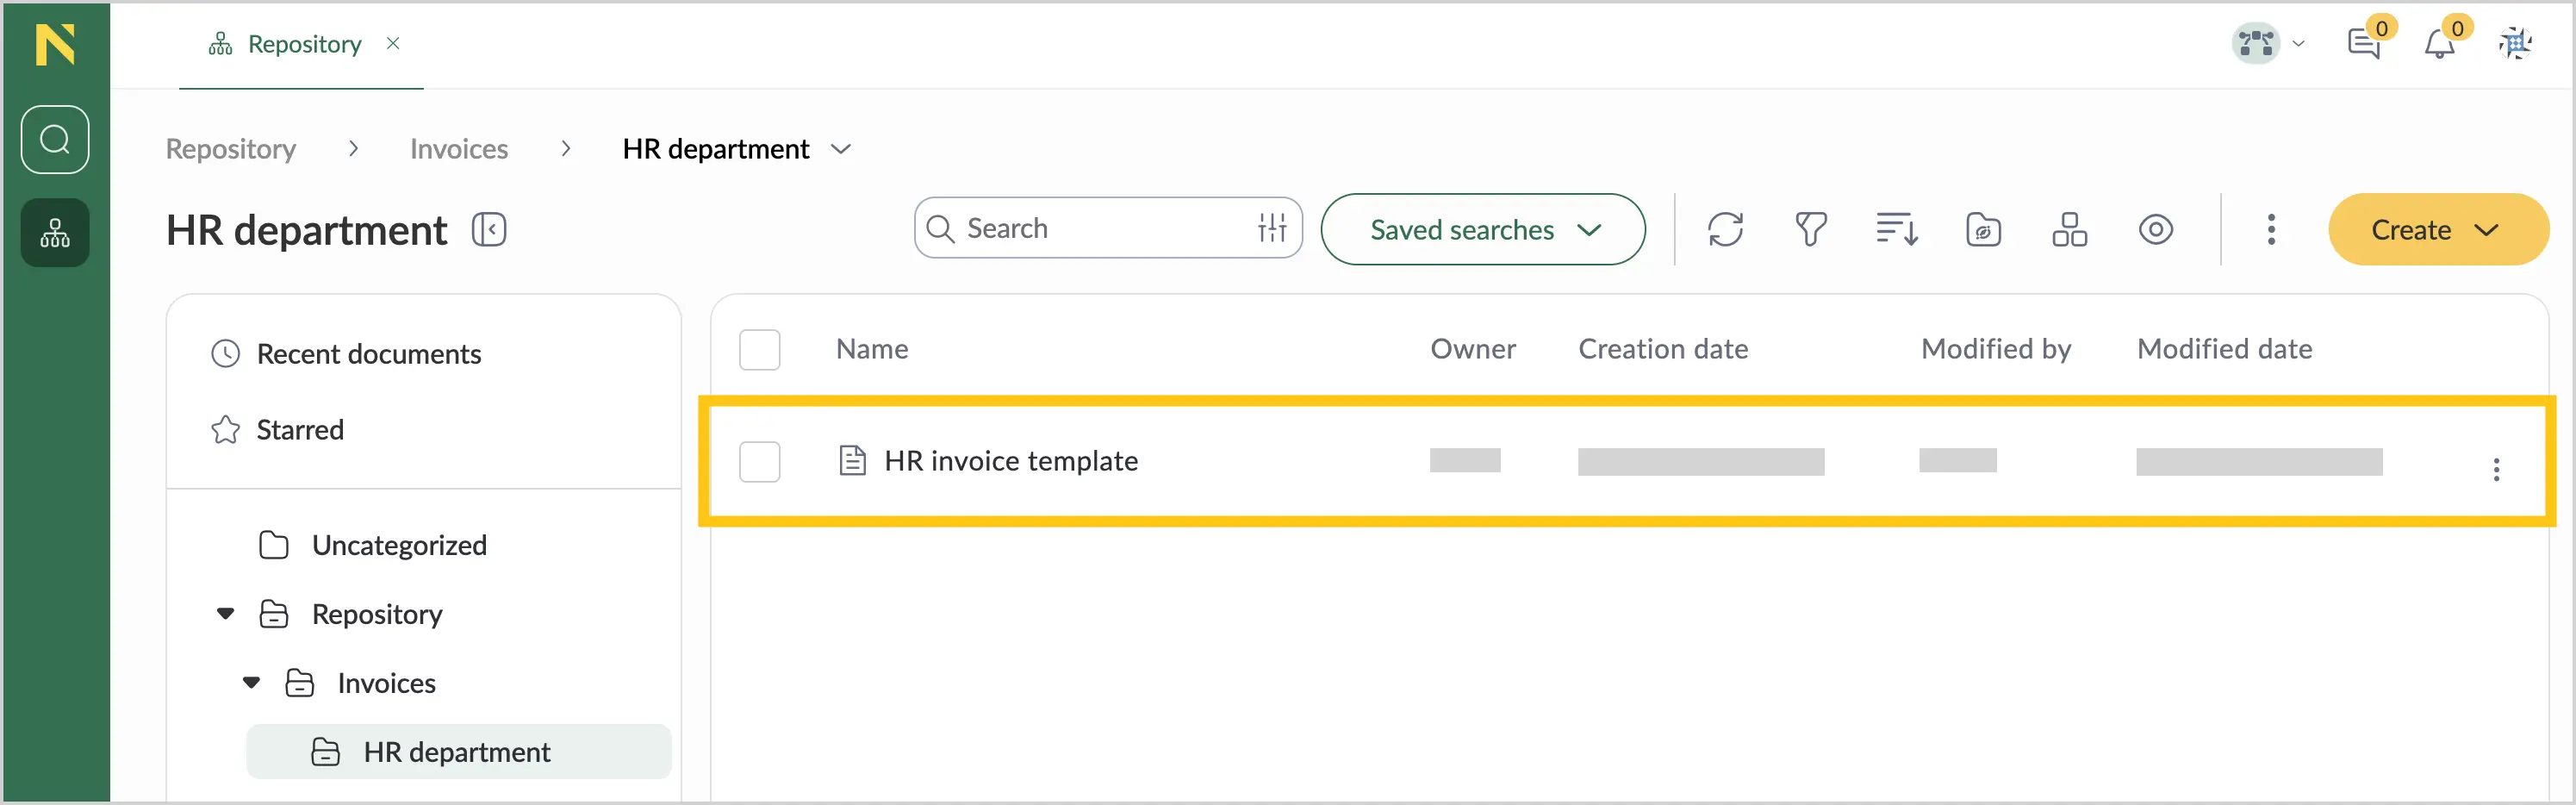
Double-click the needed document to open it.
-
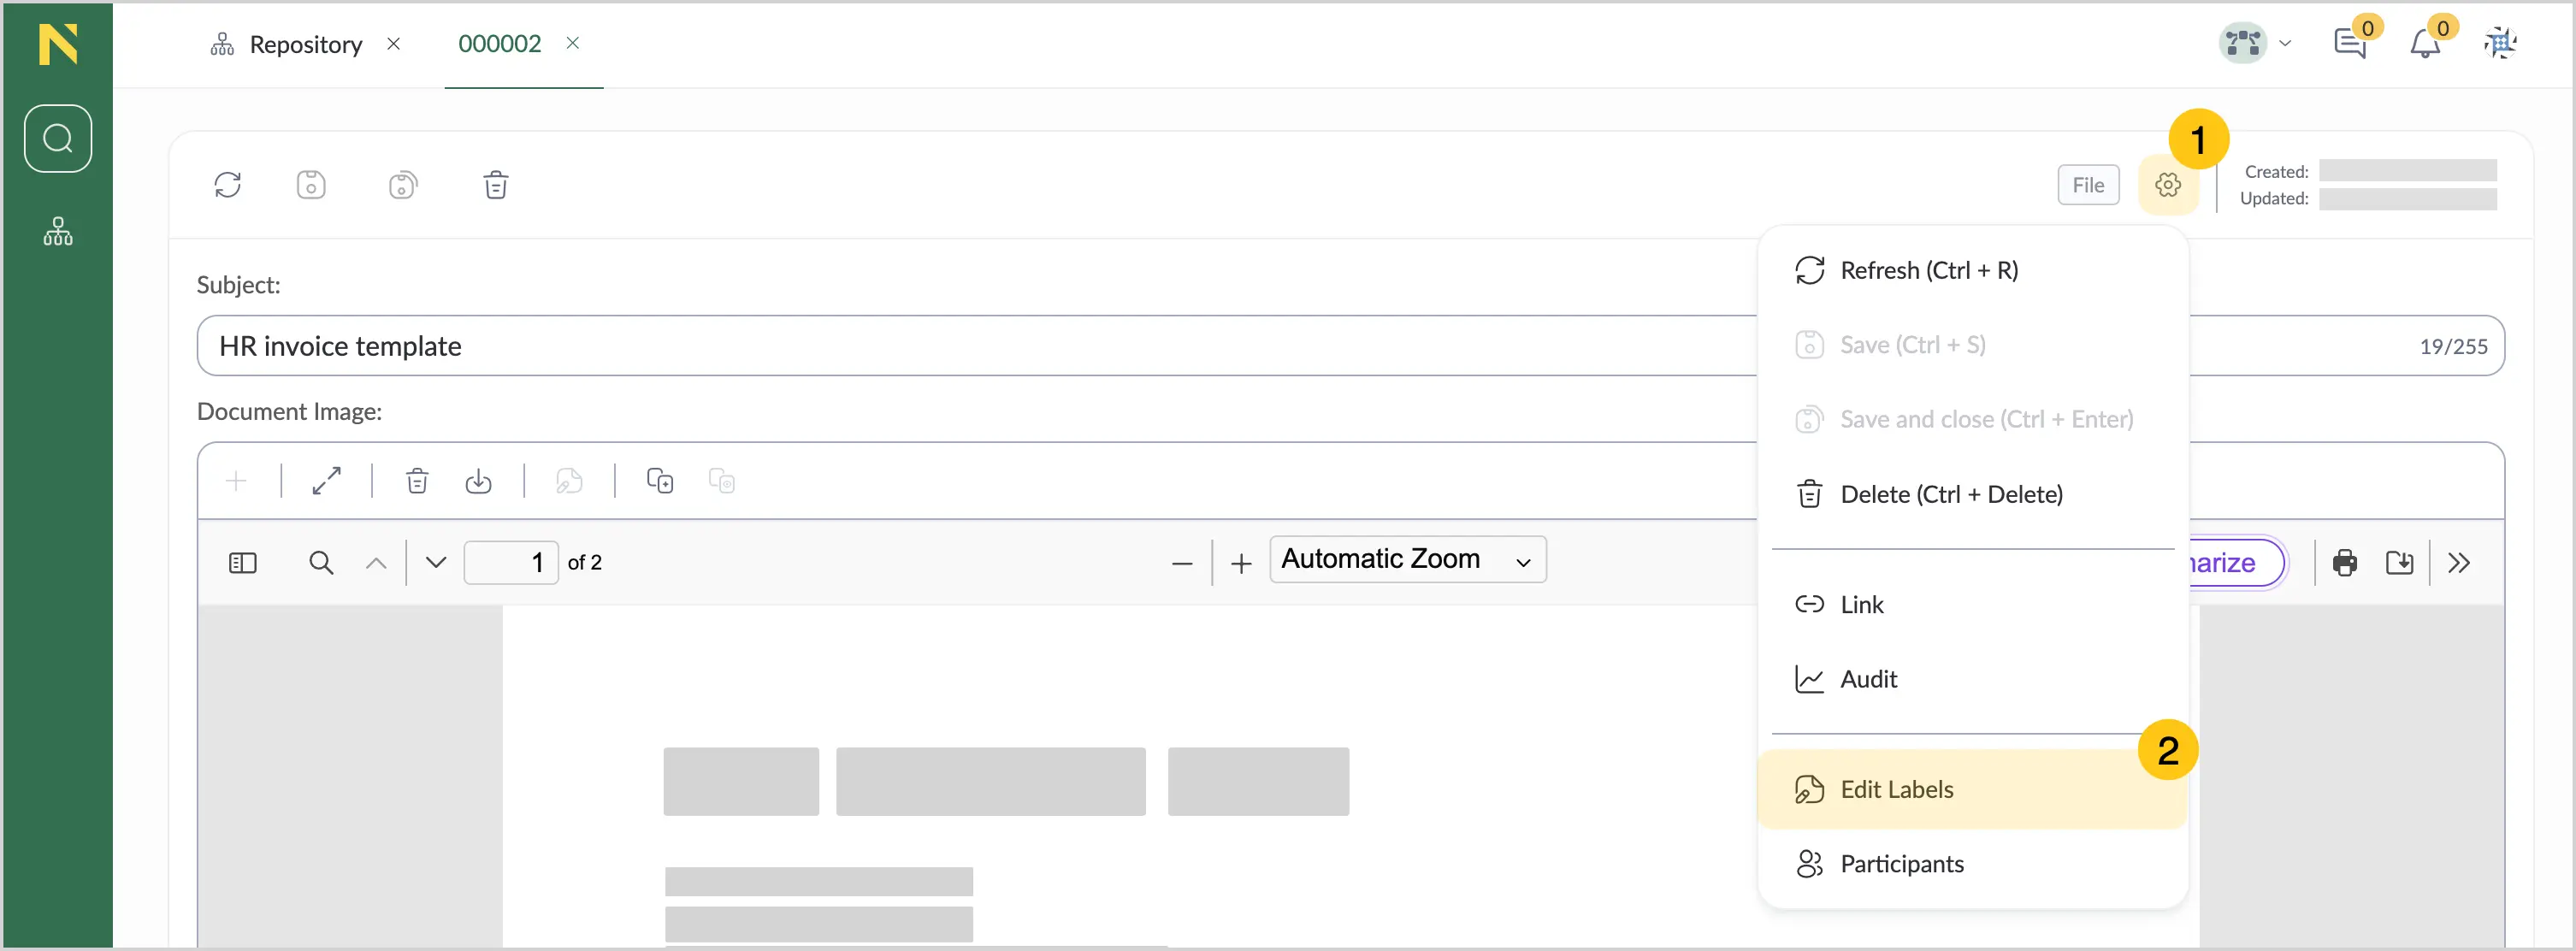
In the upper-right corner, select 1, and then select Edit Labels 2.
-
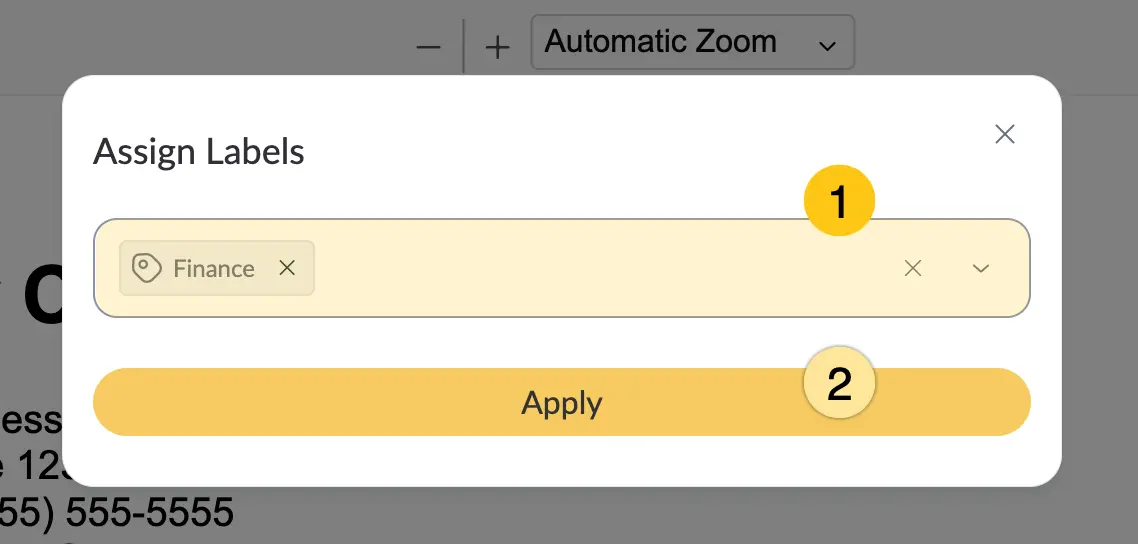
In the Assign Labels box 1, select the needed label from the dropdown list, or start typing to create a new label.
-
Select Apply 2.
Create folder label
-
Go to the target folder.
-
Select 1, and then select Settings 2.
-
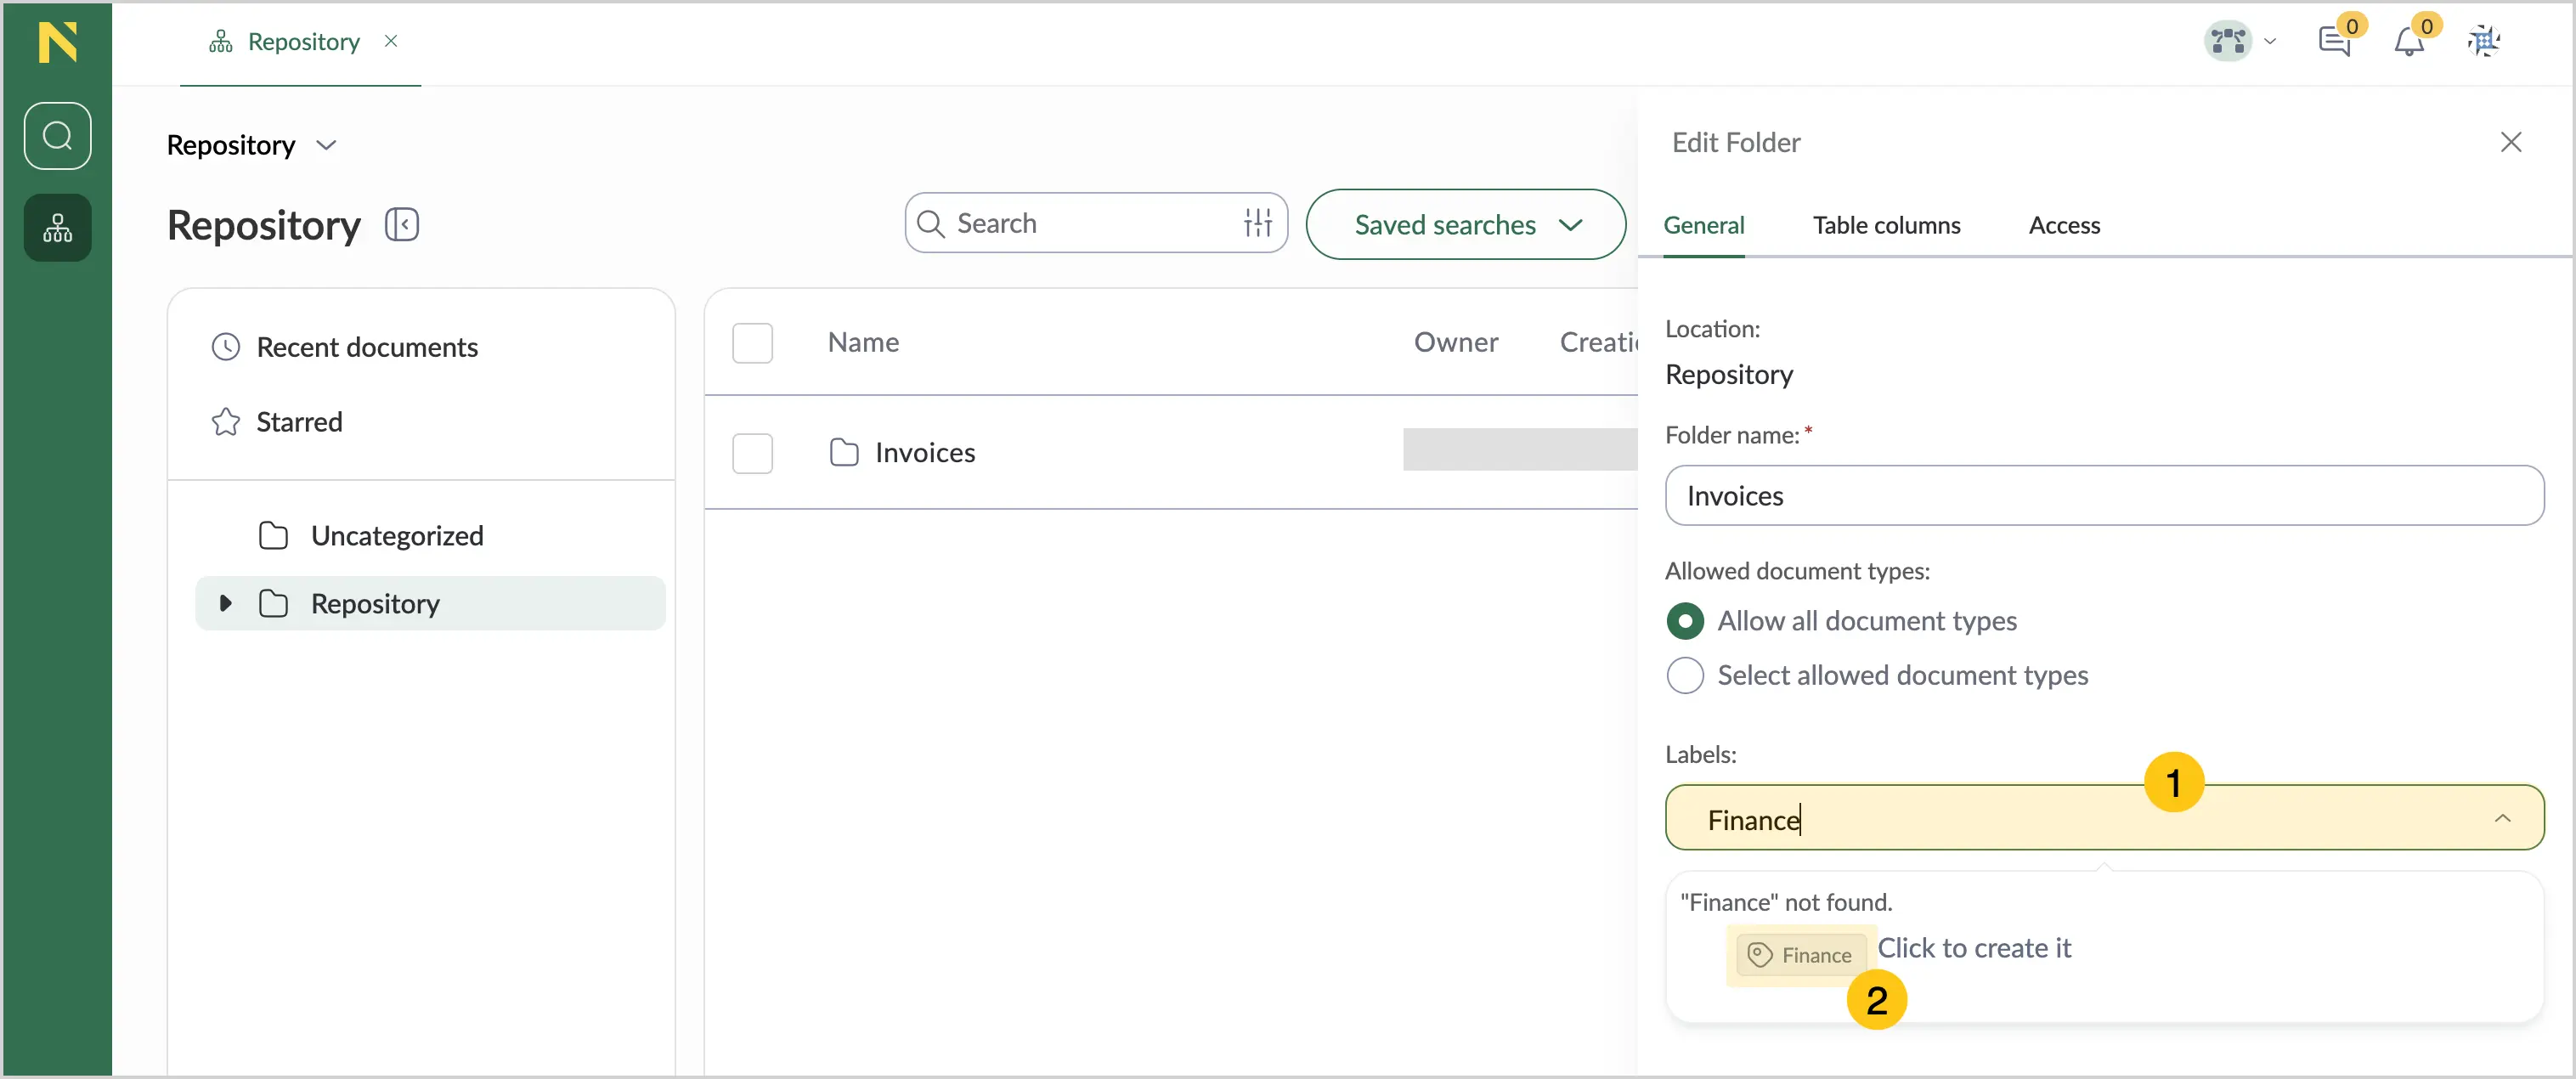
In the Labels box 1, enter the desired label name.
-
In the box below, select the label icon 2.
-
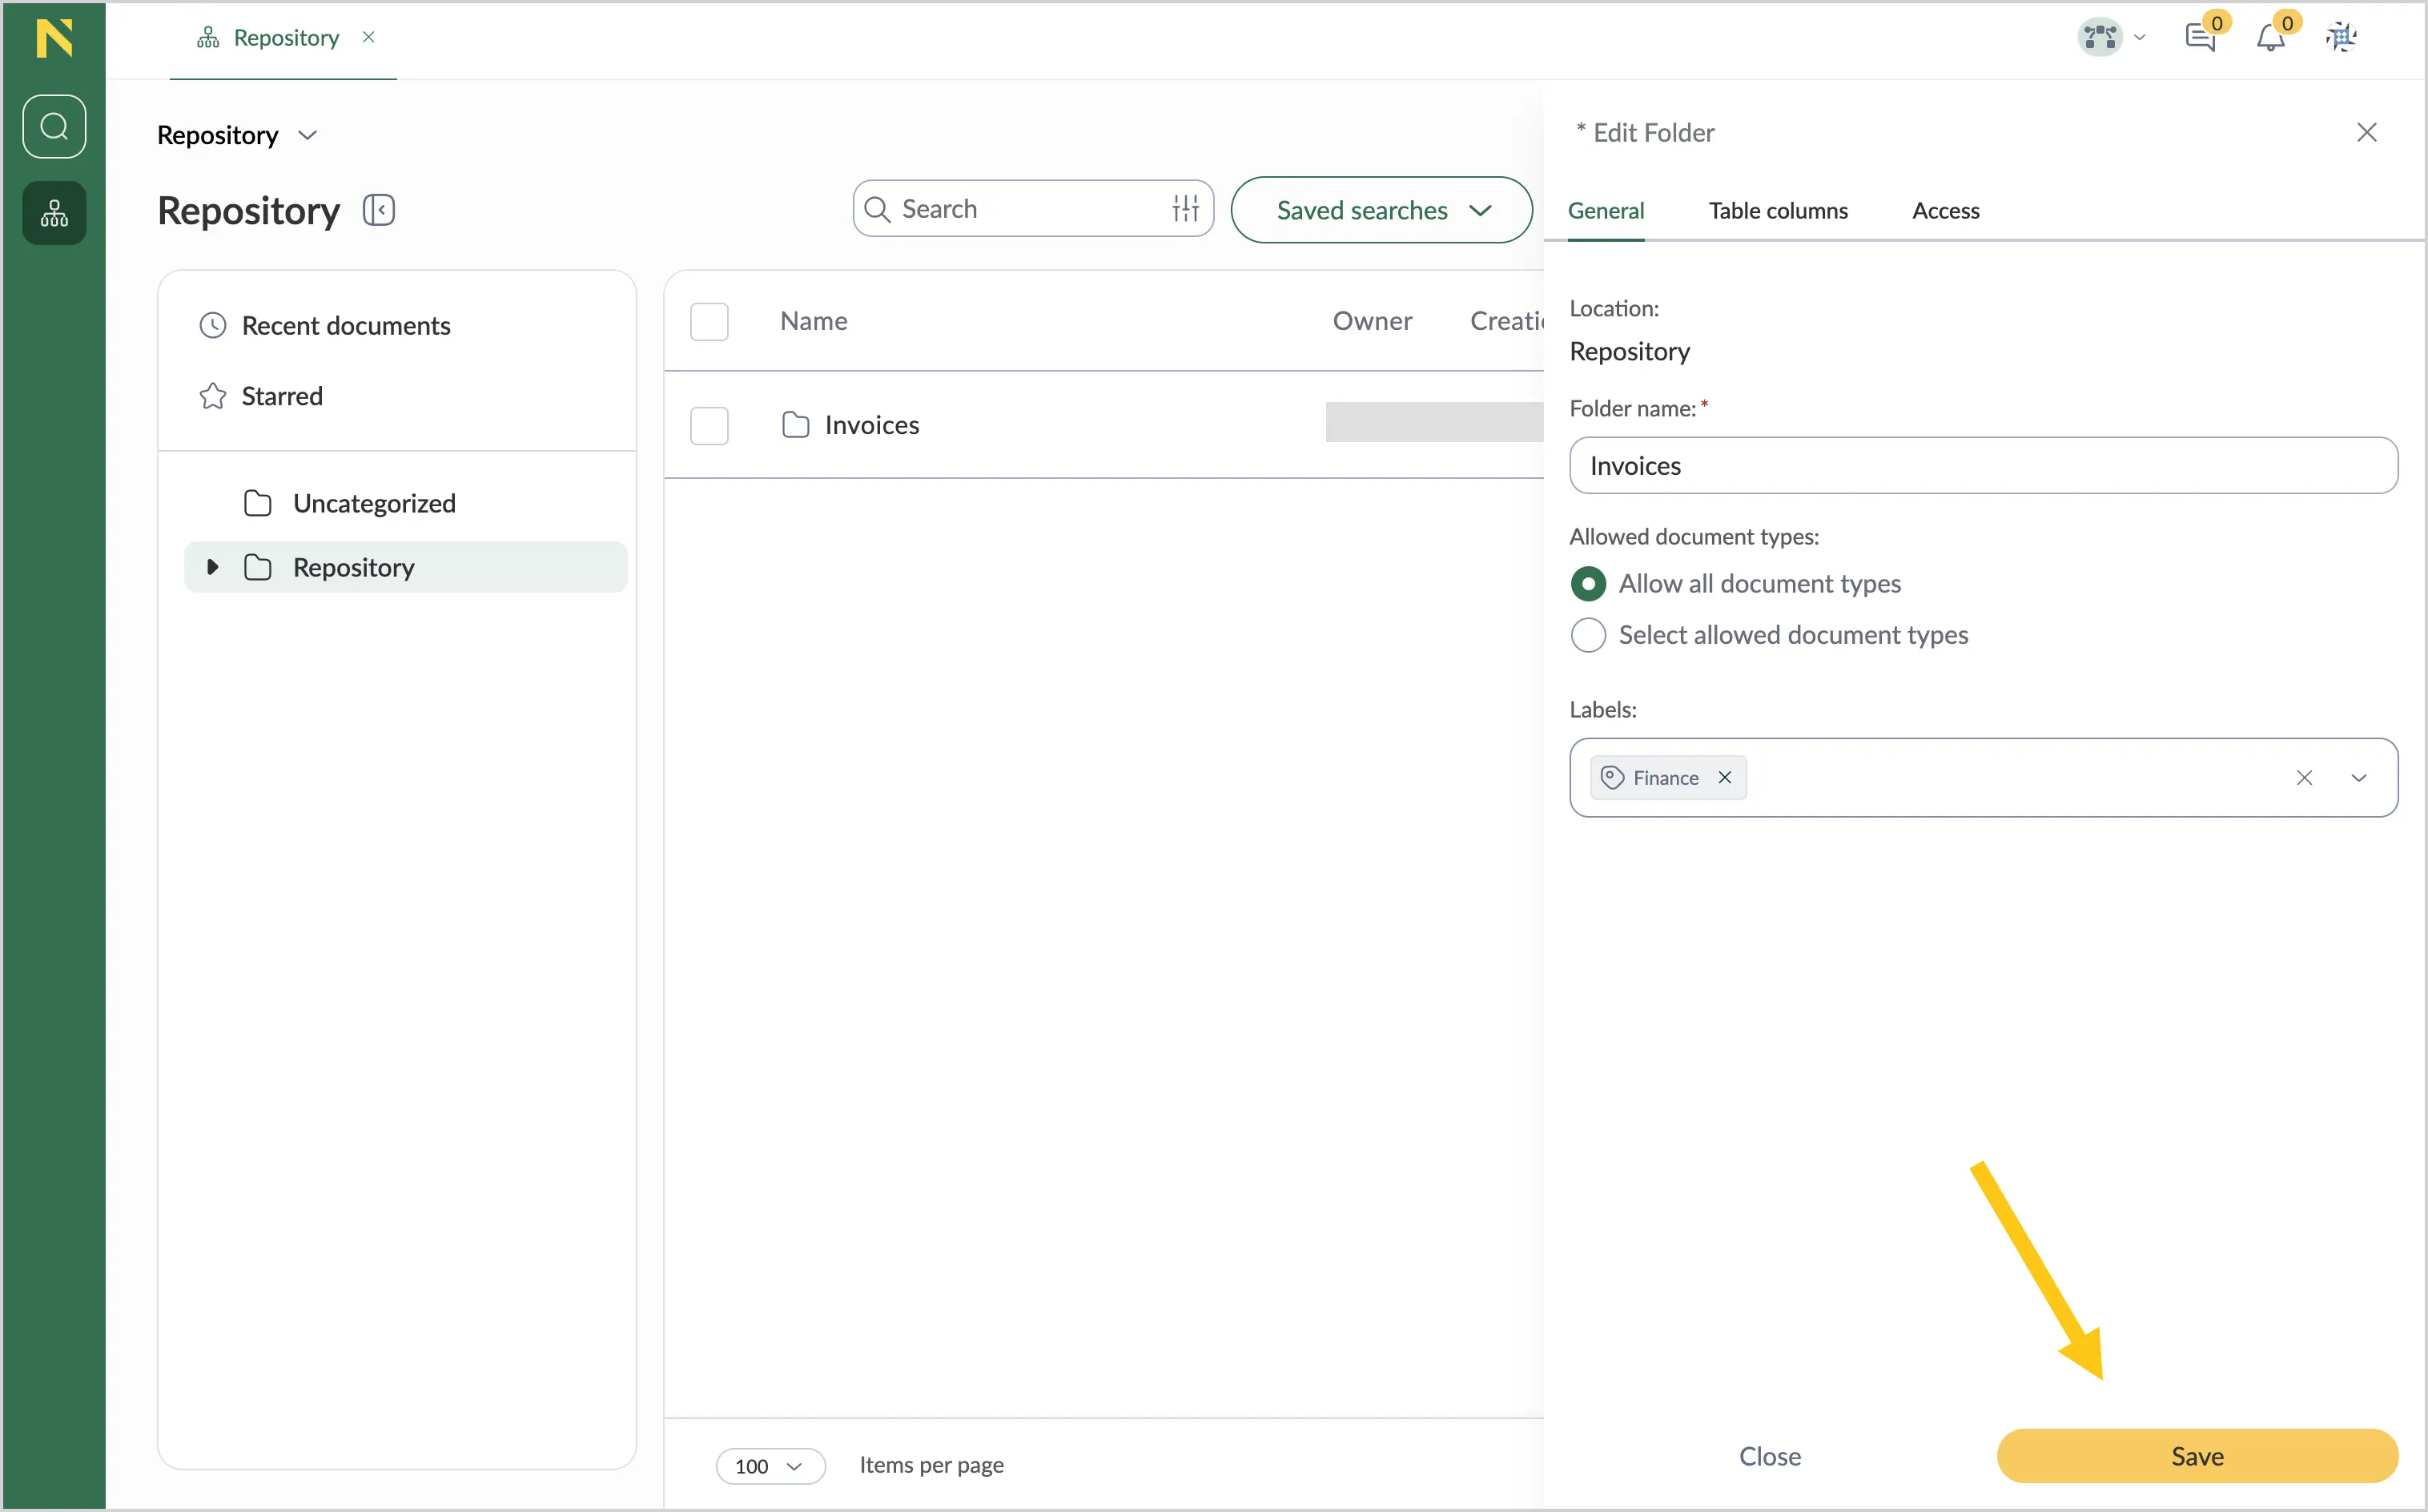
Select Save.
Create document label
-
Double-click the document to open it.
-
In the upper-right corner, select 1, and then select Edit Labels 2.
-
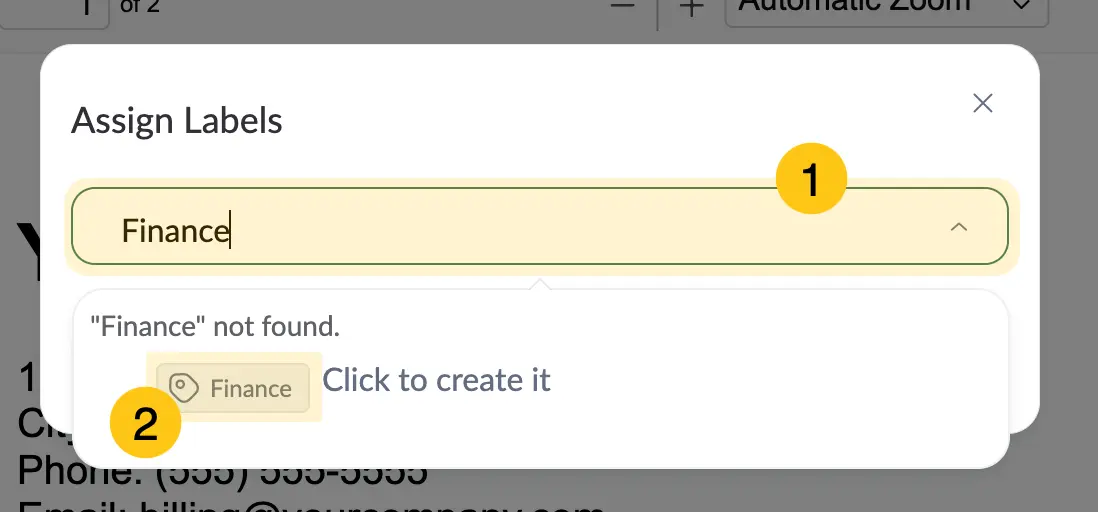
In the Assign Labels box 1, enter the desired label name.
-
In the box below, select the label icon 2.
-
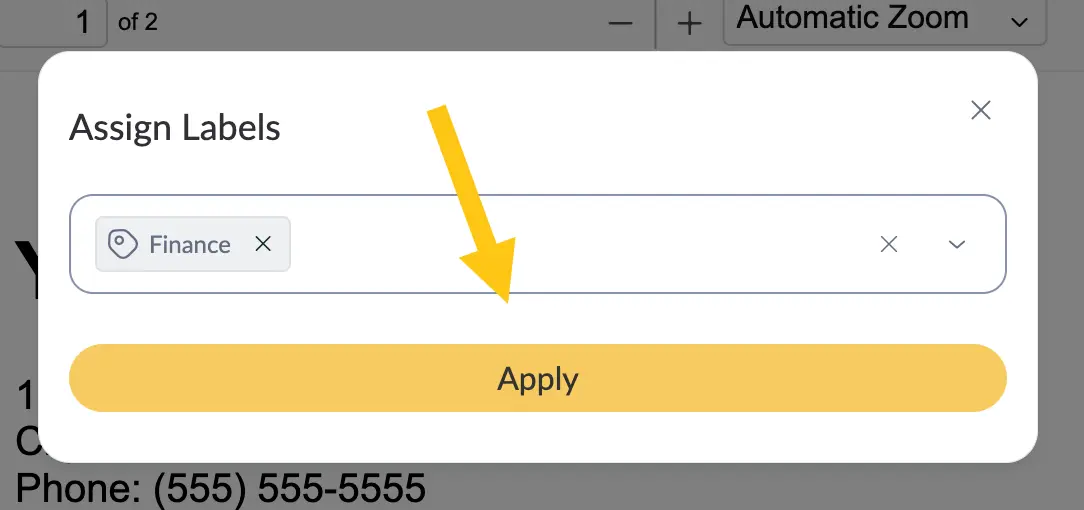
Select Apply.
Delete label
Only users with the Admin role can delete labels in the Administration desktop.
Stars
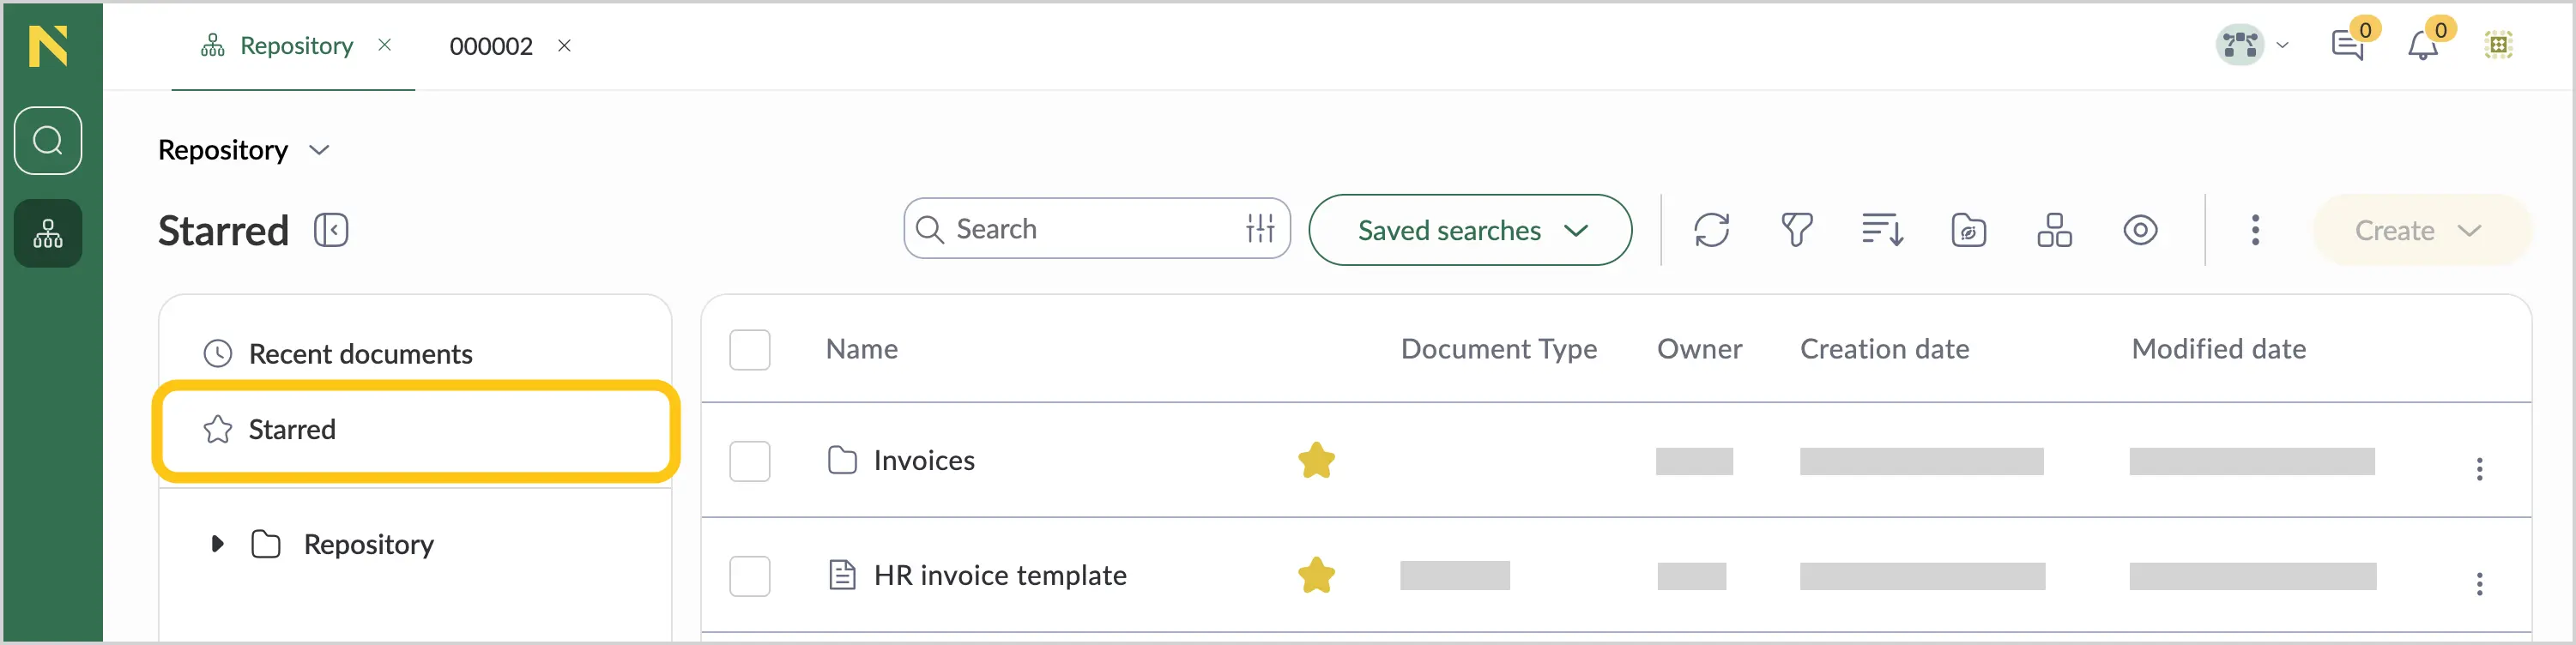
Use stars to mark important documents and folders for quick access. When you add a star to an item, it appears in the Starred section, making it easy to find and access your frequently used content.
Add star
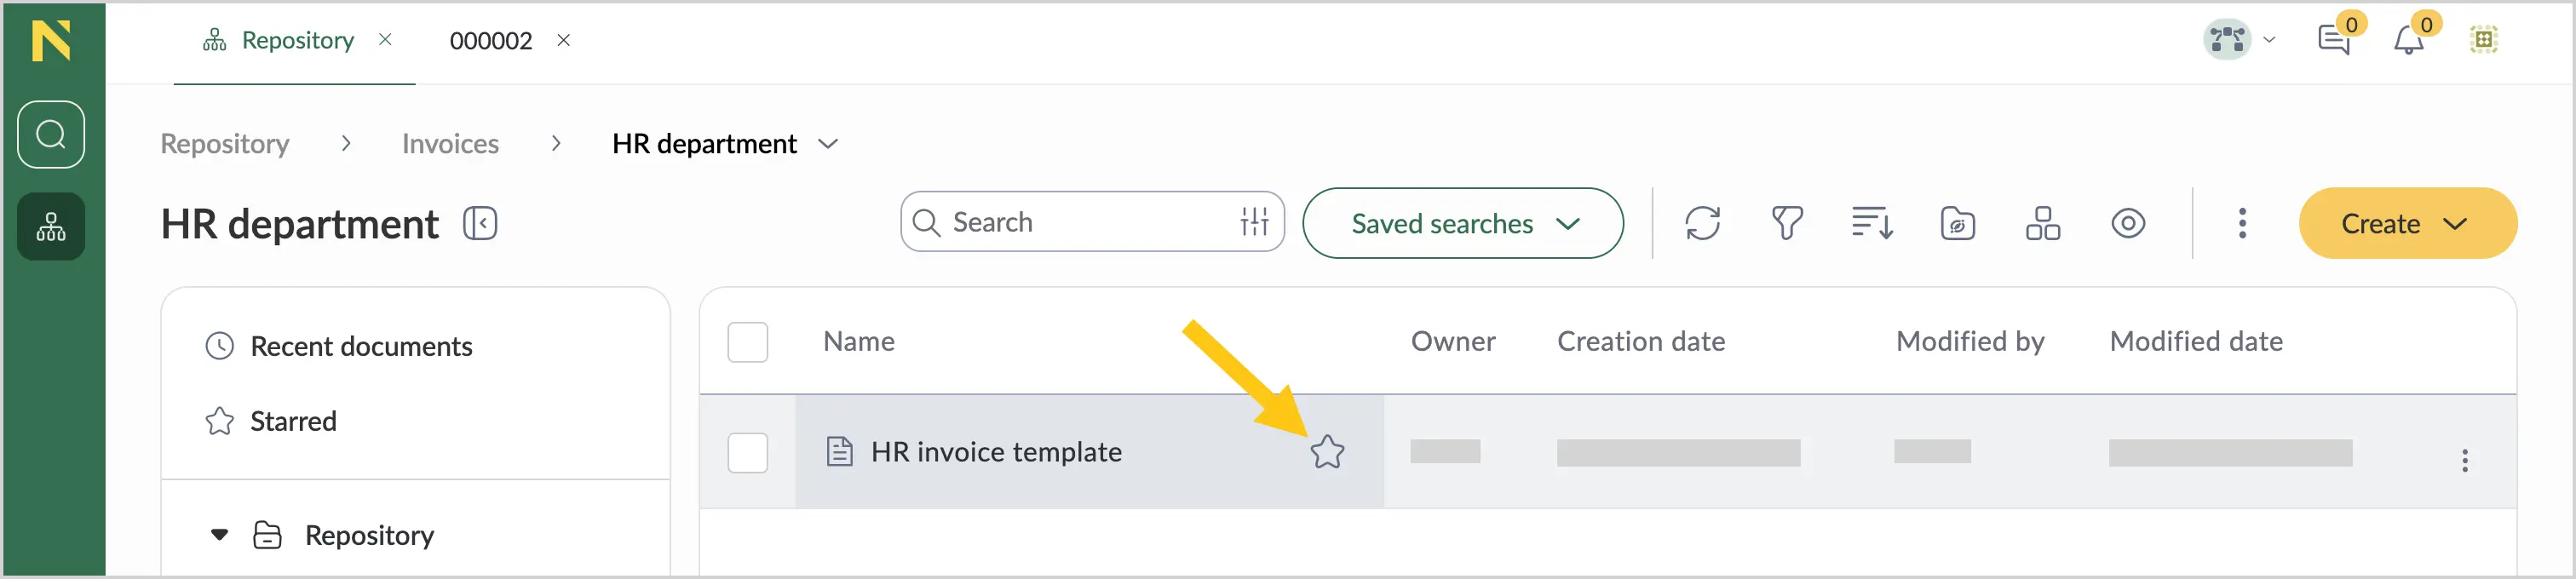
Hover over the needed document or folder, and then select the  icon next to its name.
View all starred items
-
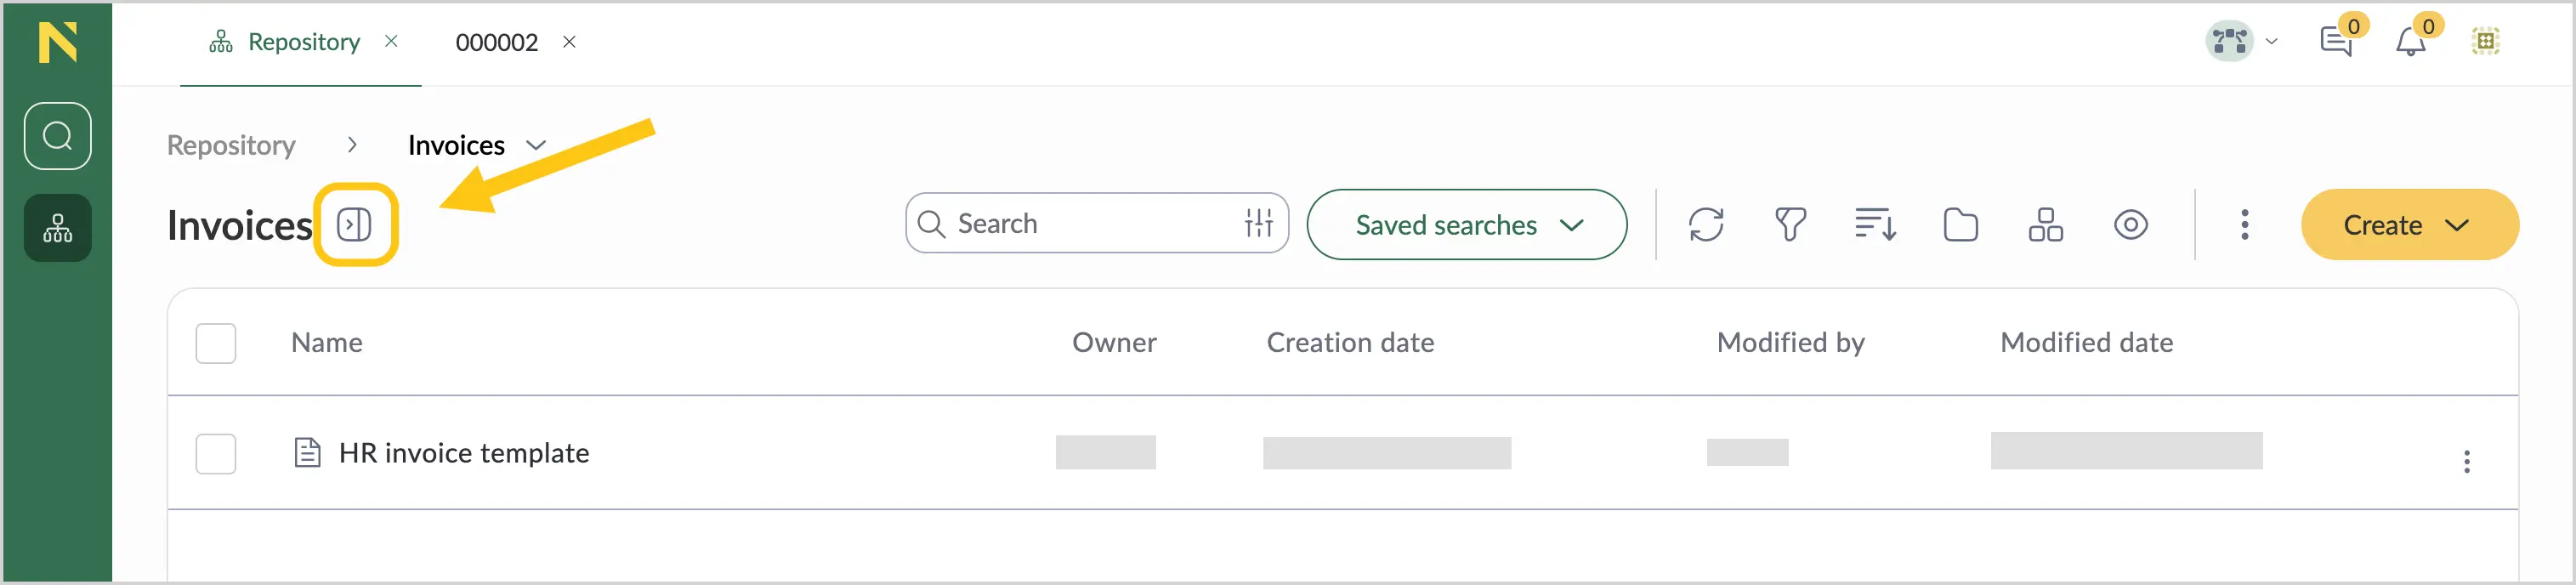
Enable the folder tree mode.
-
In the folder tree panel, select the Starred section.