Work with folders
Show or hide folders
Control the visibility of folders in your document view to simplify navigation and focus on specific content.
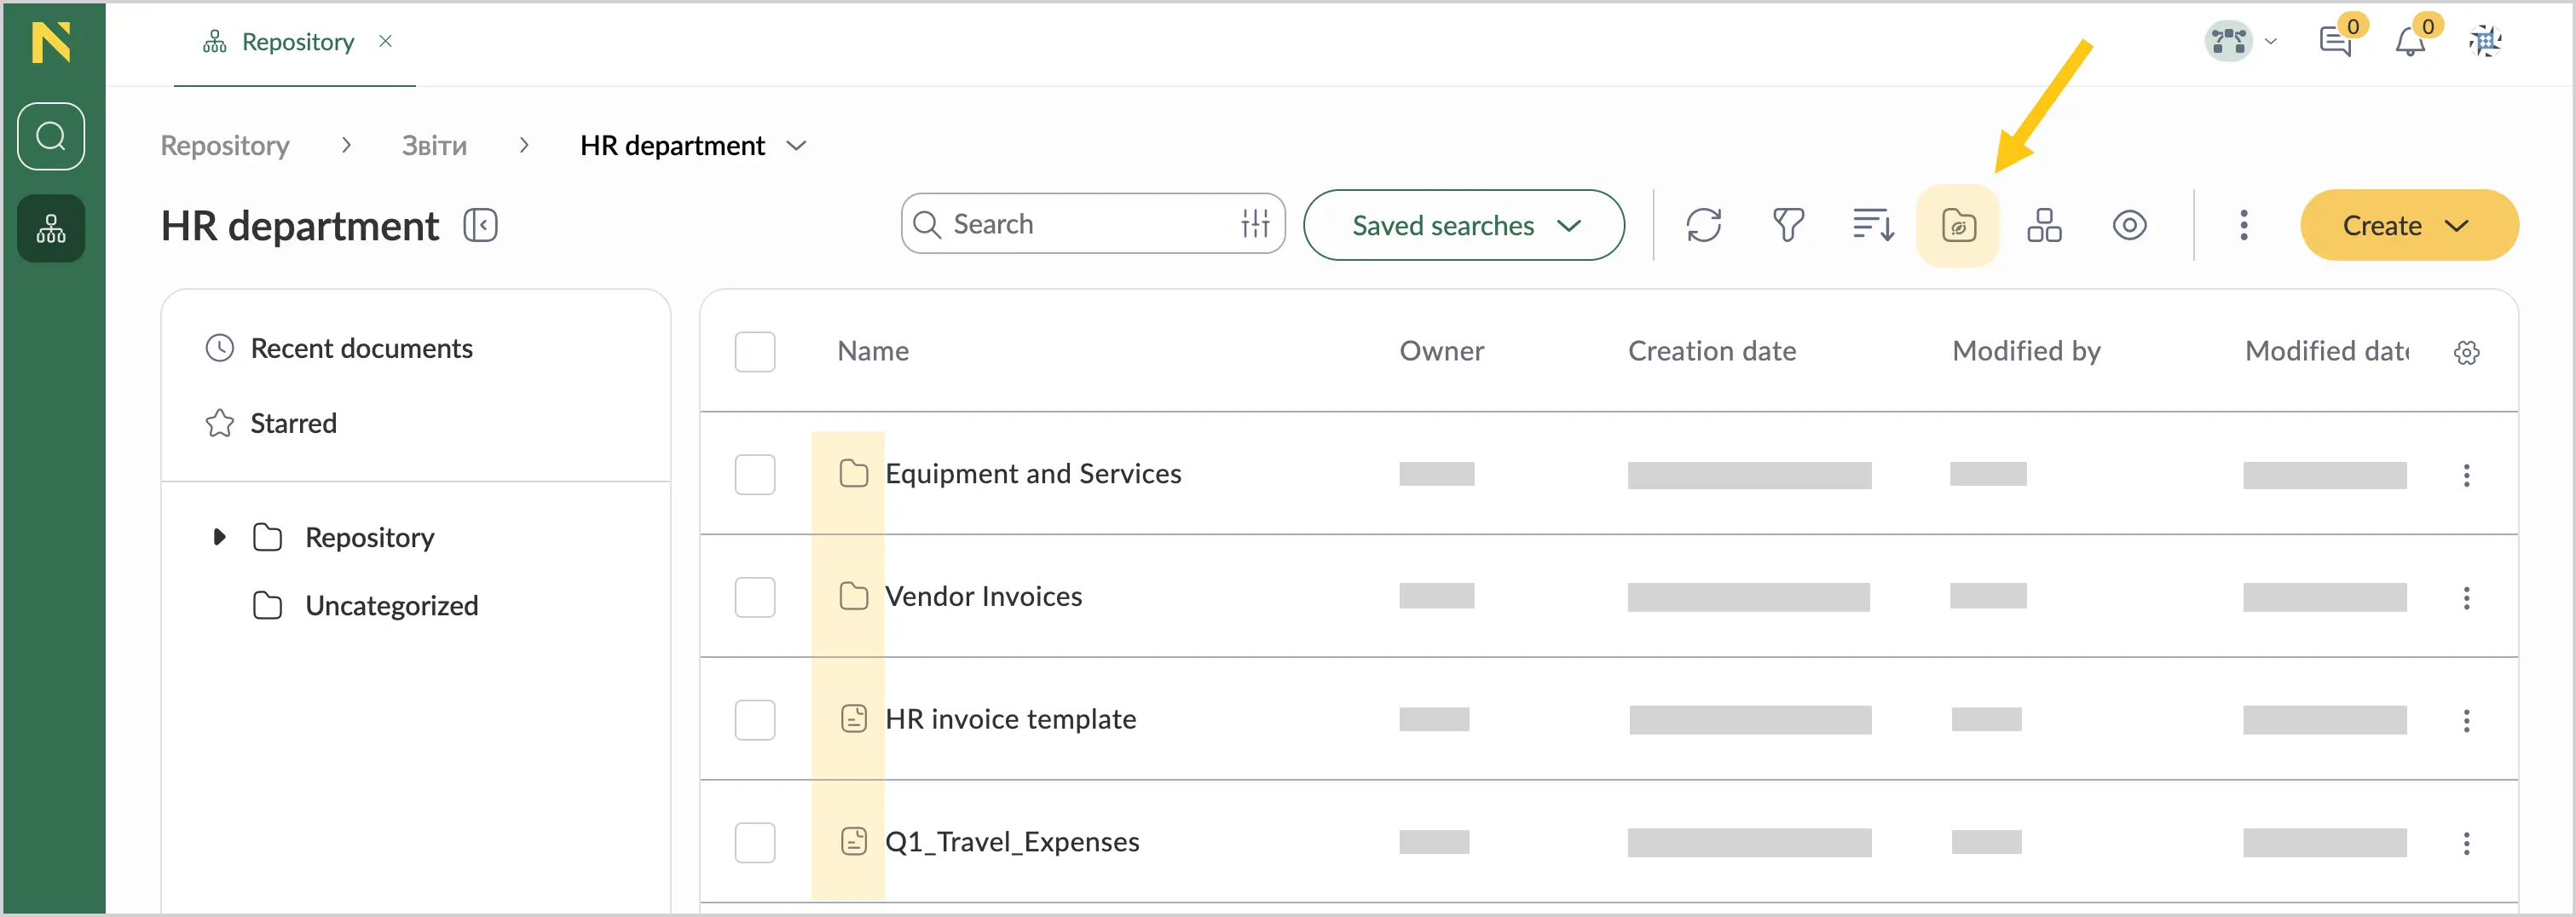
To show folders, select the folder visibility icon  on the action bar. Both documents and folders will become visible.
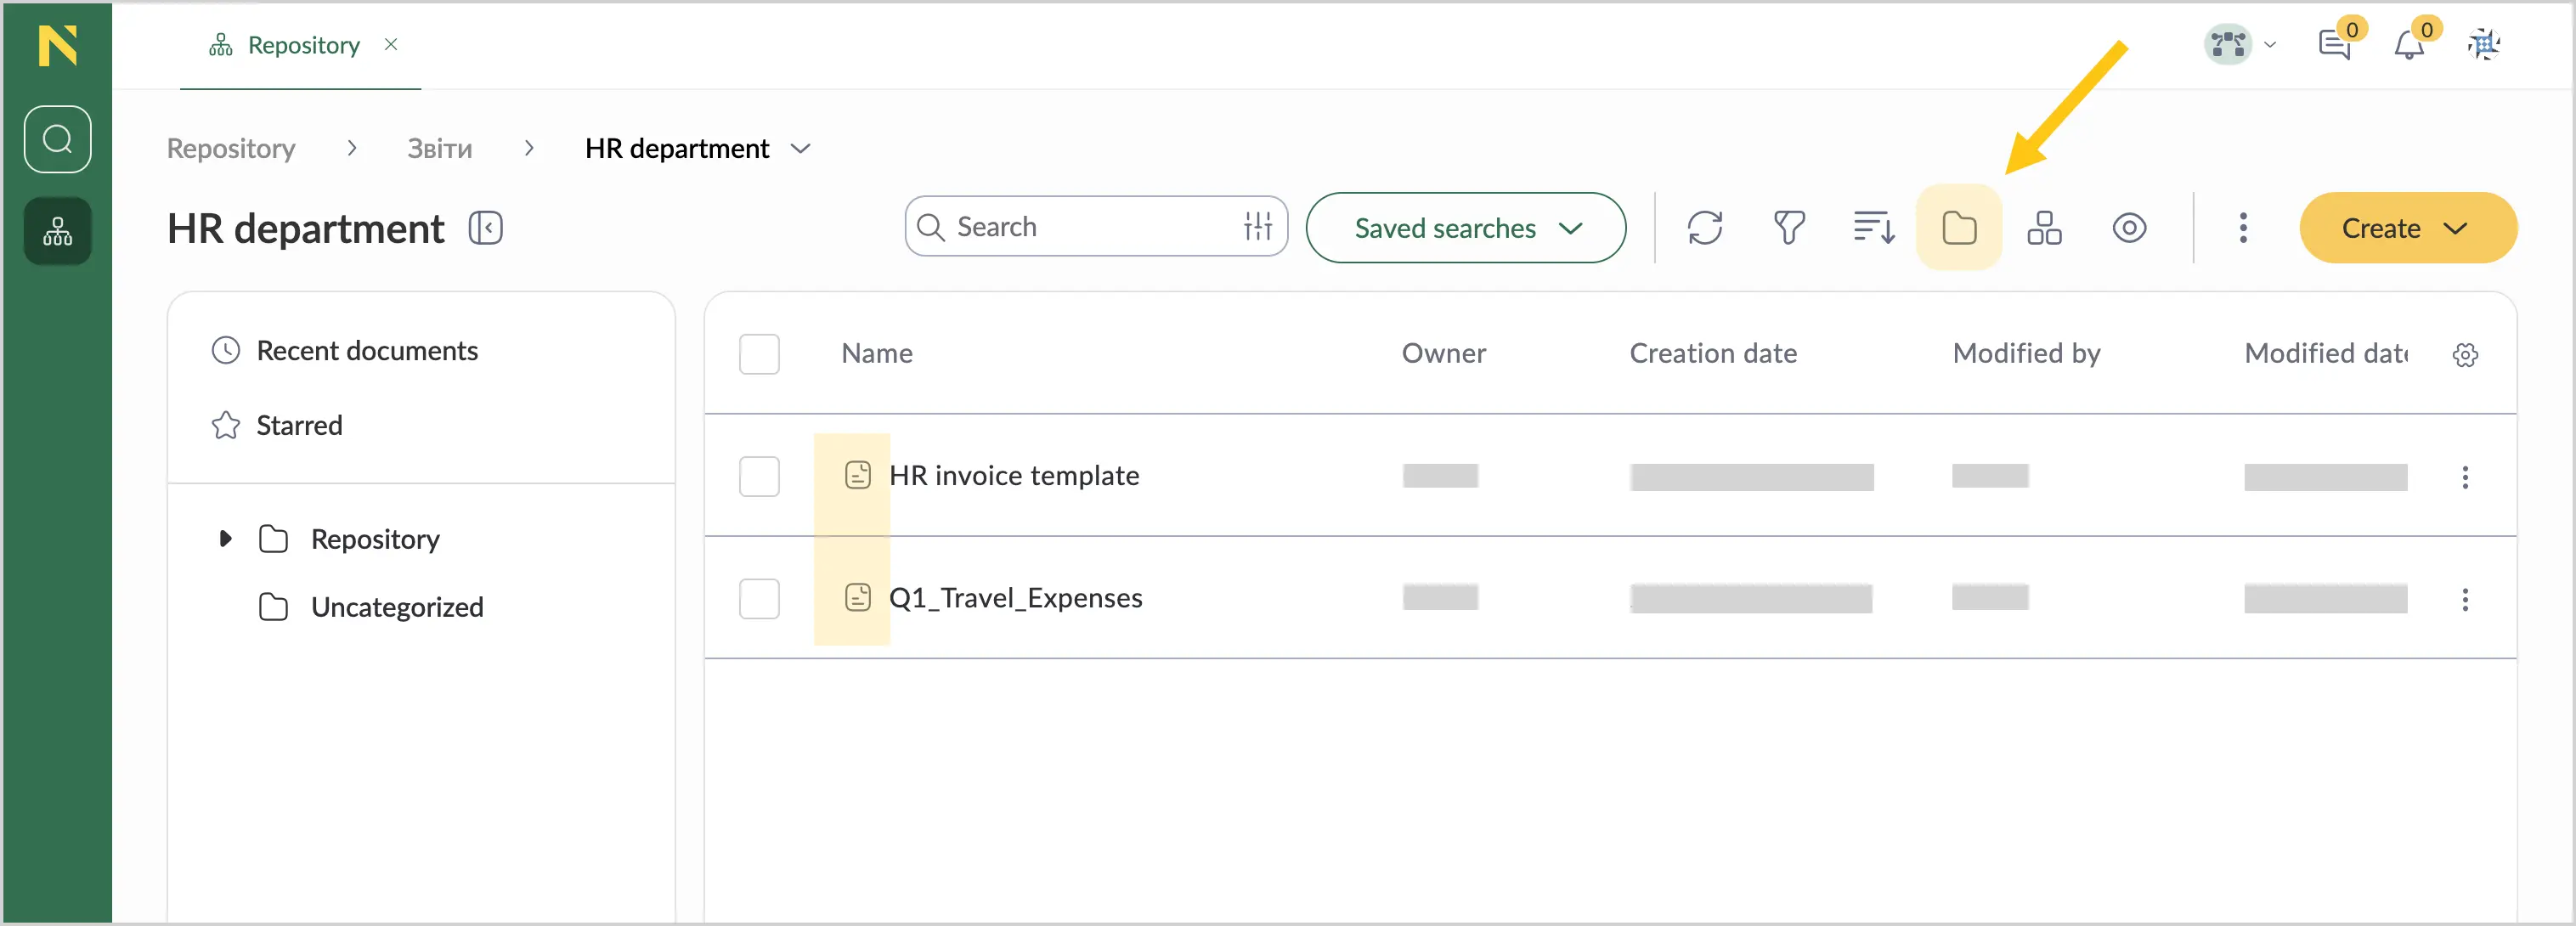
To hide folders, select the folder visibility icon  on the action bar. Only documents will remain visible.
Show or hide folder tree
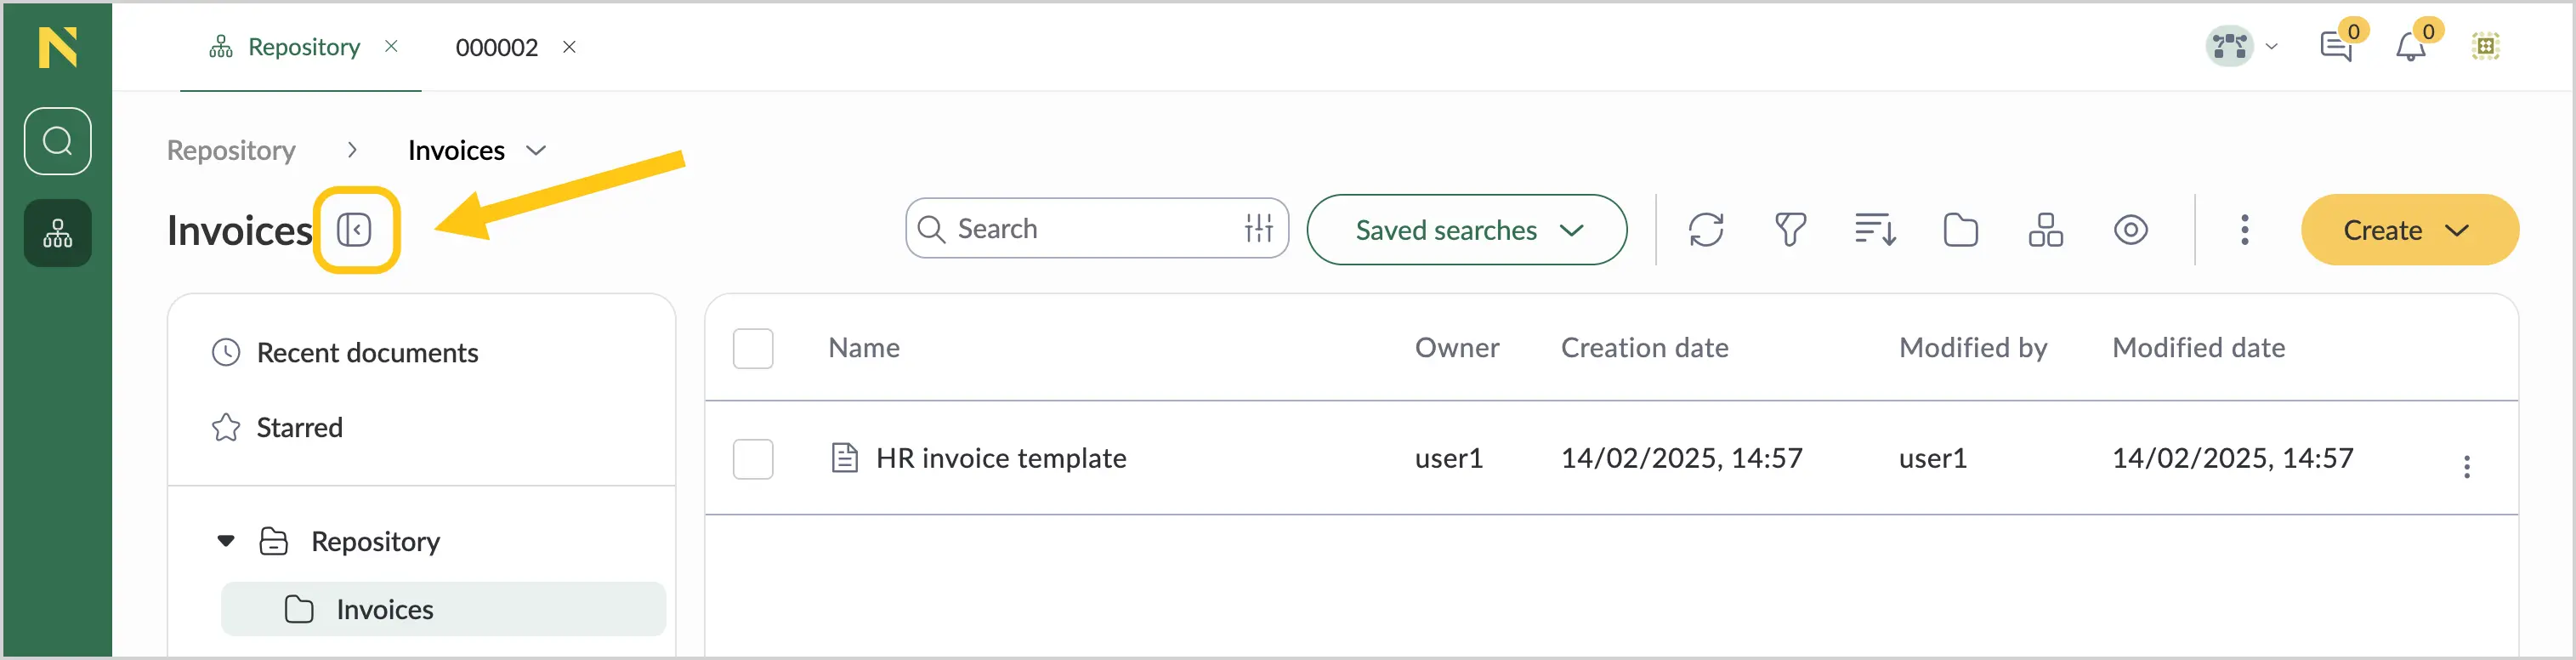
To show the folder tree, select the folder tree icon  .
.
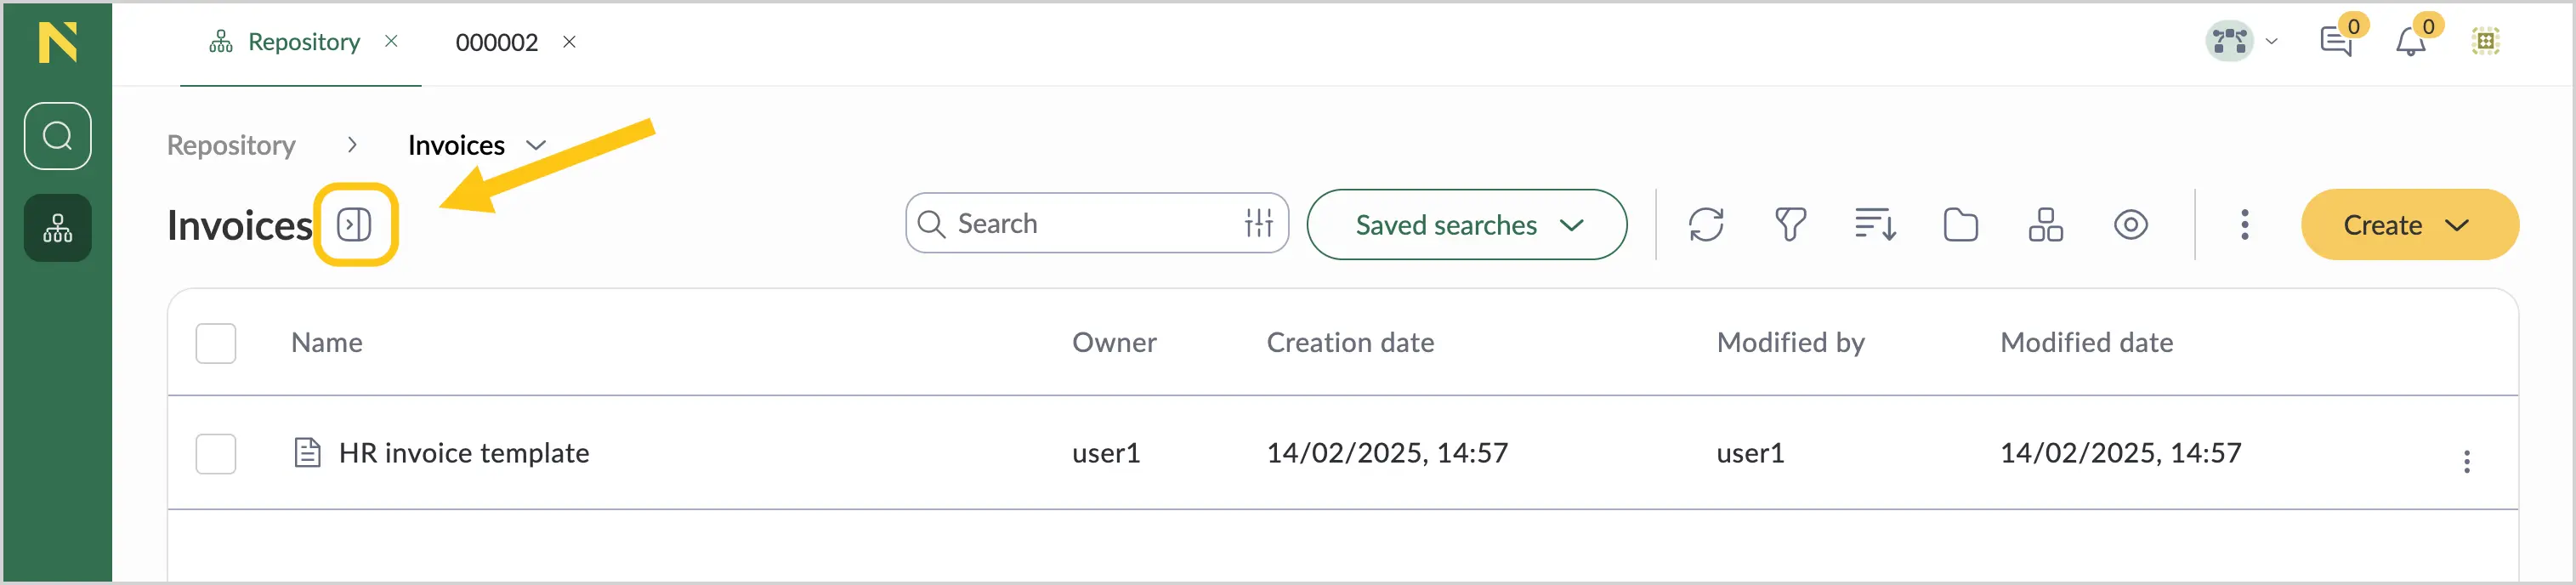
To hide the folder tree, select the folder tree icon  .
.
Create new folder
You can create new folders only within folders where you have the appropriate access rights: Folder Admin or Editor roles.
Only admin can create folders inside the Repository folder.
-
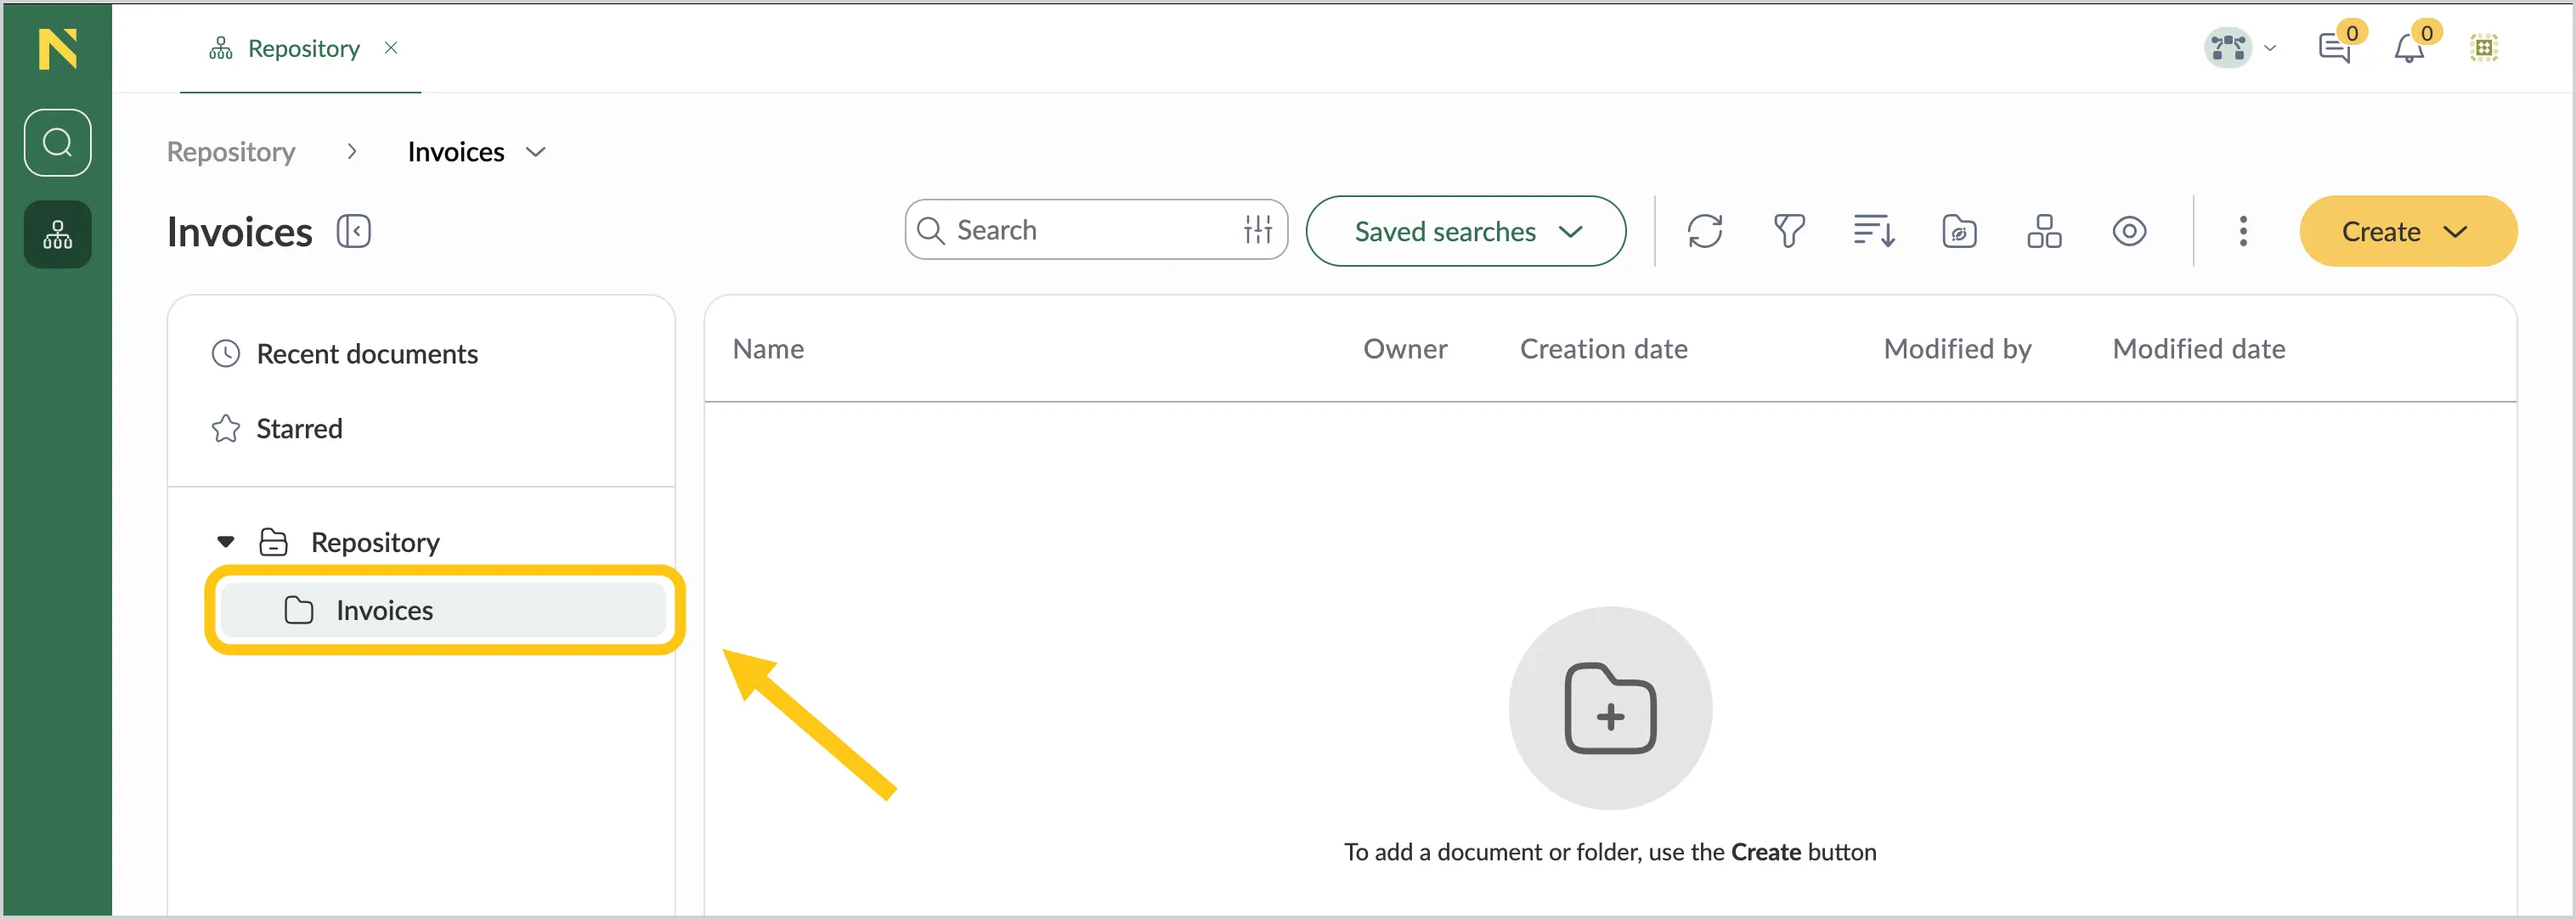
To select a location for your folder, in the folder tree, select the needed folder.
-
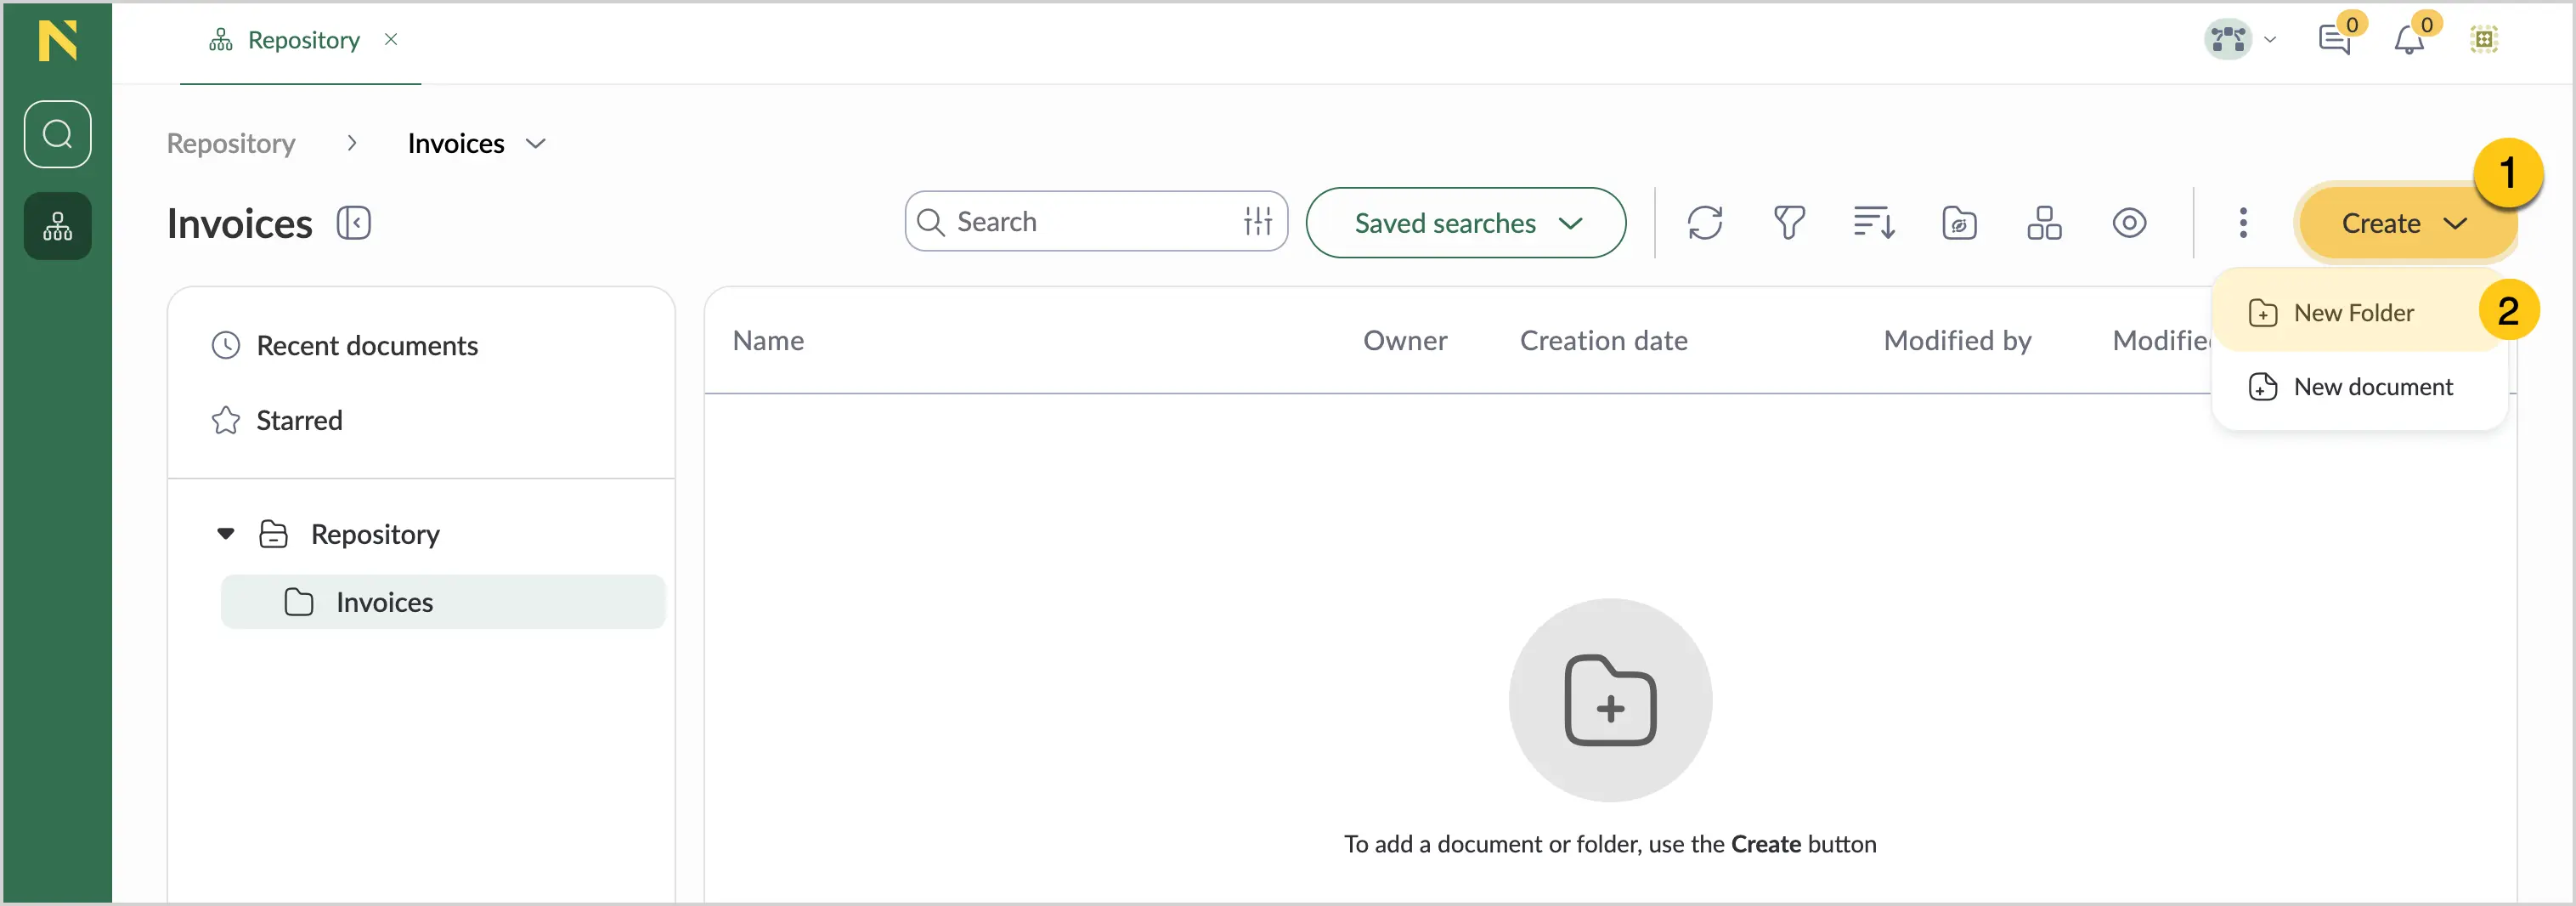
On the action bar, select Create 1, and then select New folder
 2.
2.
-
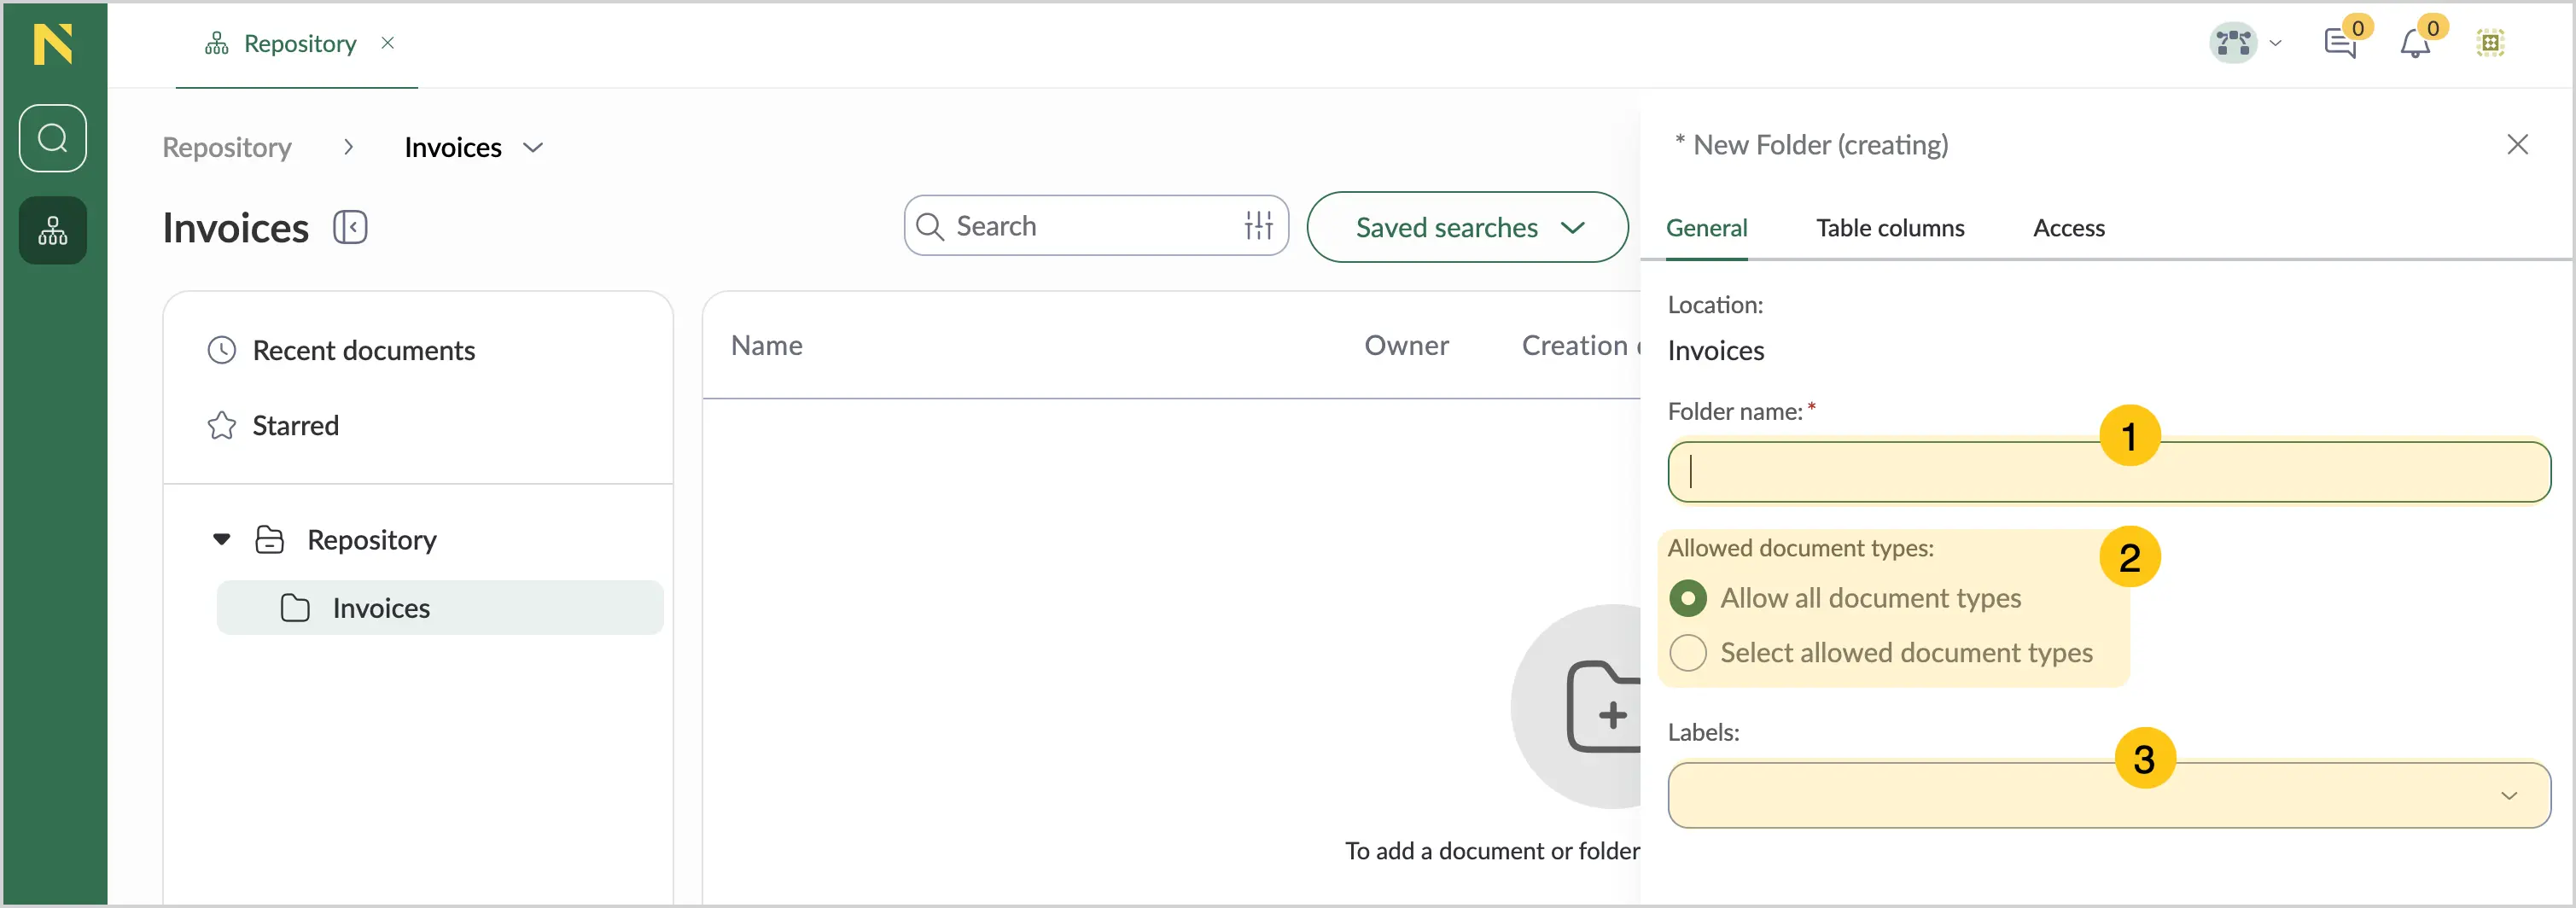
In the Folder Name box 1, enter a descriptive name for your folder.
-
Under Allowed document types 2, select one of the following options:
- Allow all document types — no restrictions on document types.
- Select allowed document types — choose specific document types from the dropdown list.
-
Optional: In the Labels box 3, select labels to help organize and find your folder. See also Create folder label.
-
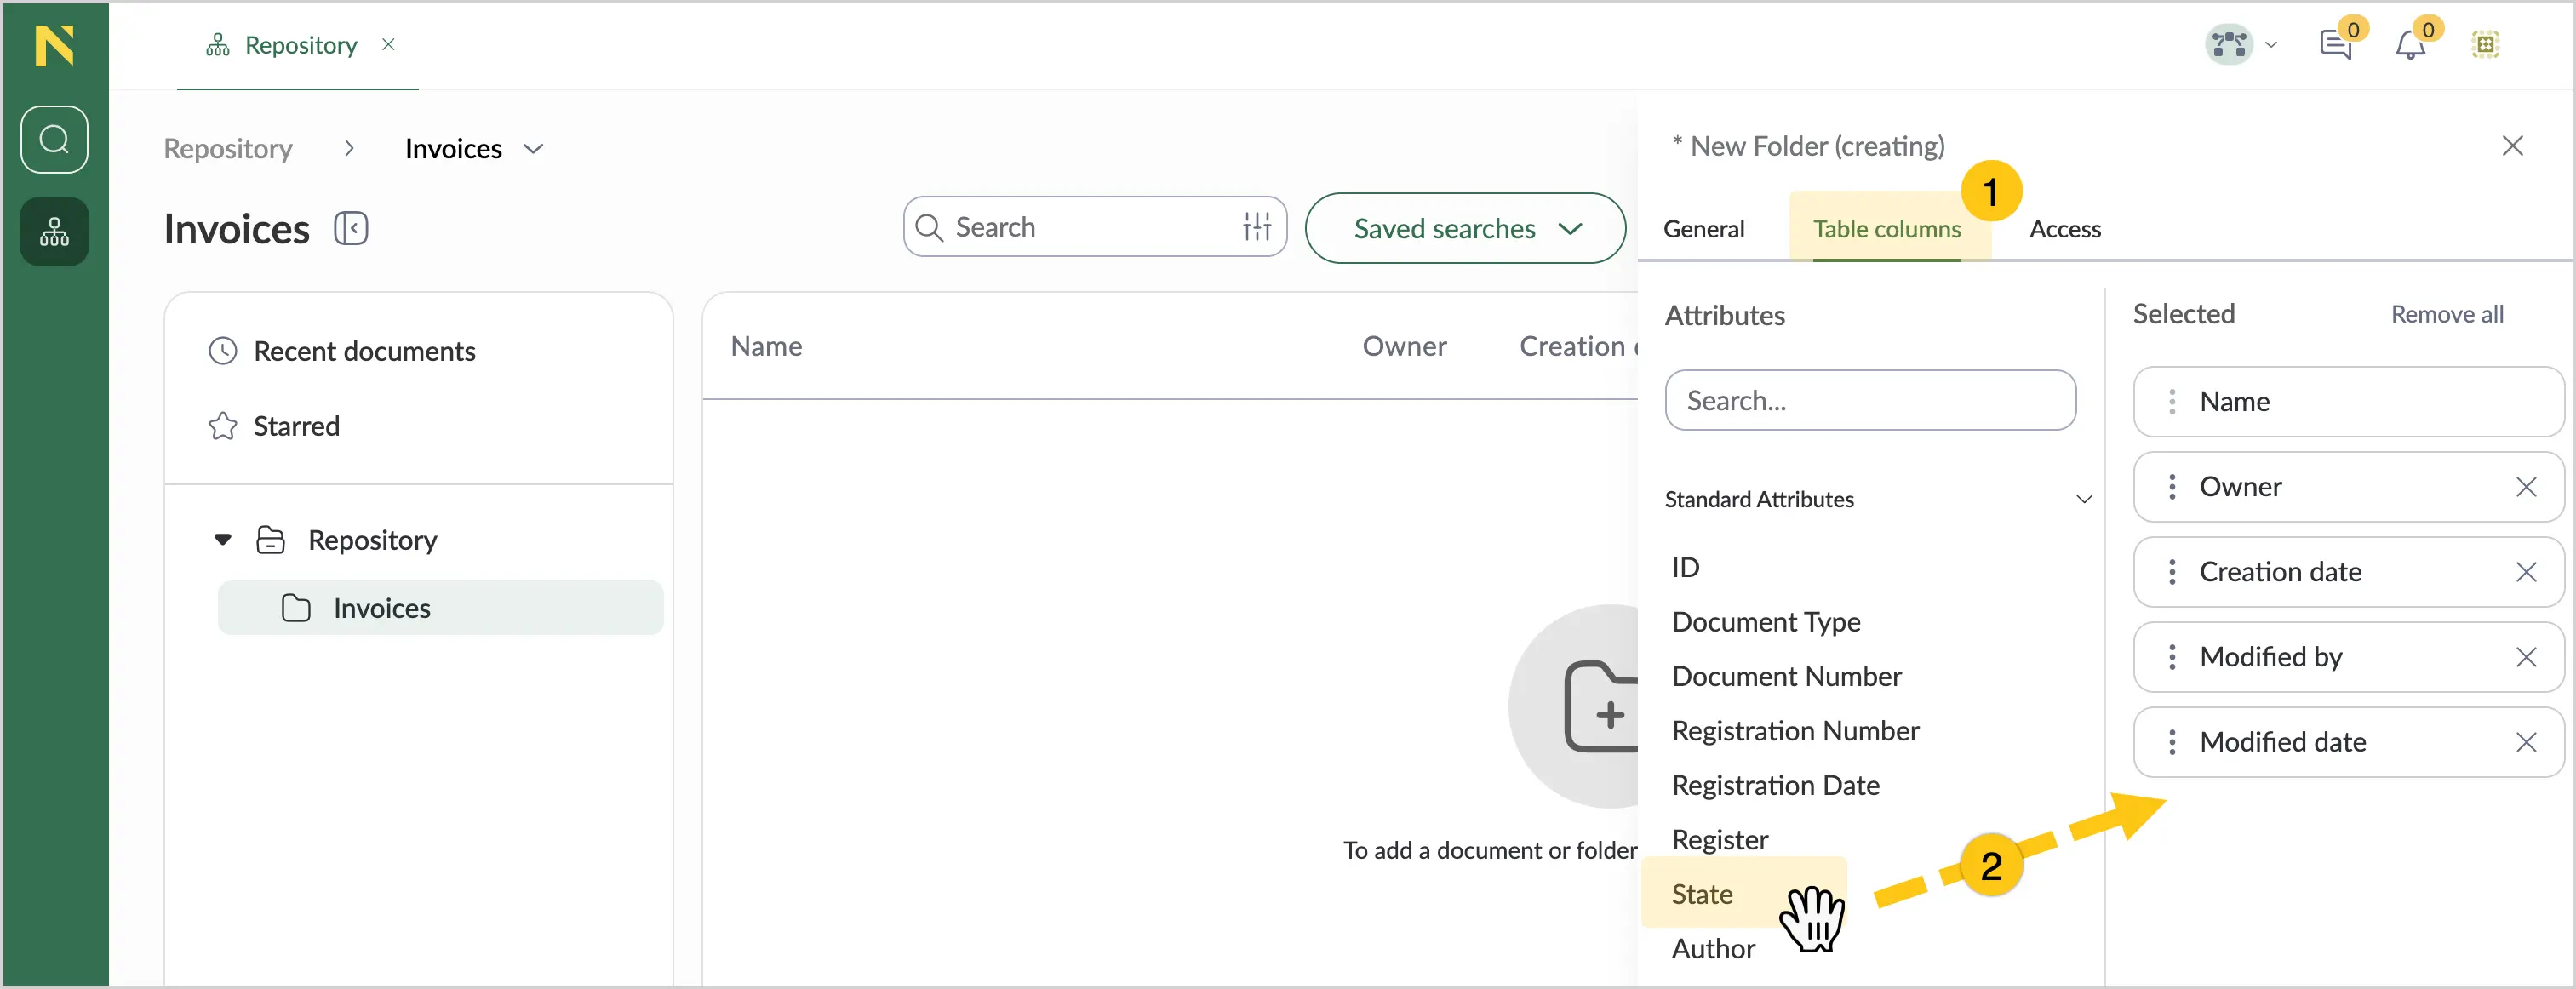
Go to the Table columns tab 1 to configure the document table view.
-
Add columns 2 using one of the following methods:
- Drag attributes from the Attributes pane to the Selected pane.
- Double-click attributes in the Attributes pane.
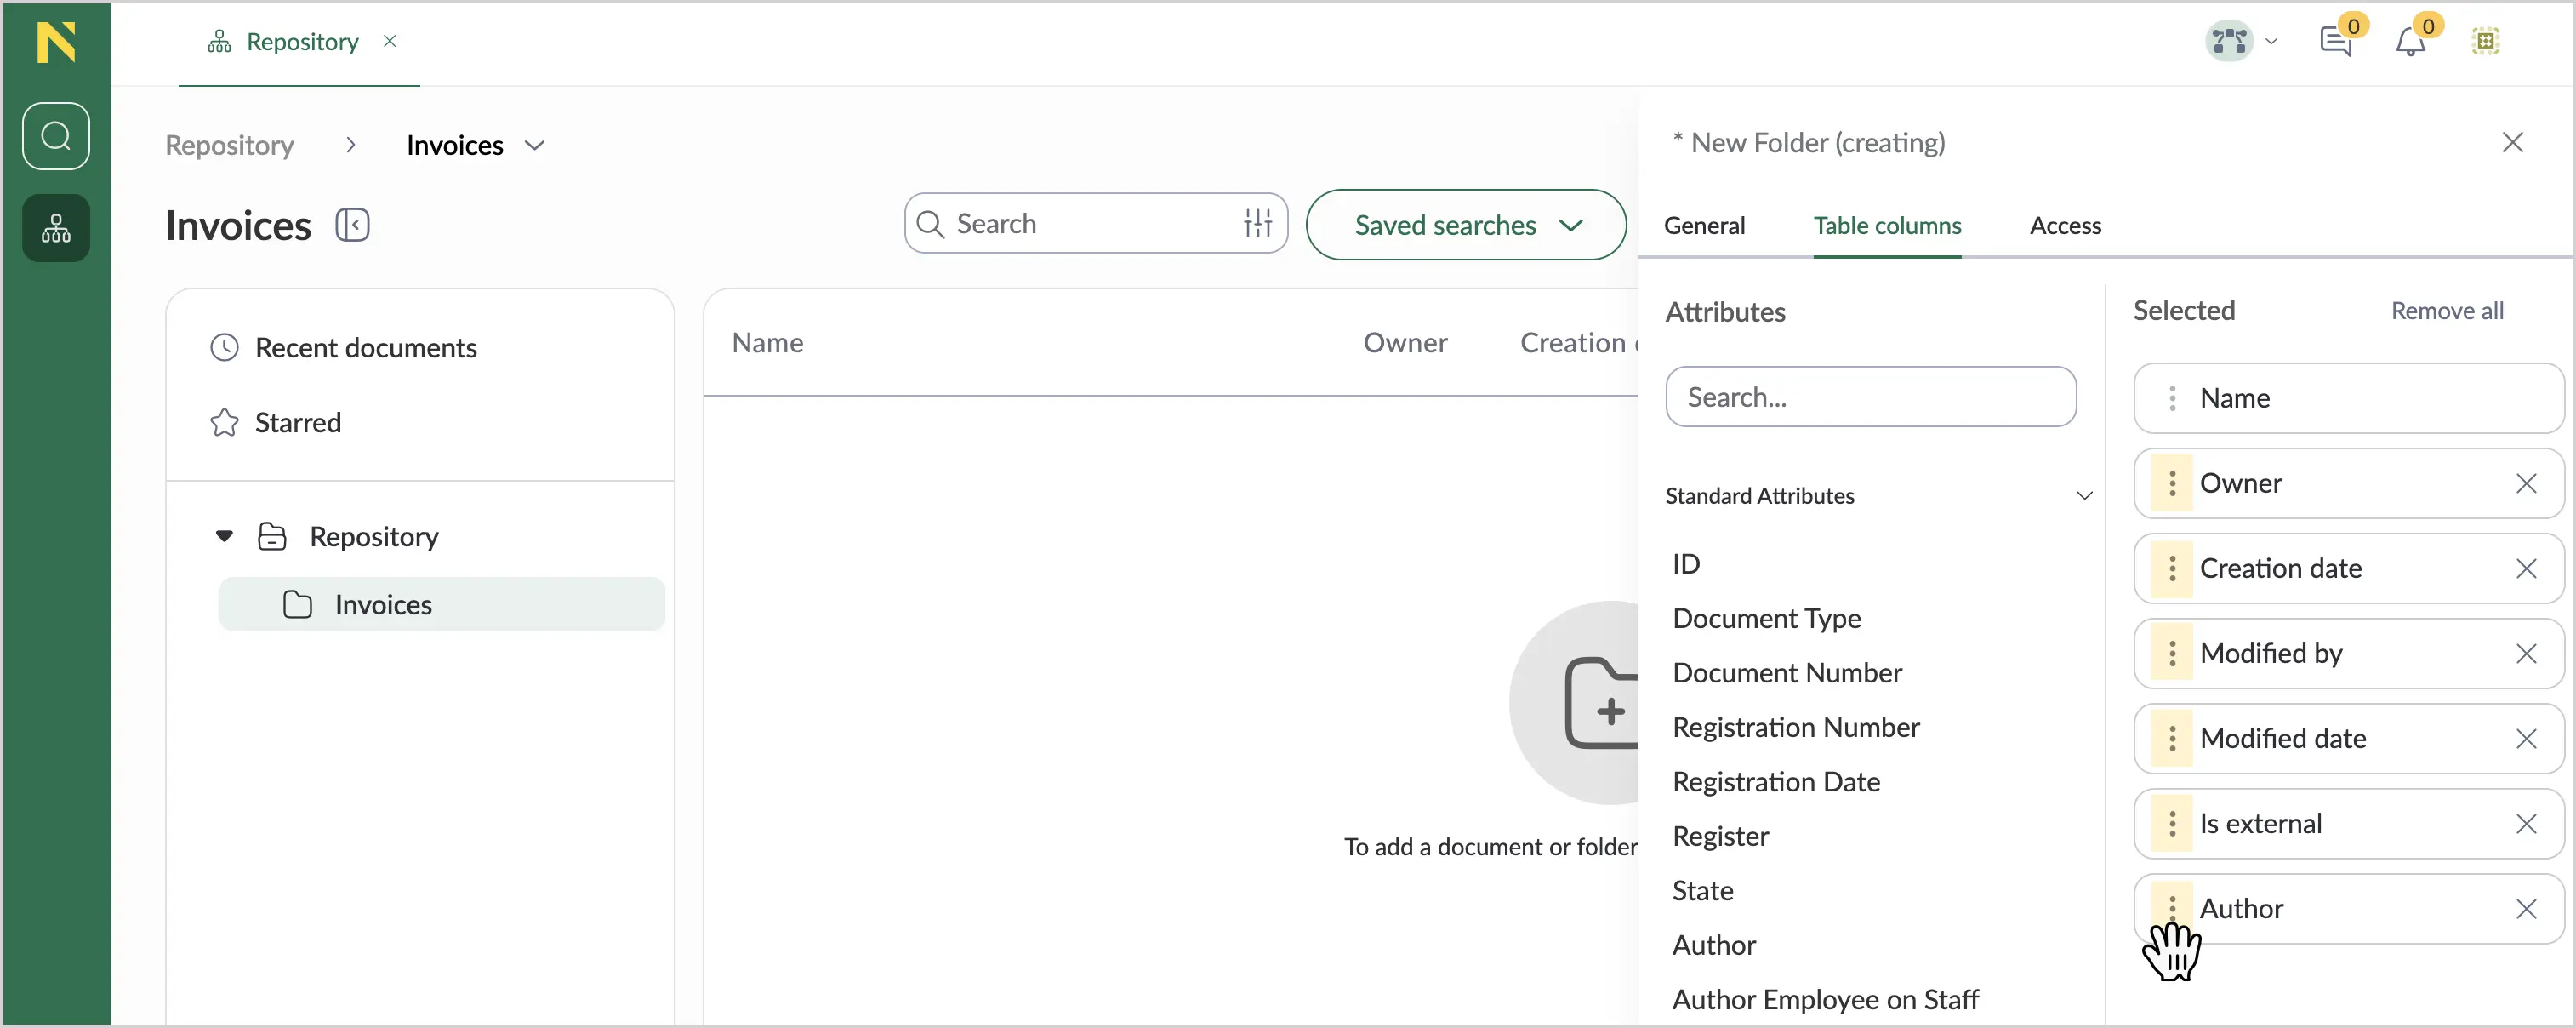
To reorder columns, select the icon and move a column up or down.
-
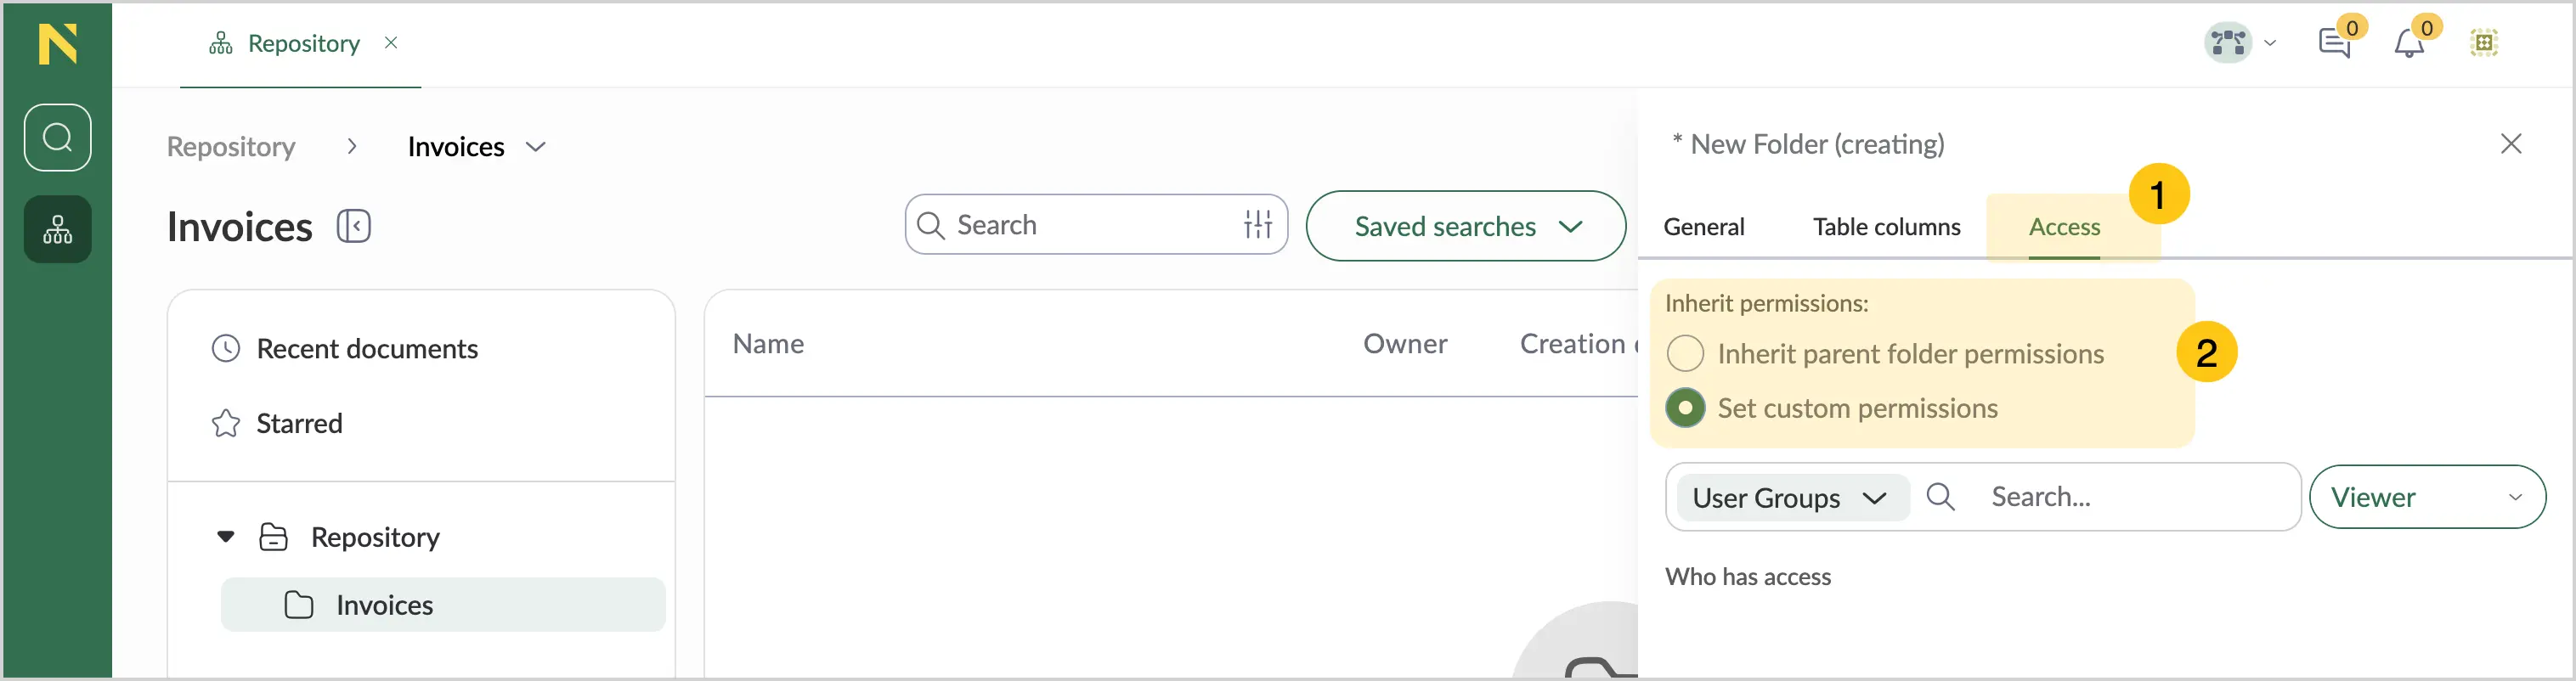
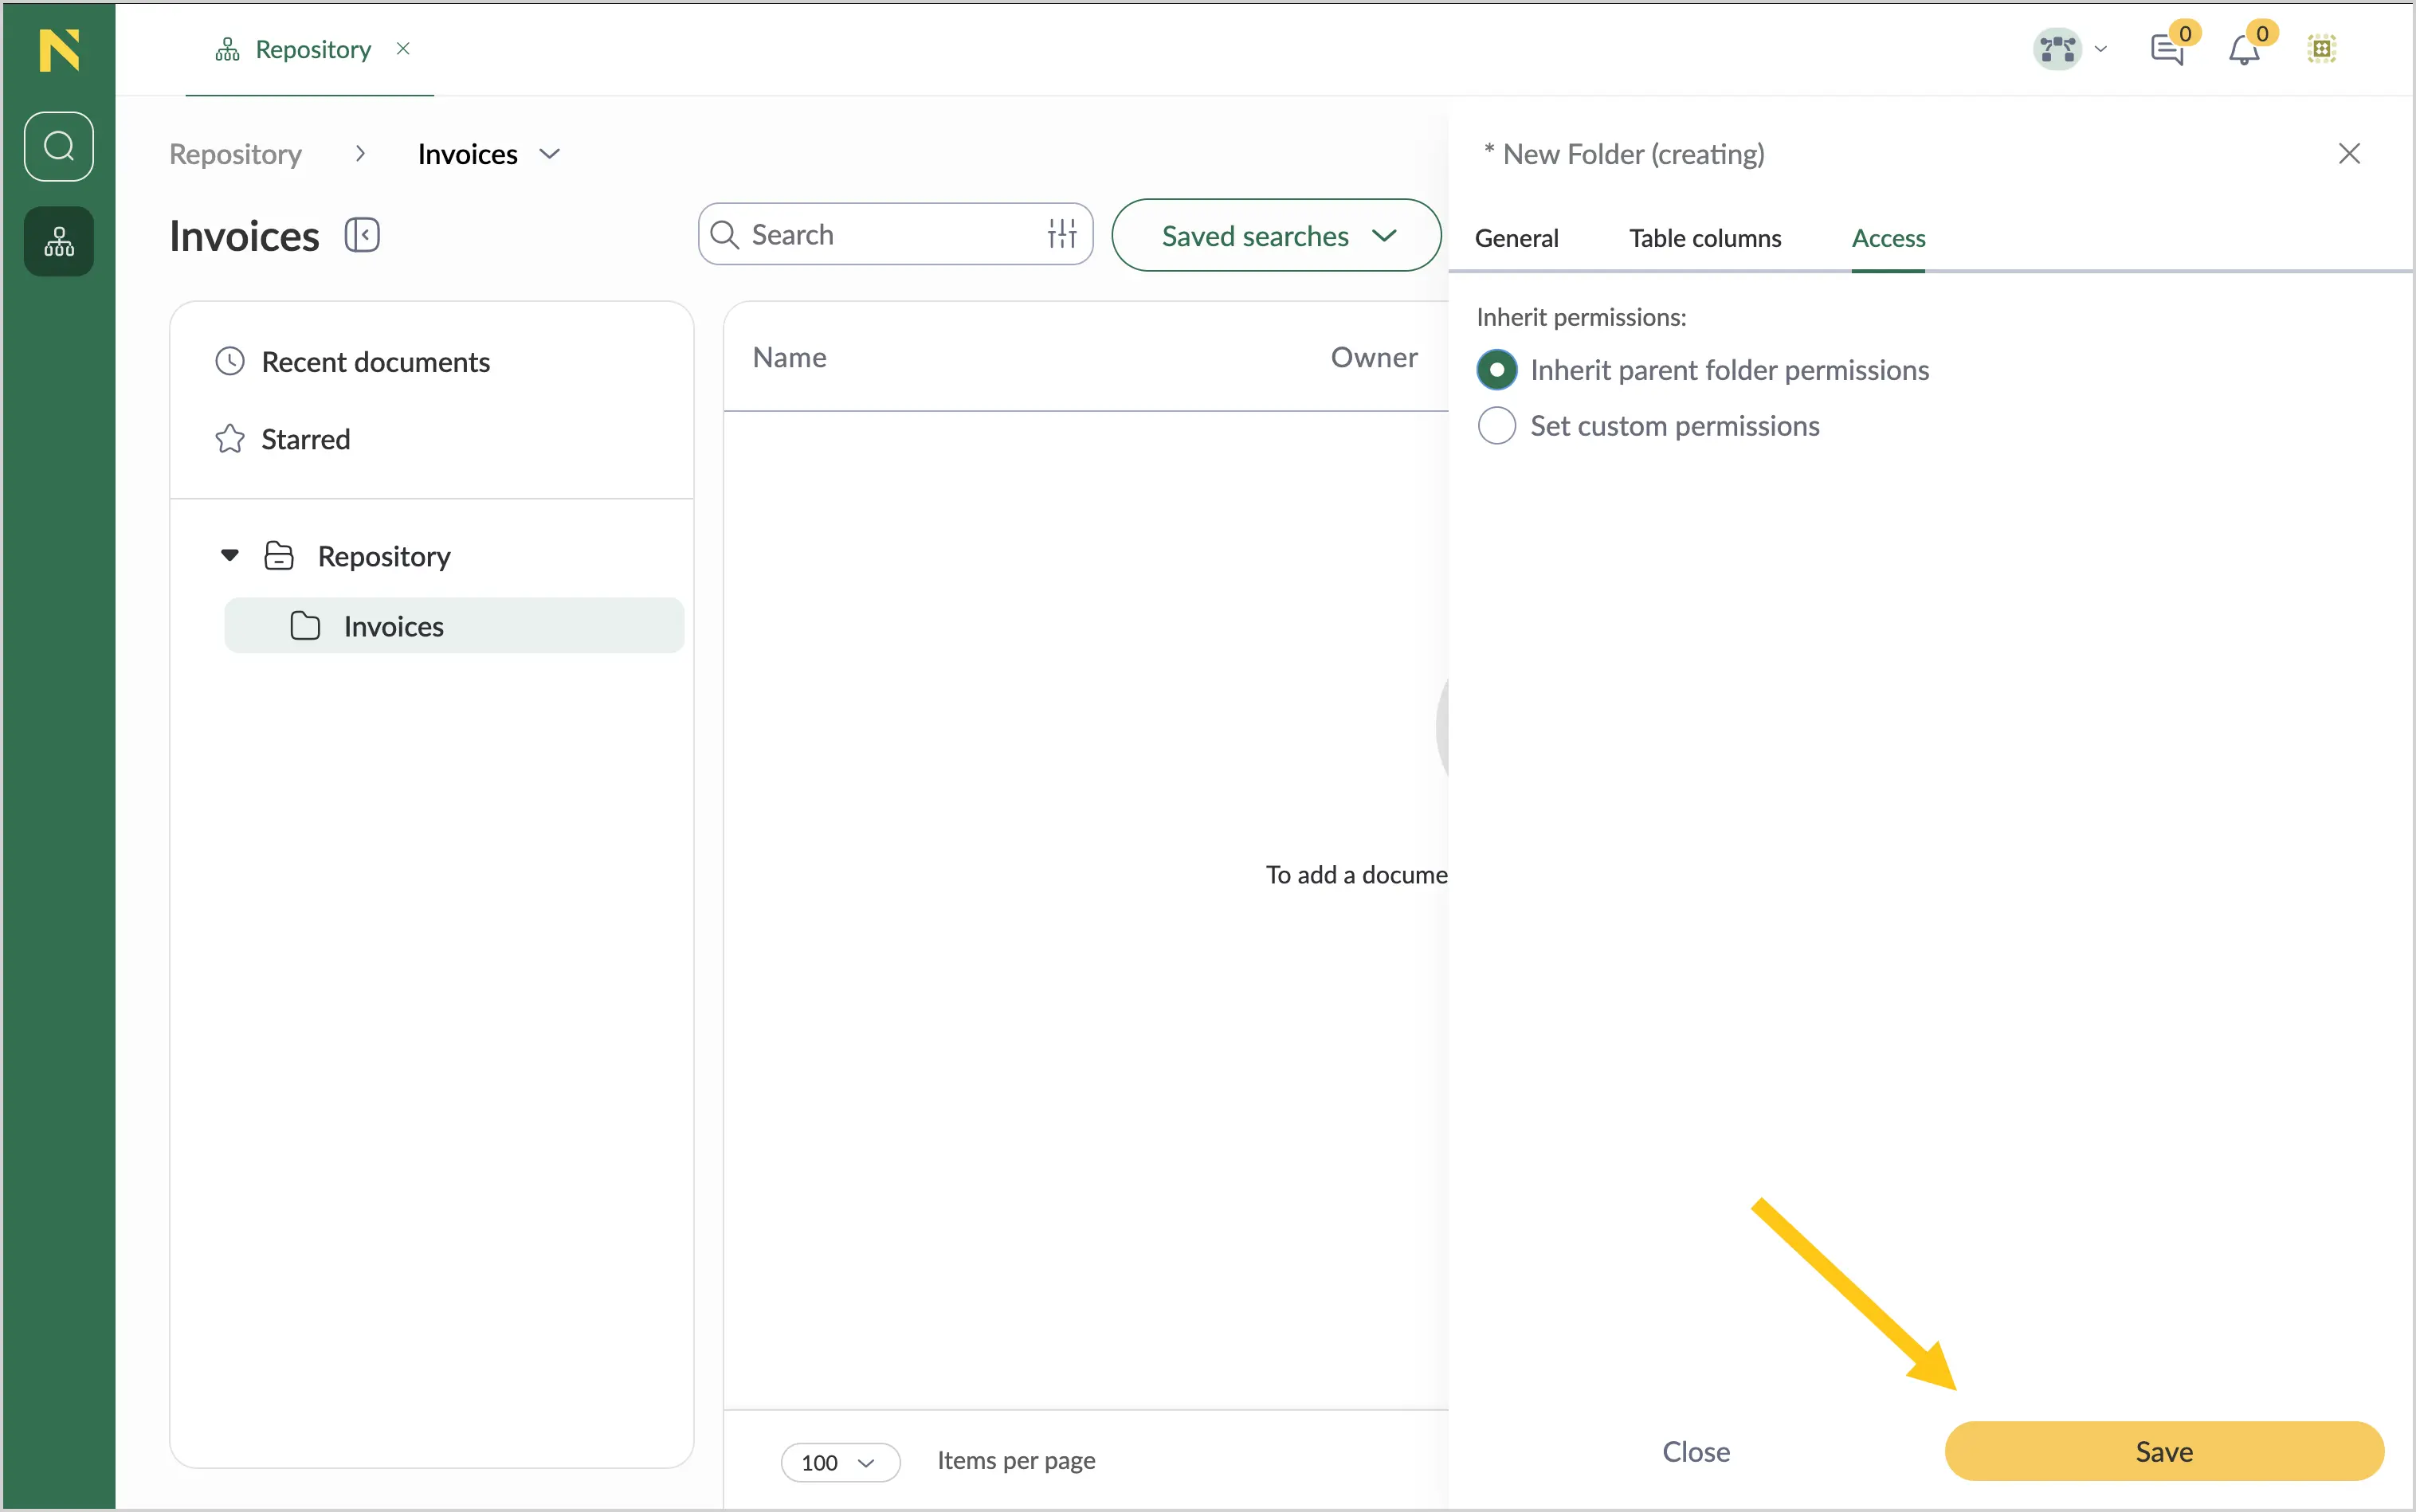
Go to the Access tab to configure folder permissions.
-
In the Inherit permissions section, select one of the following options:
- Inherit parent folder permissions — use the same permissions as the parent folder.
- Set custom permissions — define specific access rights.
-
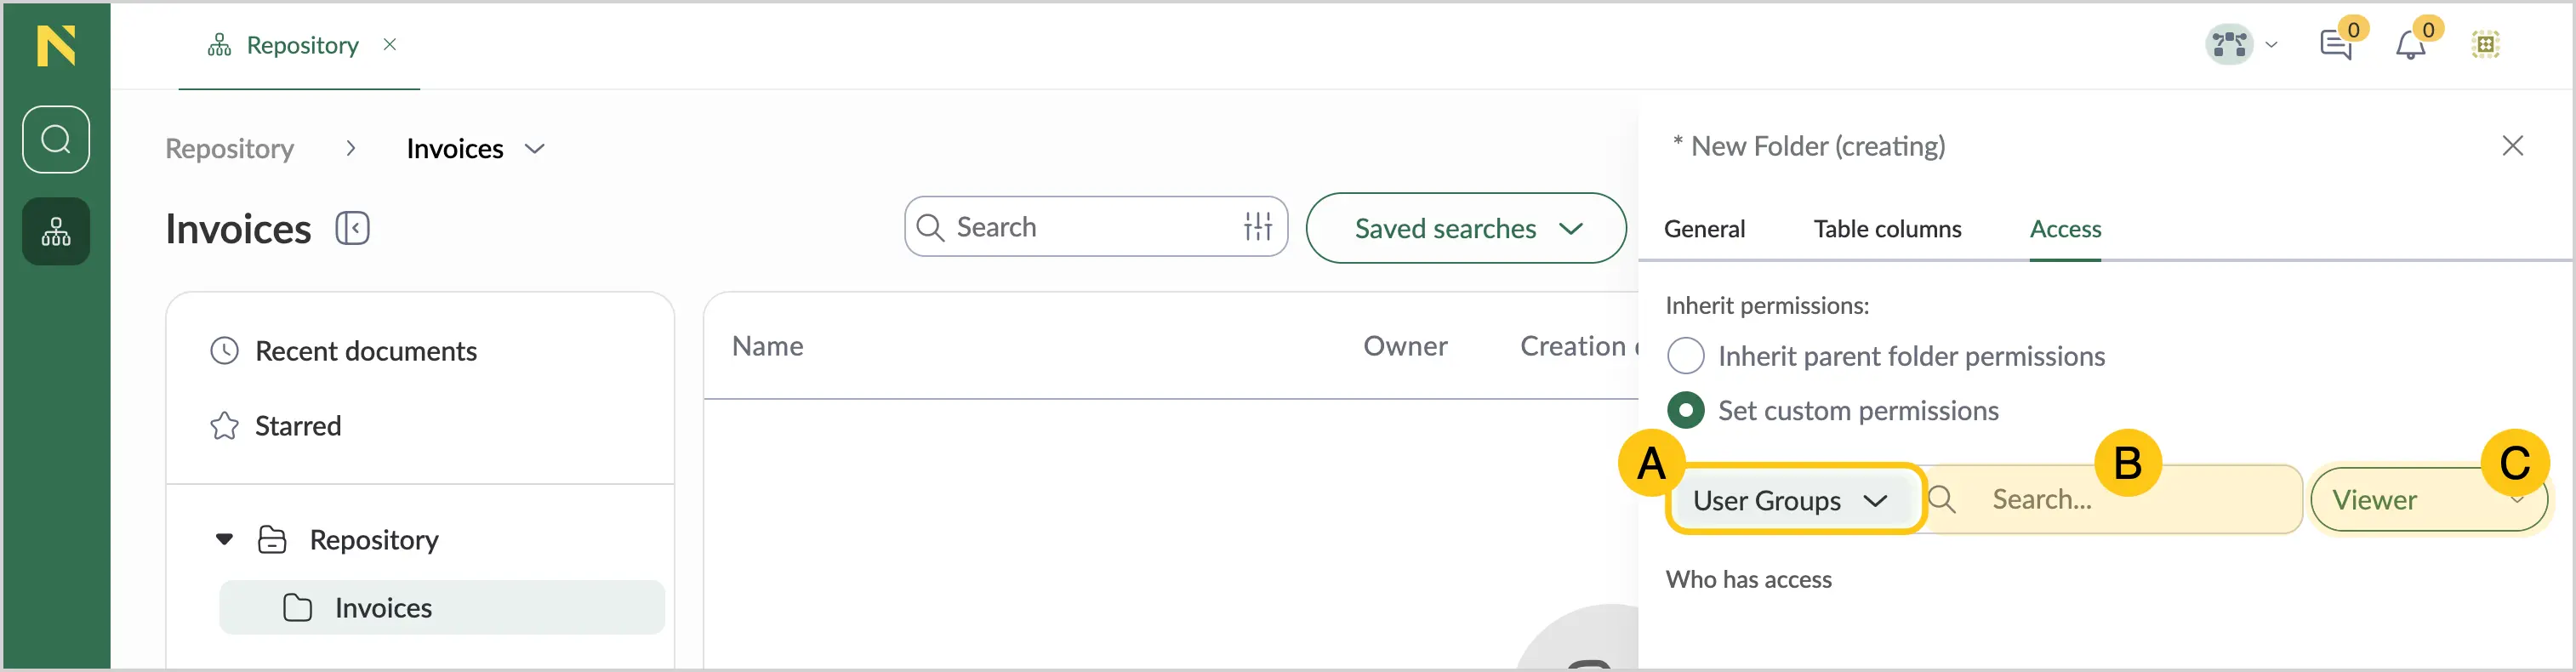
If you selected Set custom permissions:
a. Optional: In the type toggle, select one of the following user entities to filter the search results:
- Users group — a collection of grouped users.
- System roles — built-in roles that define system-wide permissions.
- Users — individual user accounts in the system.
- Internal Organizations — all organization members.
- Departments — organizational units within your organization.
- Positions — job titles within your organization.
- Executors Groups — groups of positions, departments, or internal organizations.
b. In the Search box, enter the name of the user entity.
c. From the Role dropdown list, select one of the following roles:
- Folder admin — can edit, move, share, copy, download, delete, create content, and configure access permissions for the folder.
- Editor — can create new documents and folders, and work with existing documents, including viewing, editing, and filling forms.
- Document creator — can edit, move, share, copy, download, delete, and create folders and files within their own folder.
- Viewer — can view folders and documents.
-
Select Save.
Delete folder
-
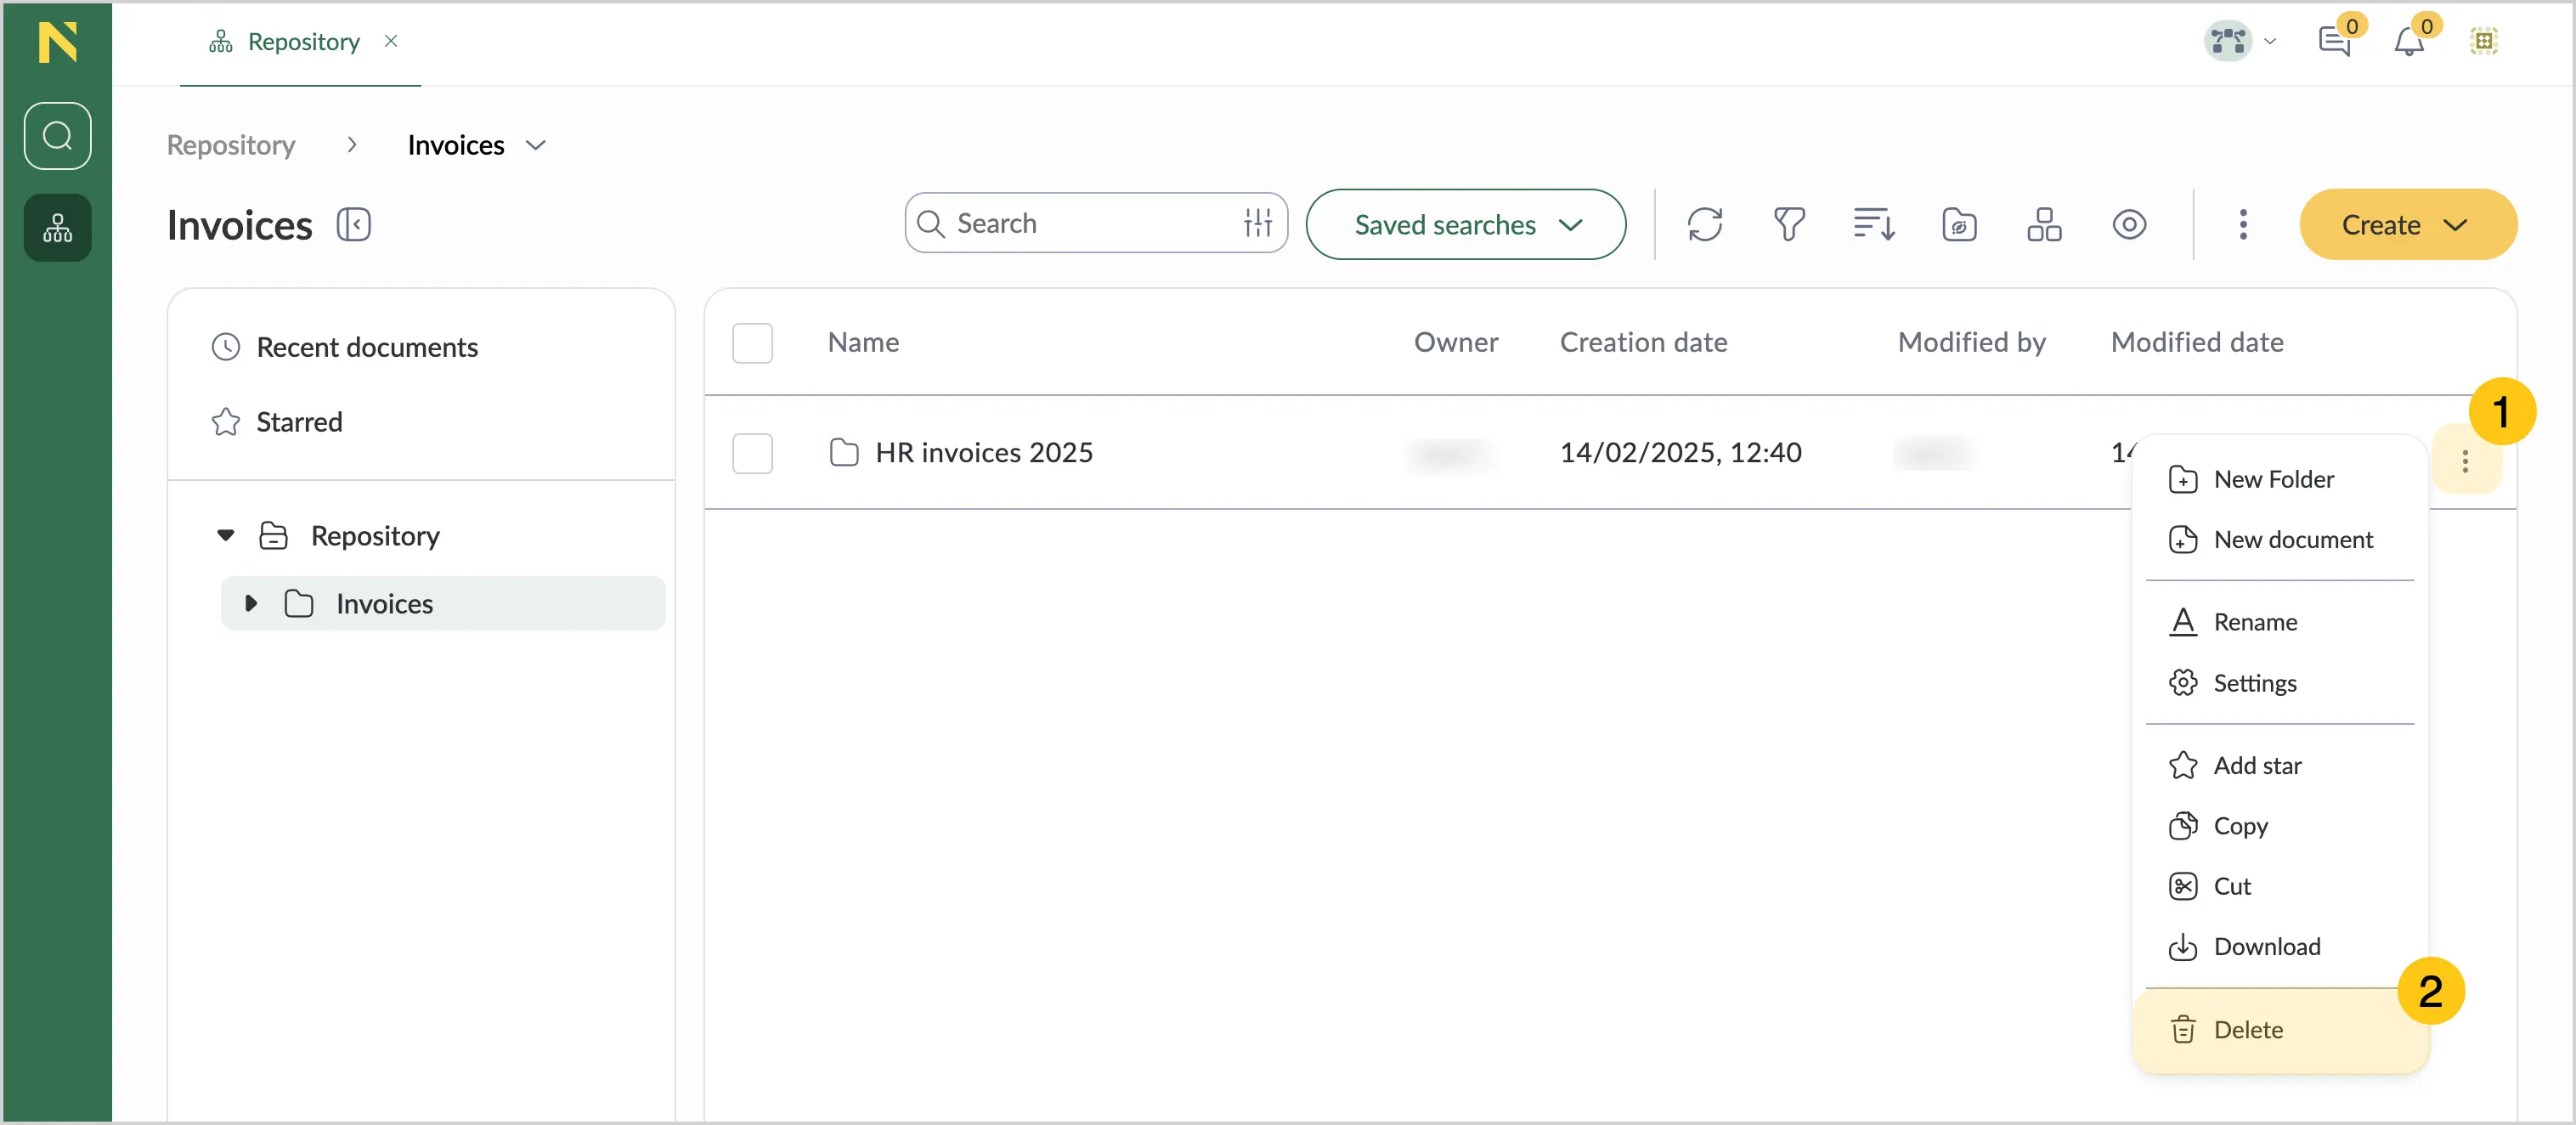
Hover over a folder, and then select 1.
-
Select Delete
 2.
2. Note:
Note:To delete several folders at once, use the Multiselect feature.
-
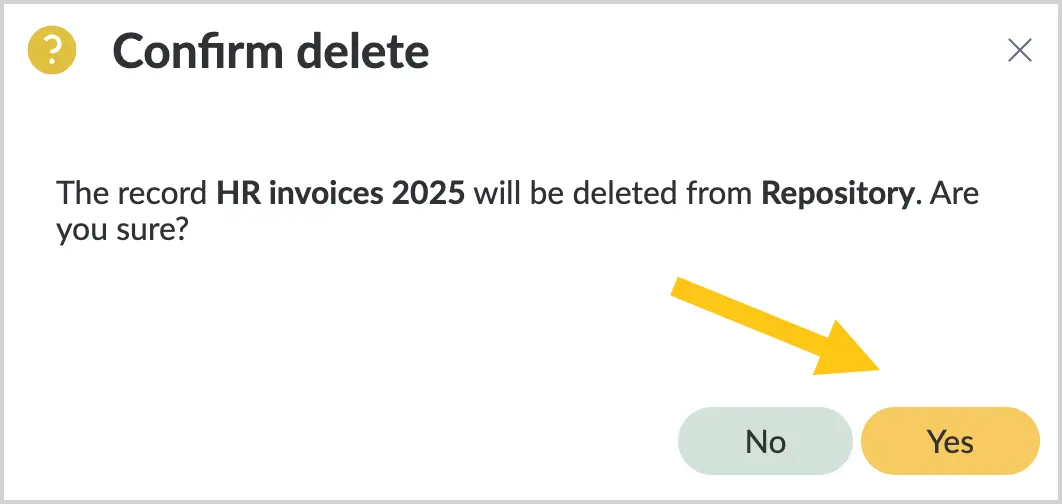
Confirm deletion by selecting Yes.
Rename folder
-
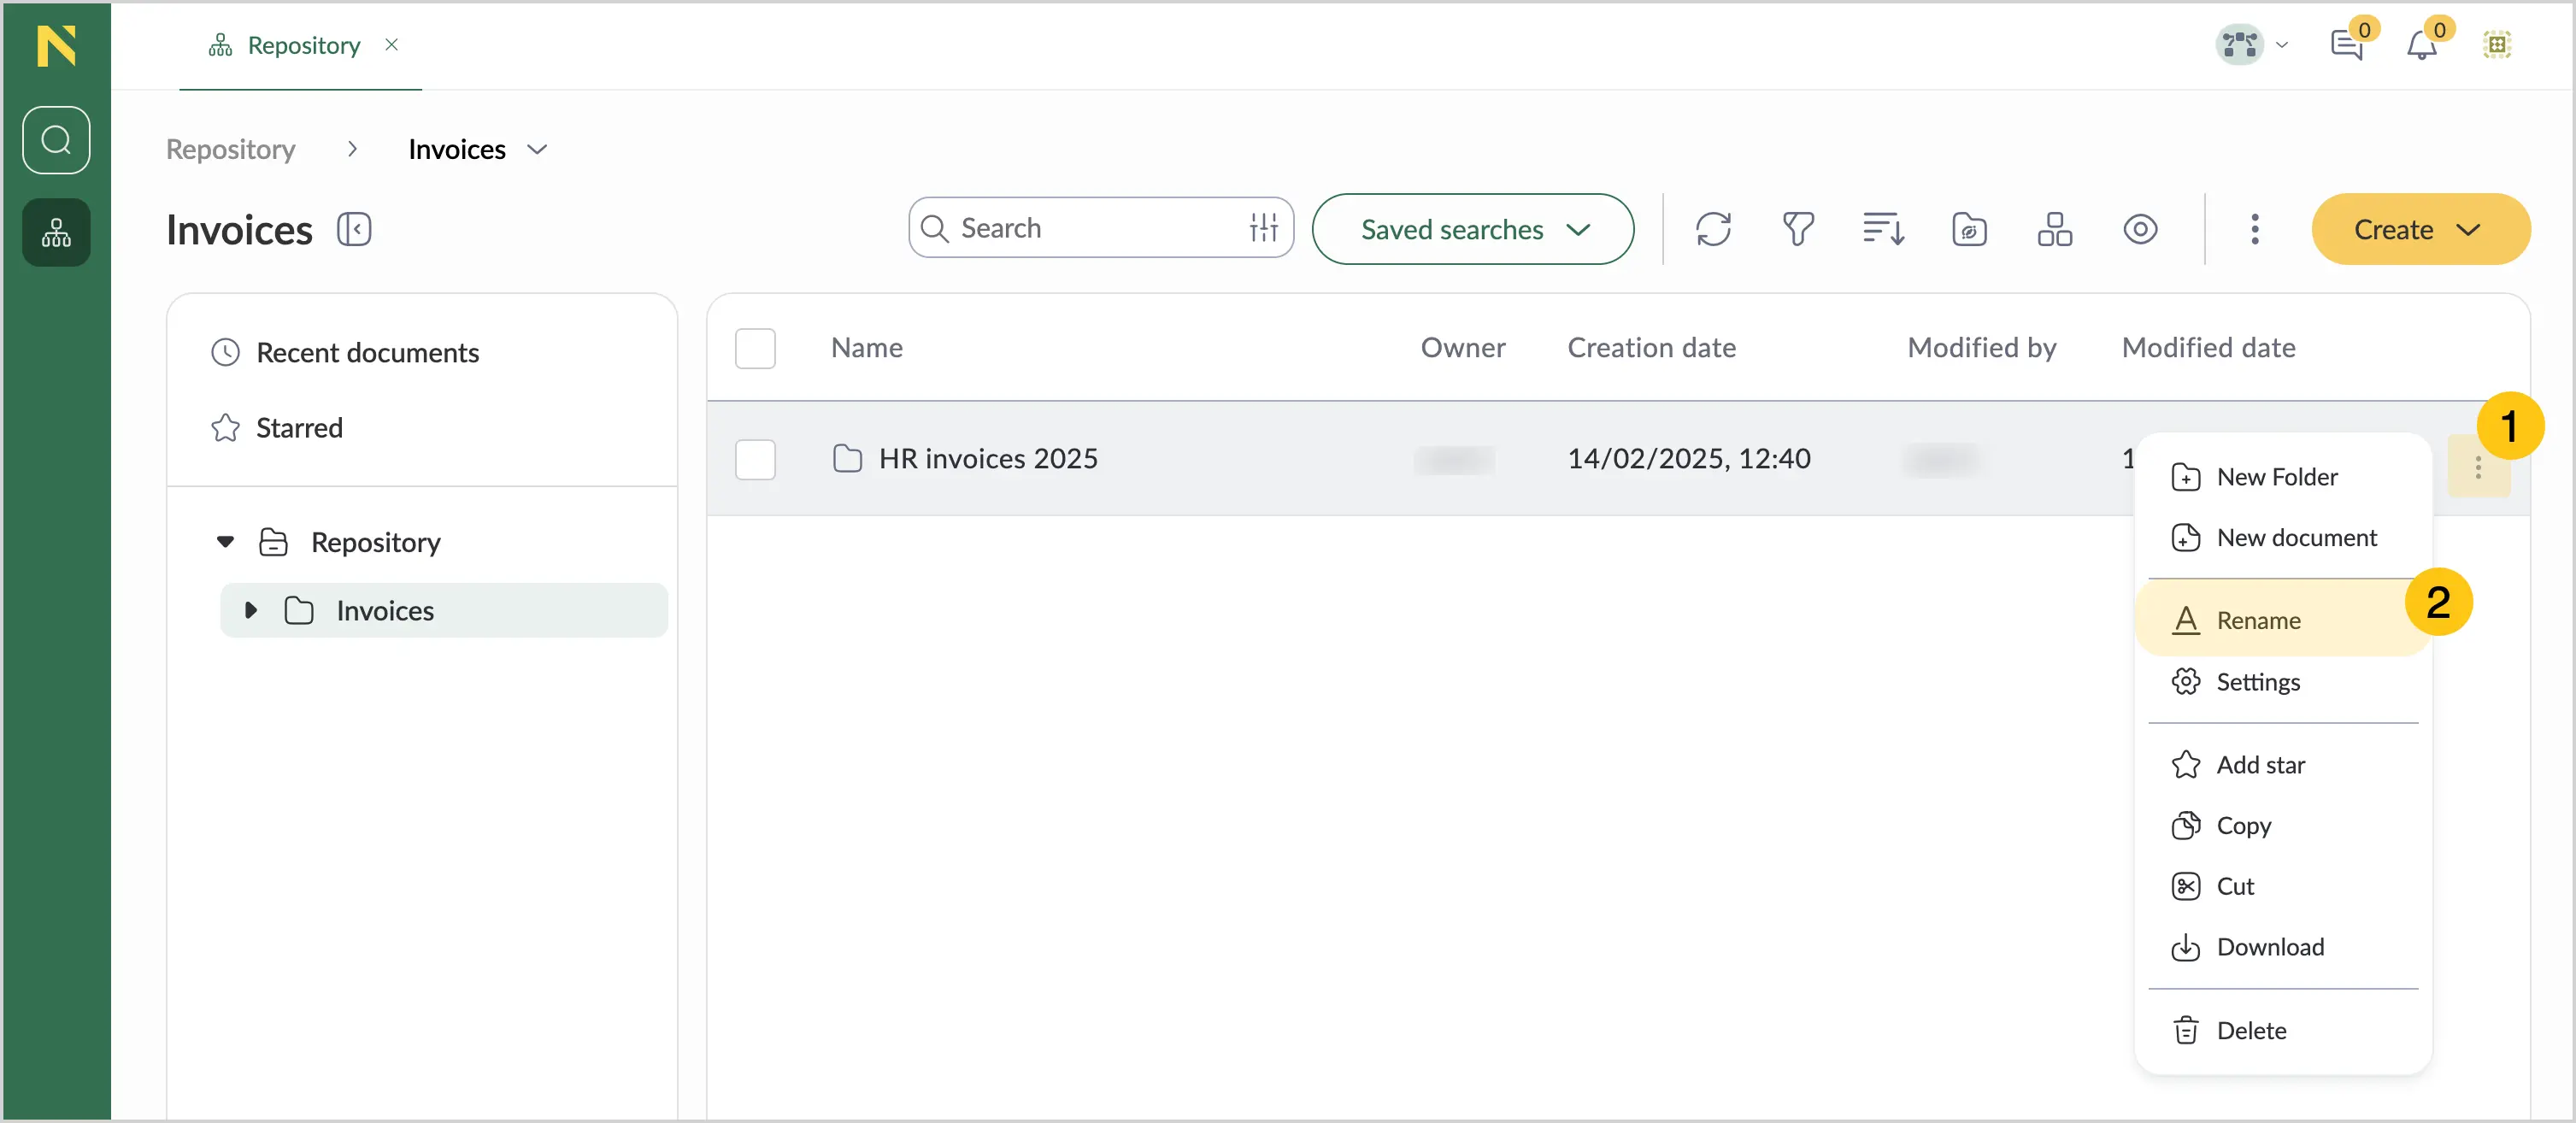
Hover over a folder, and then select 1.
-
Select Rename 2.
-
In the Name box 1, enter a new name for your folder.
-
Select Save 2.
 Note:
Note:The folder name must be unique within its location.
Move folder
-
Hover over a folder, and then select 1.
-
Select Cut
 2.
2.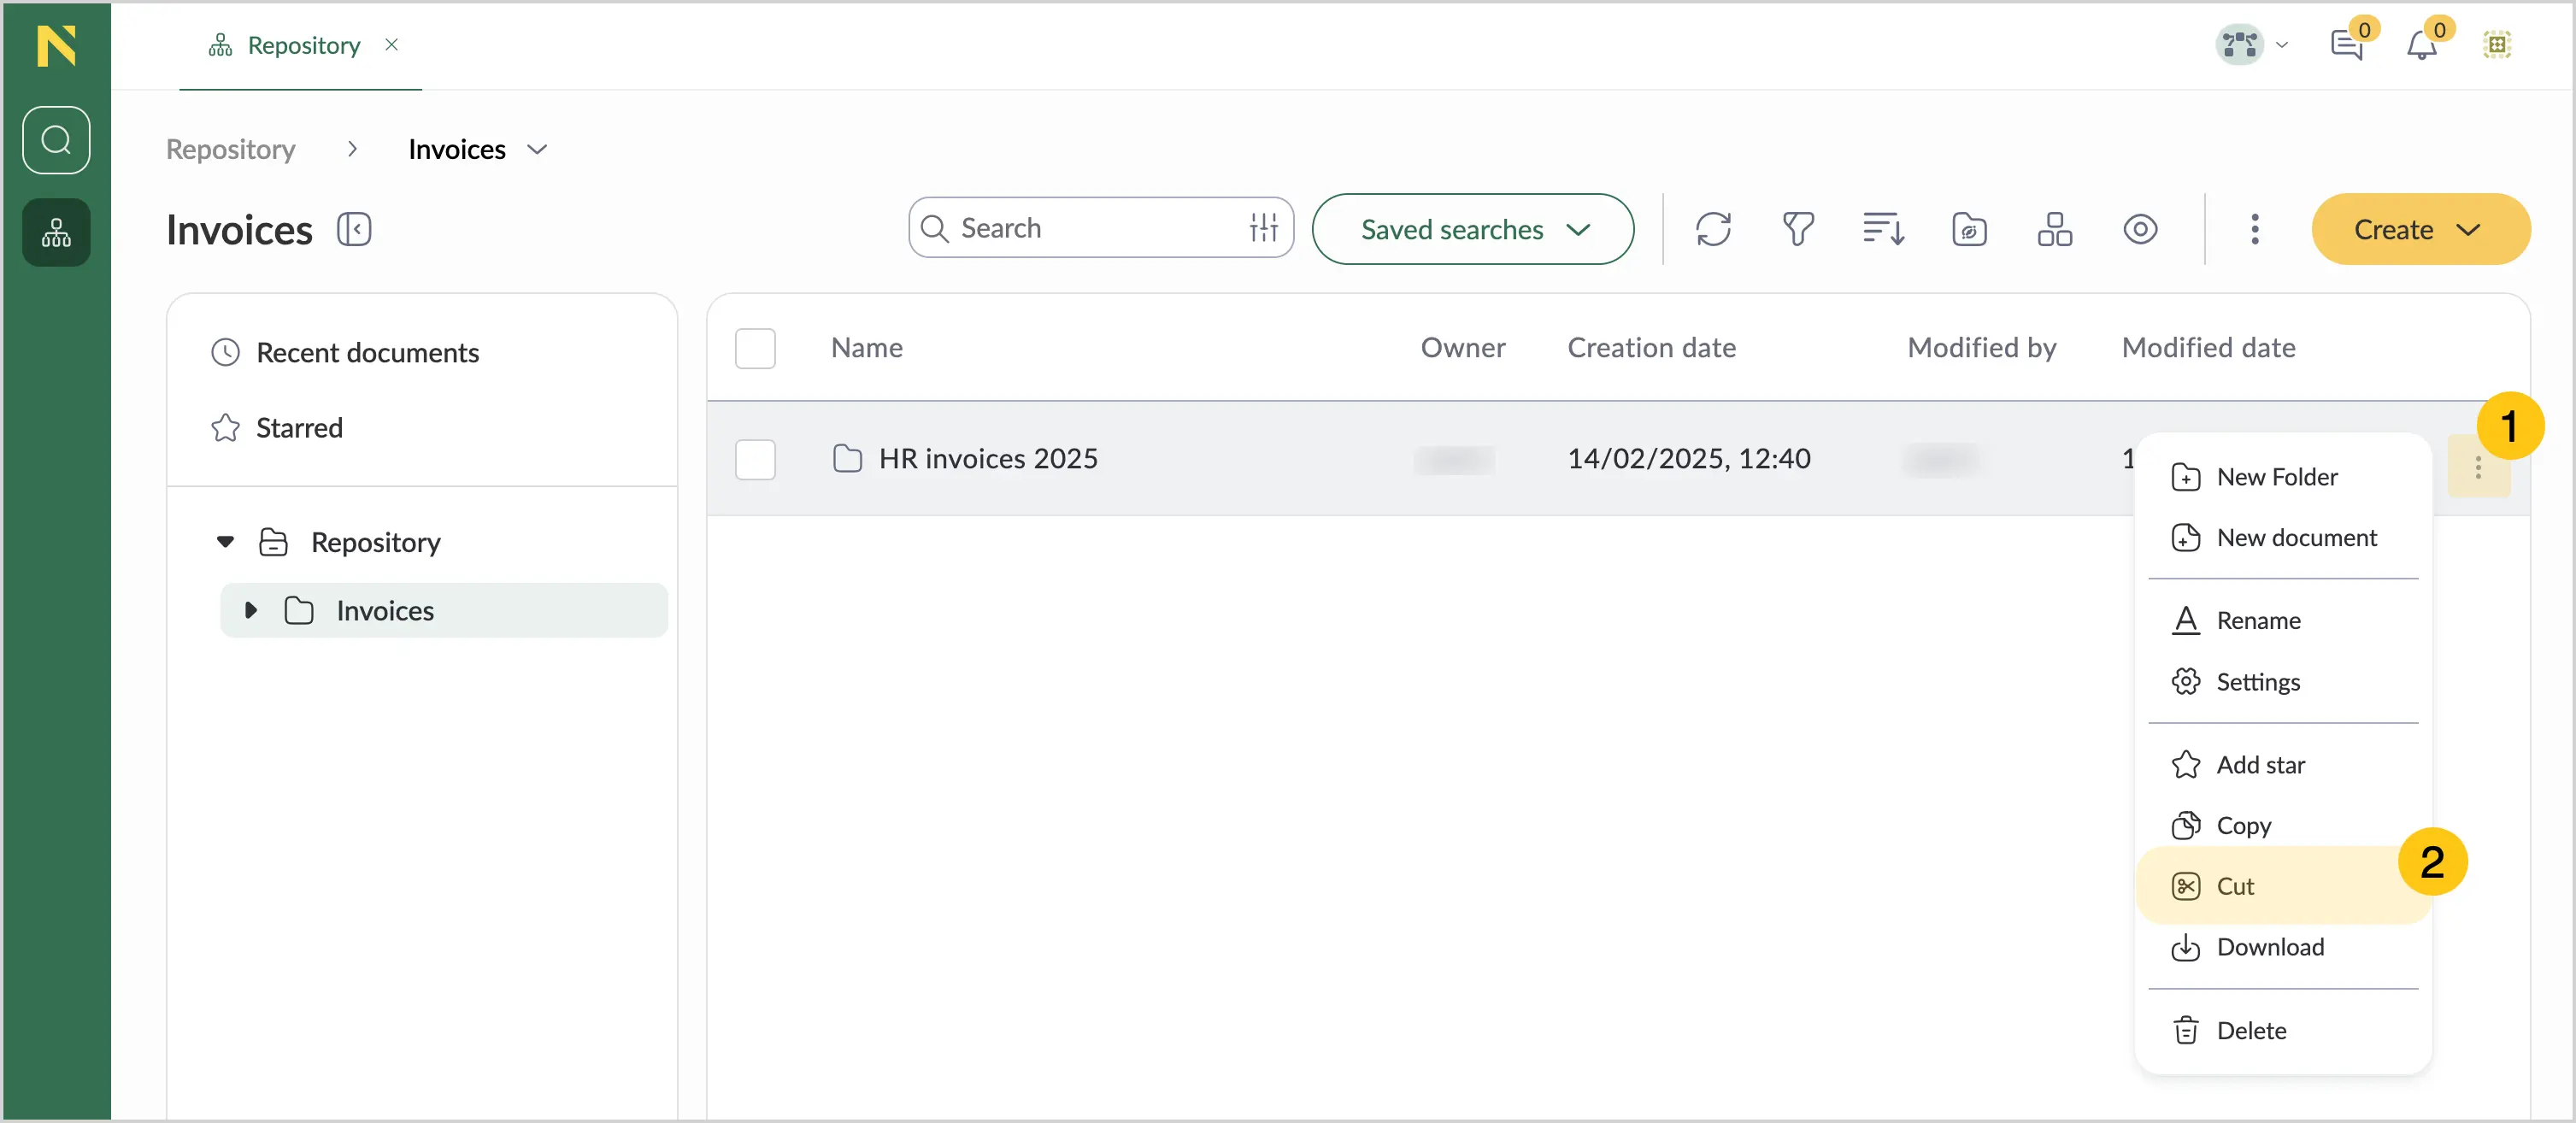 Note:
Note:To move several folders at once, use the Multiselect feature.
-
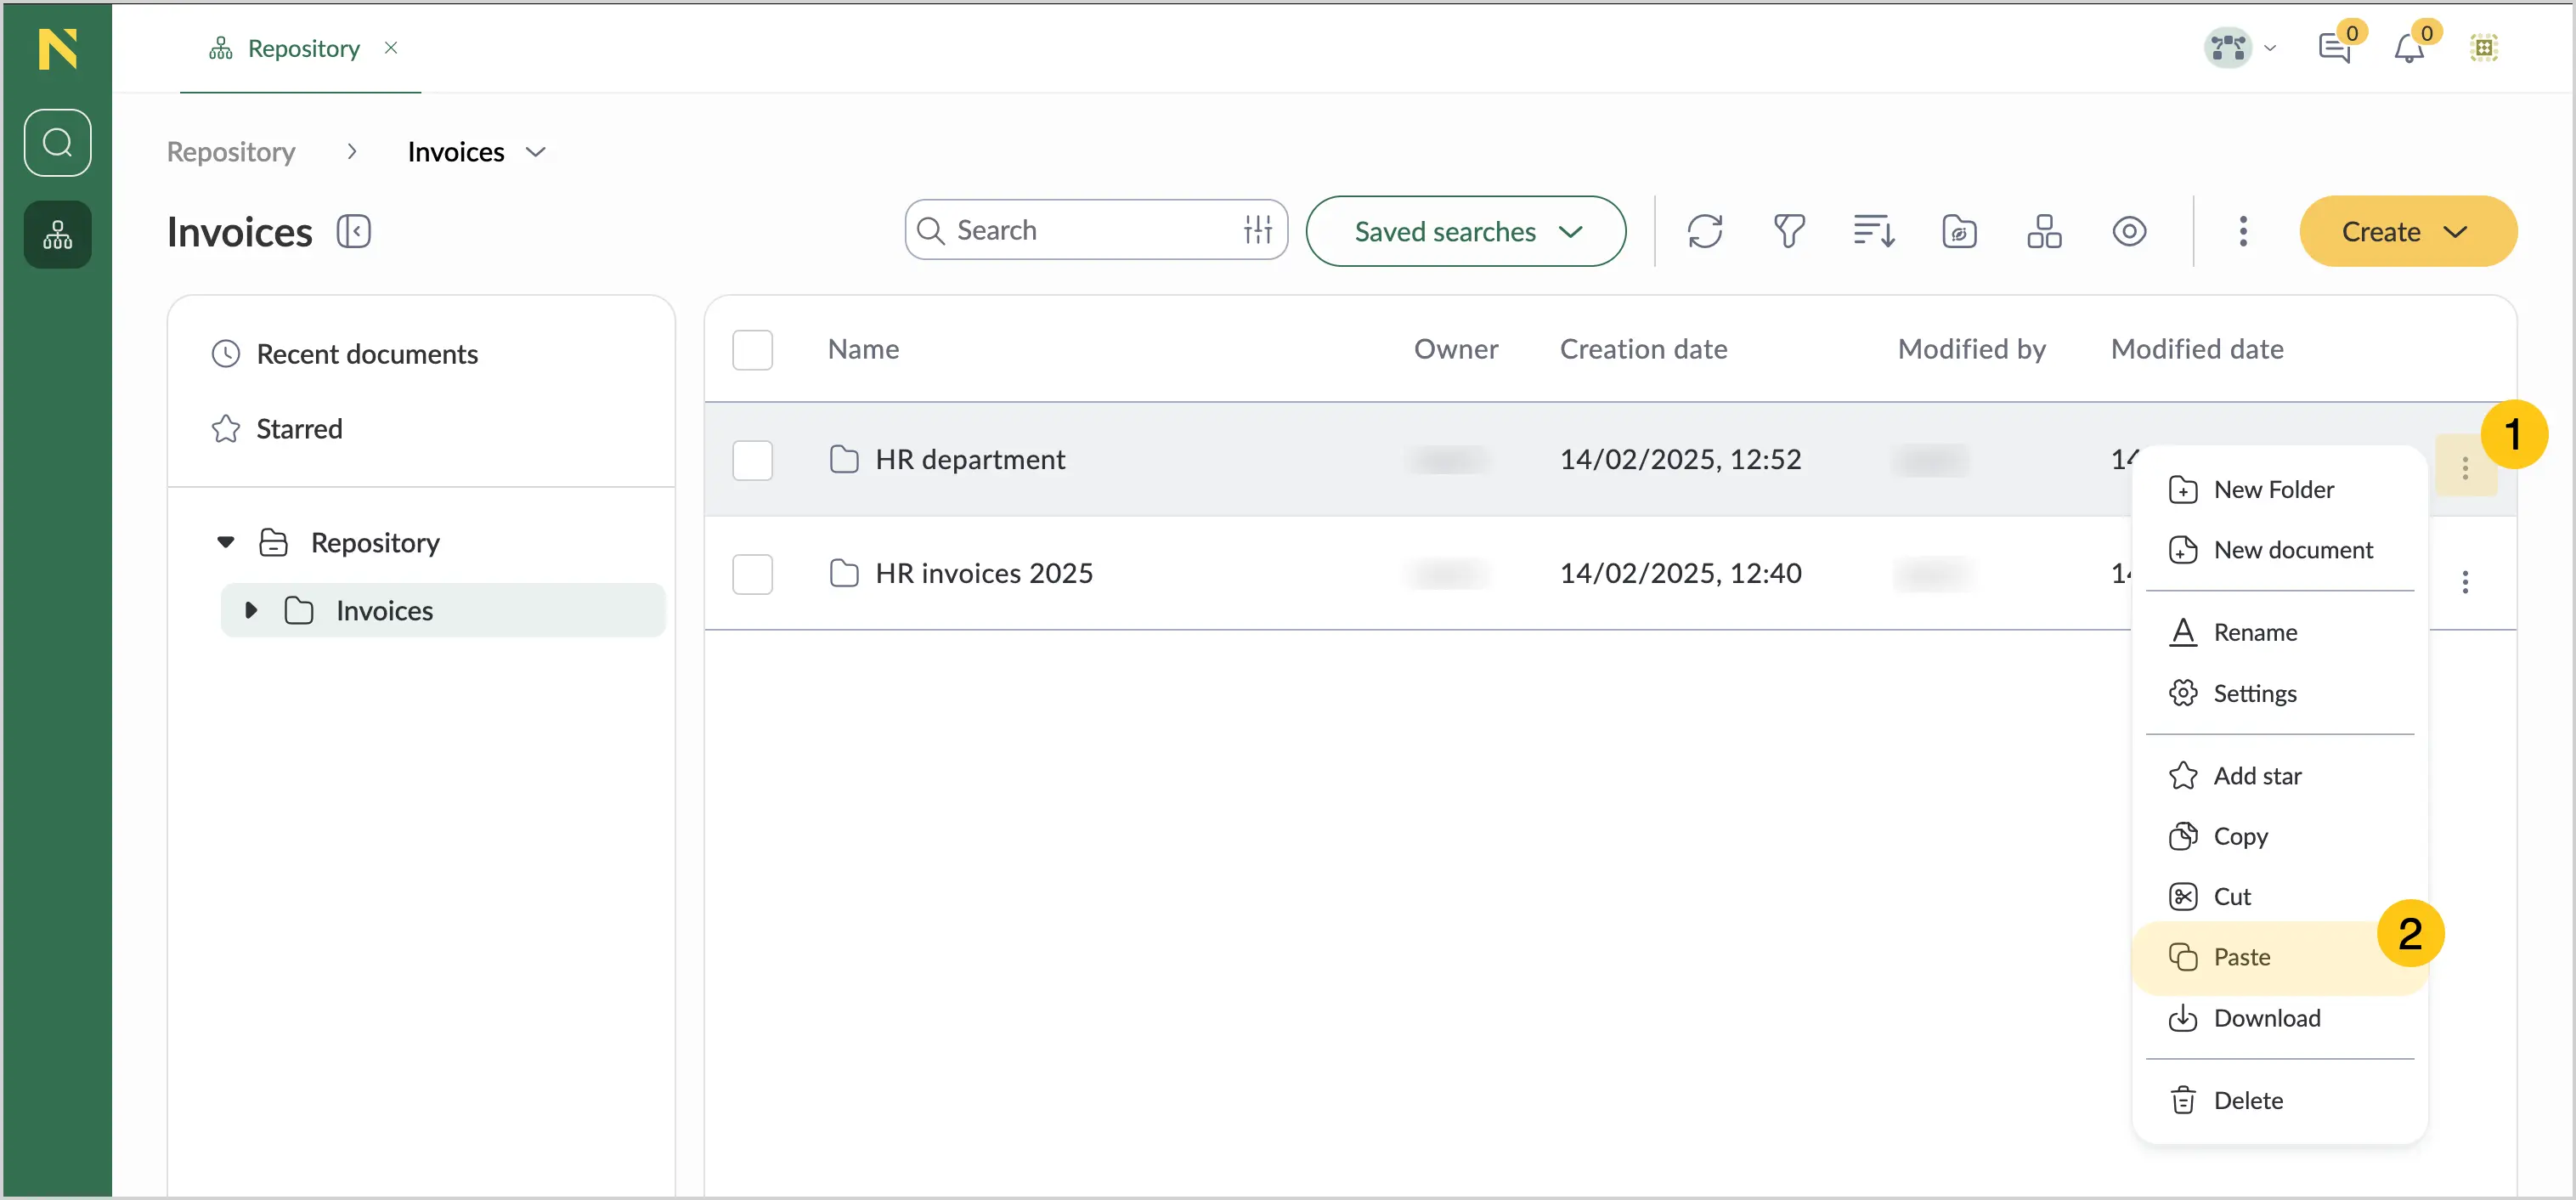
Select the destination folder where you want to move the folder.
-
Select 1, and then select Paste
 2.
2.
Duplicate folder
-
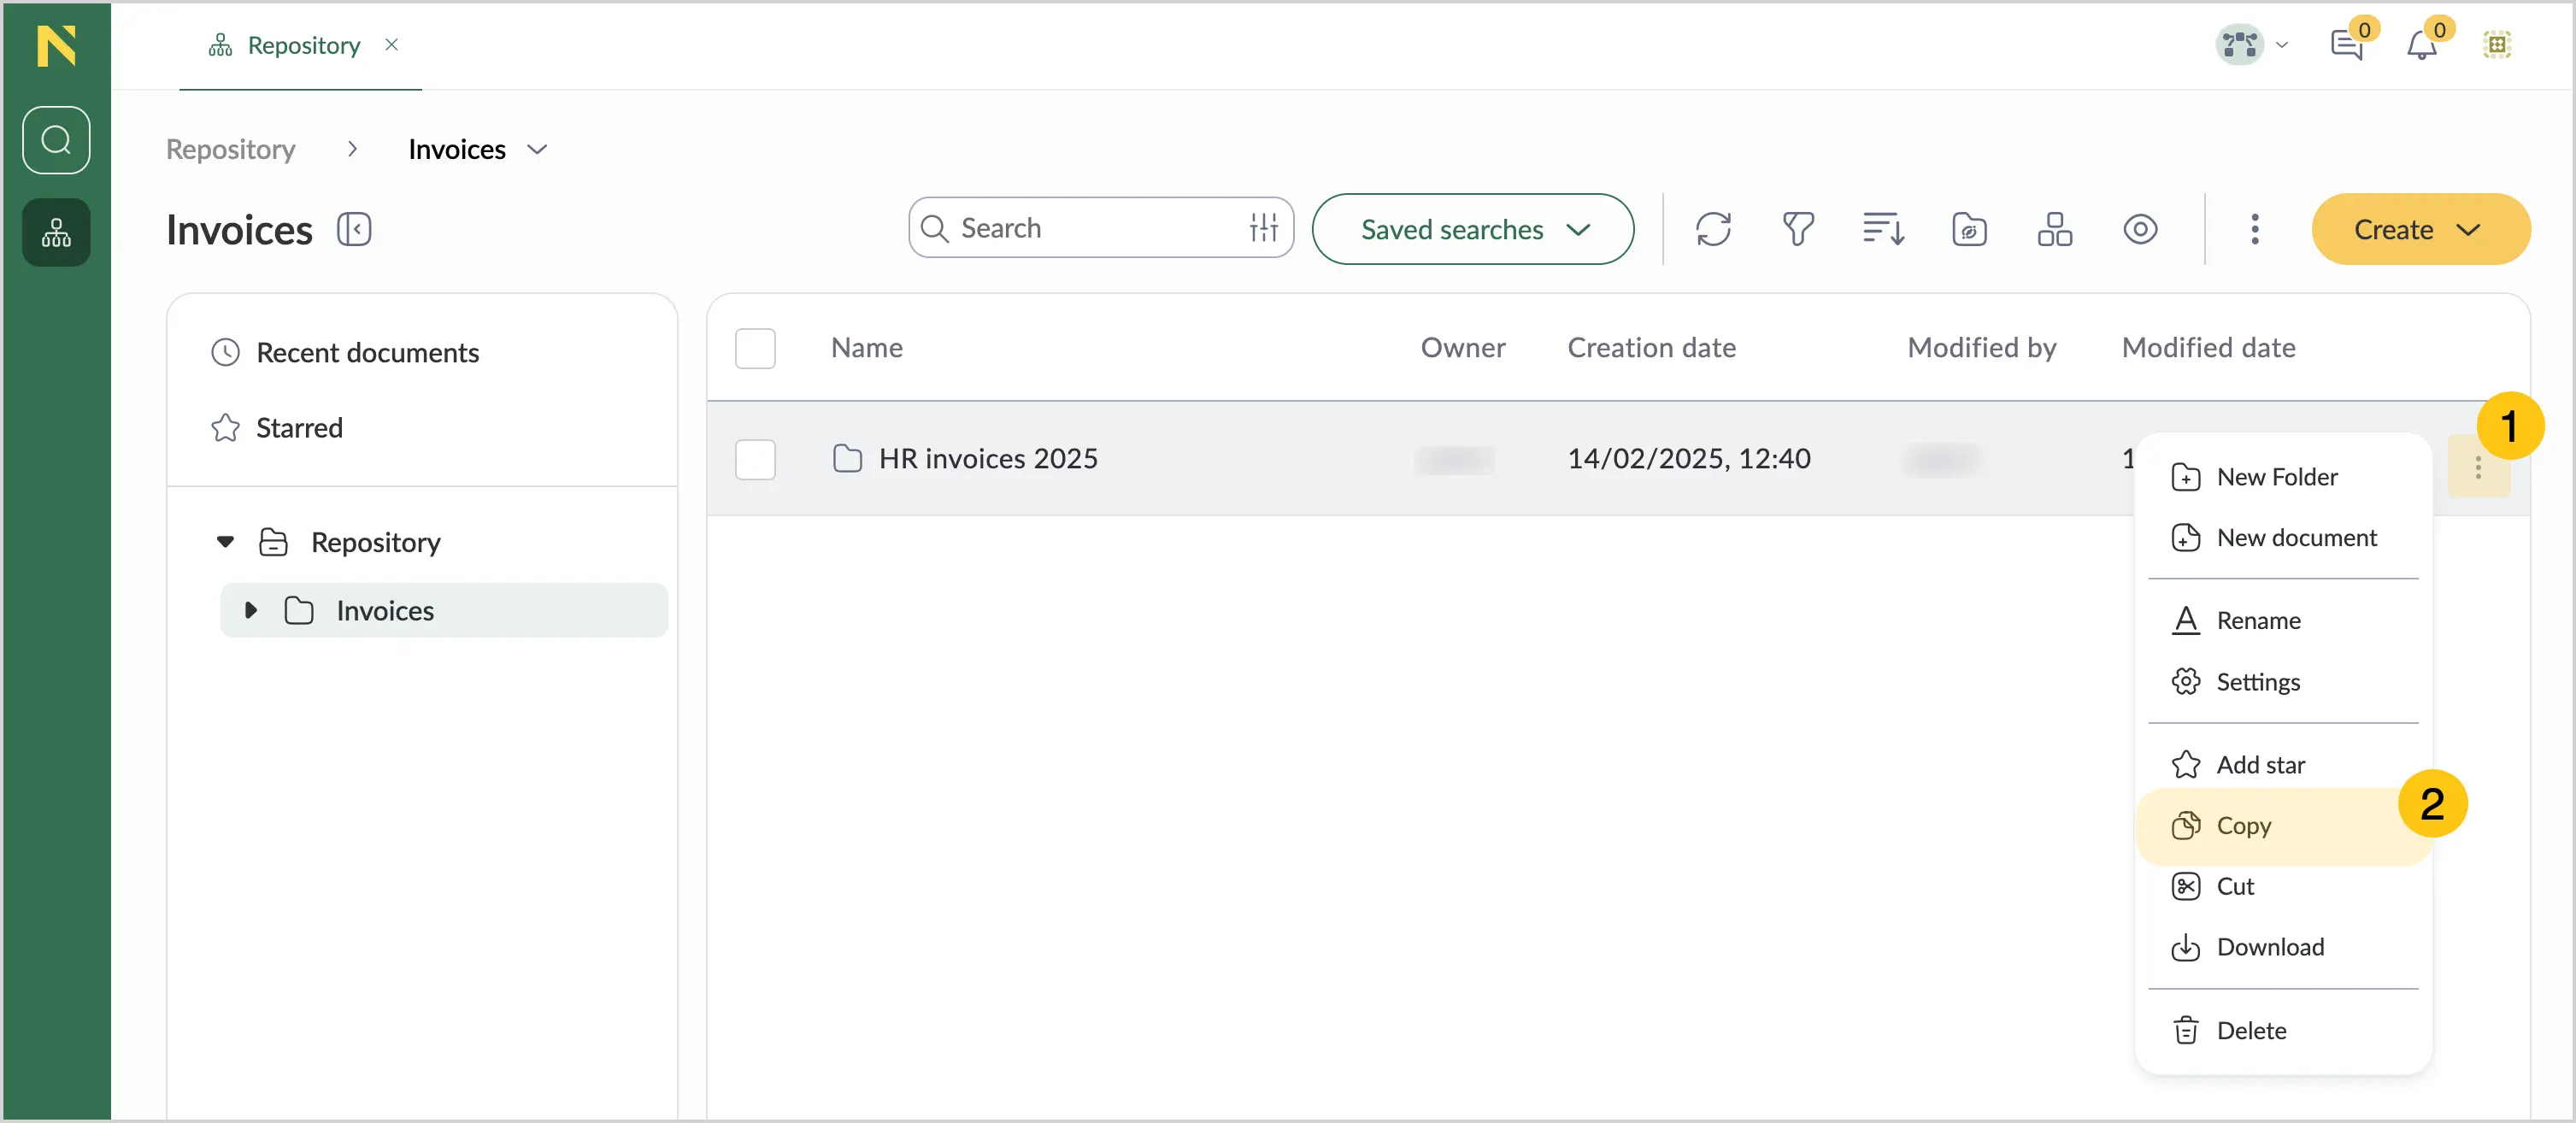
Hover over a folder, and then select 1.
-
Select Copy
 2.
2.
-
Select the destination folder where you want to place the copied folder.
-
Select 1, and then select Paste
2.
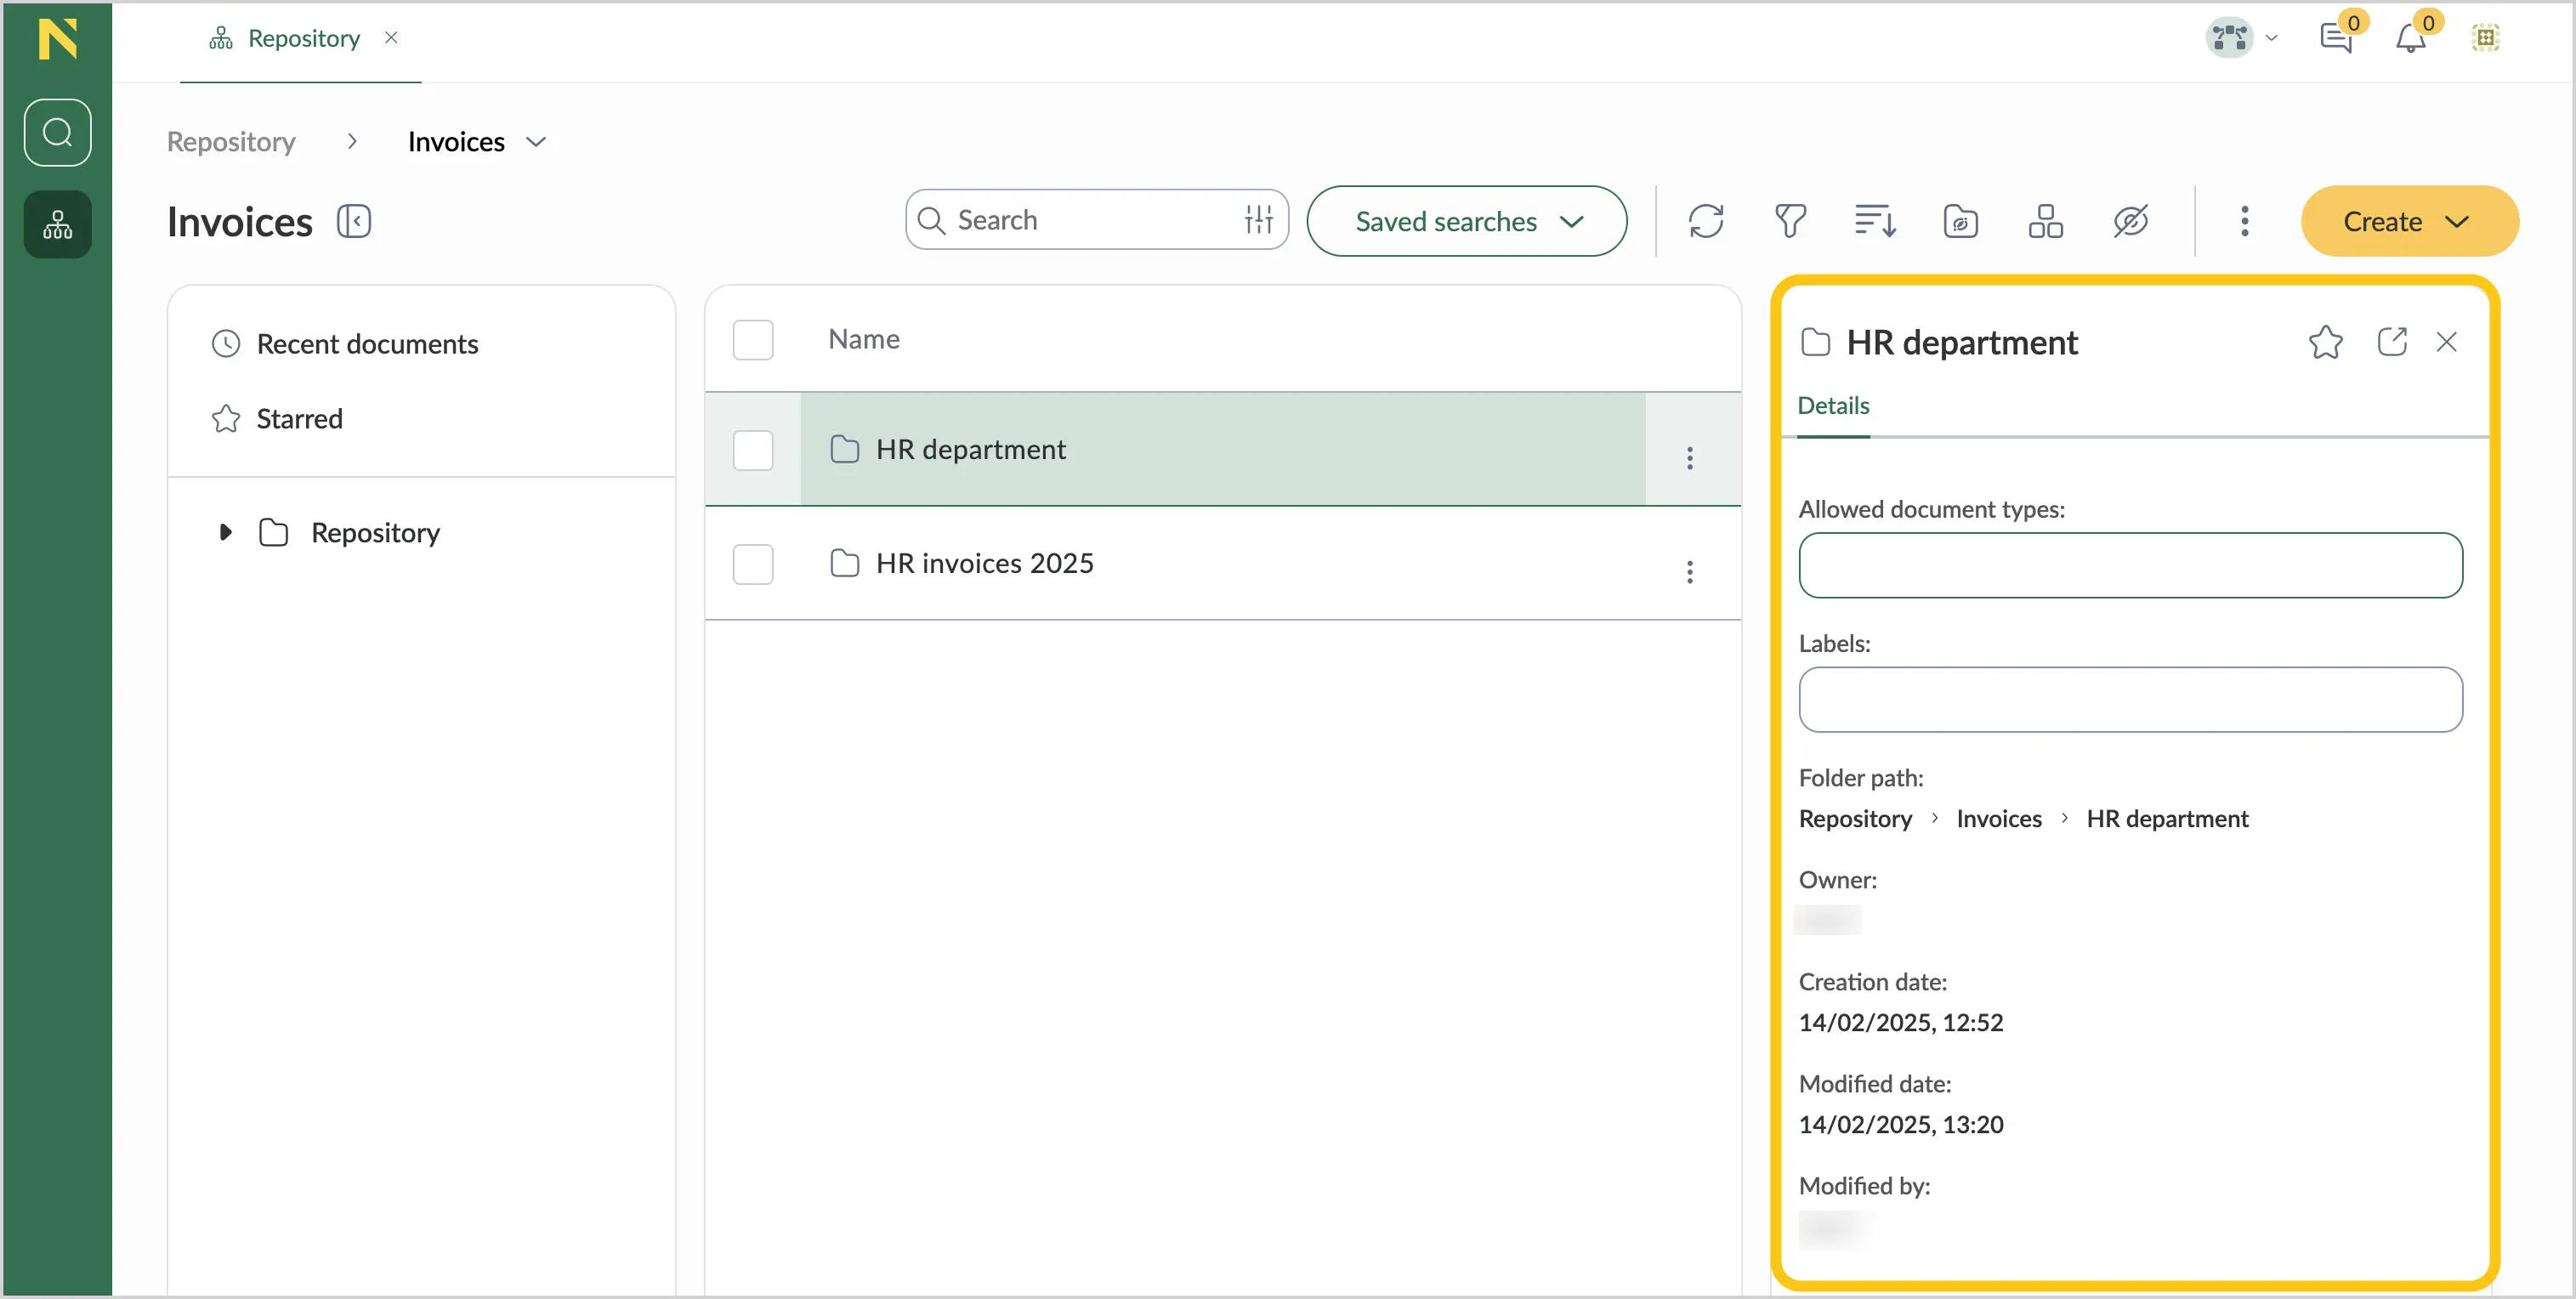
View folder properties
-
Select a folder 1.
-
In the top menu, select the preview icon
 2 to open the preview panel.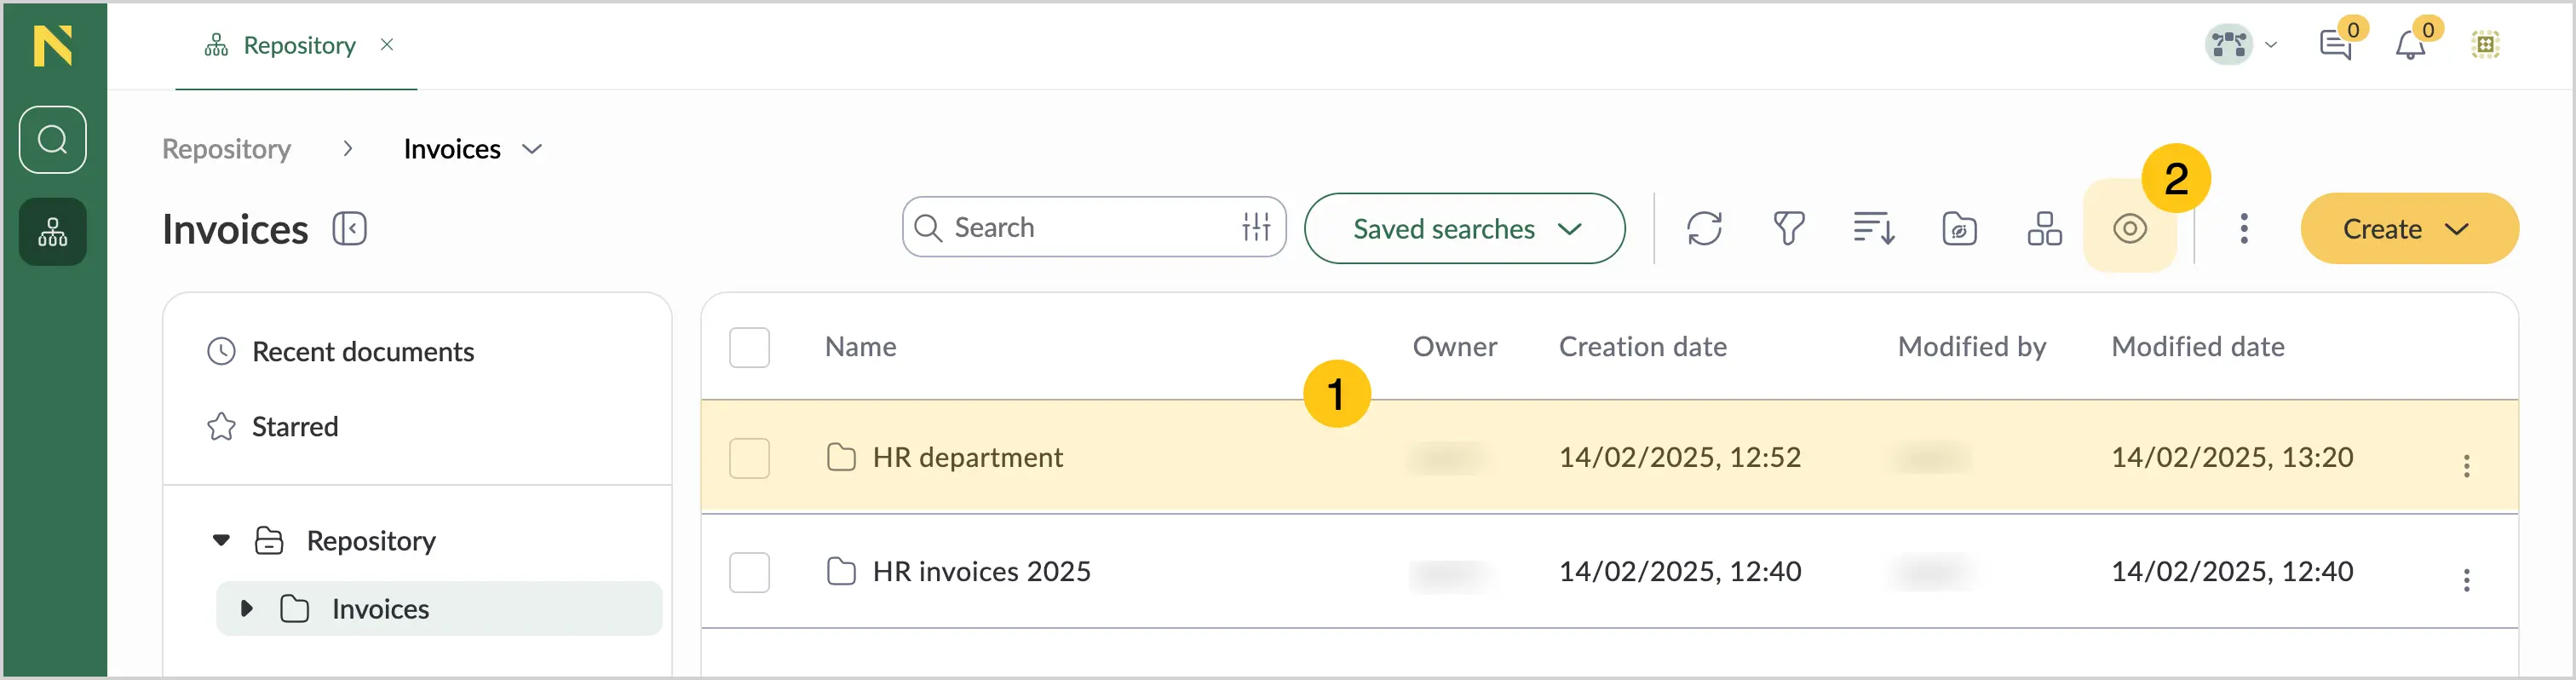
-
On the right side, the Details tab will open.
Download folder
-
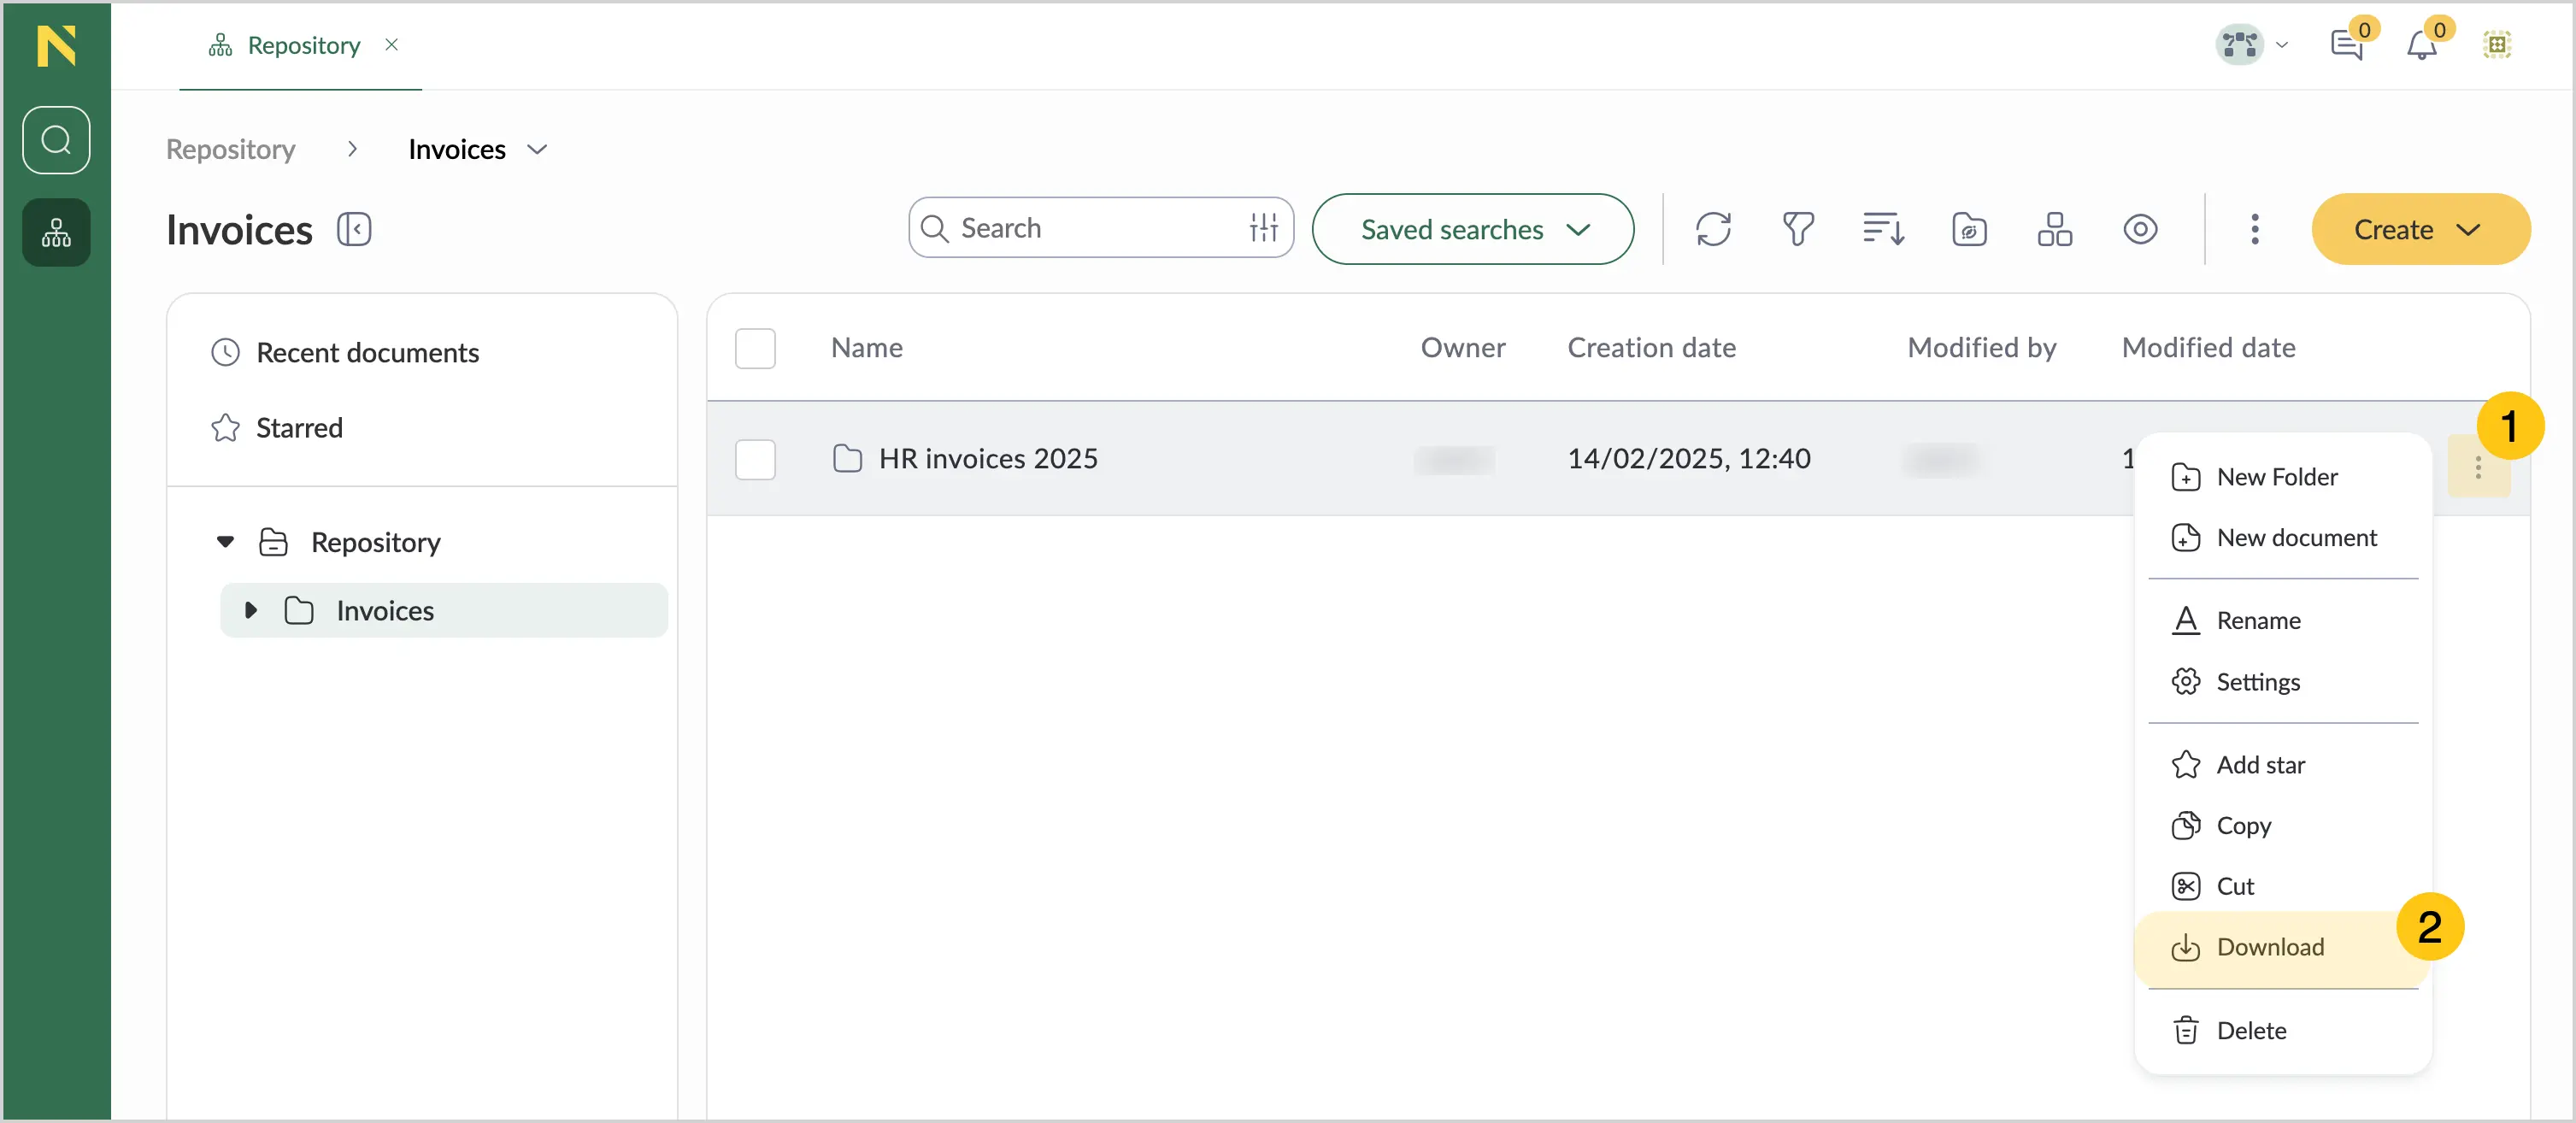
Hover over a folder, and then select 1.
-
Select Download
 2.
2. Note:
Note:To download several folders at once, use the Multiselect feature.
Edit folder
-
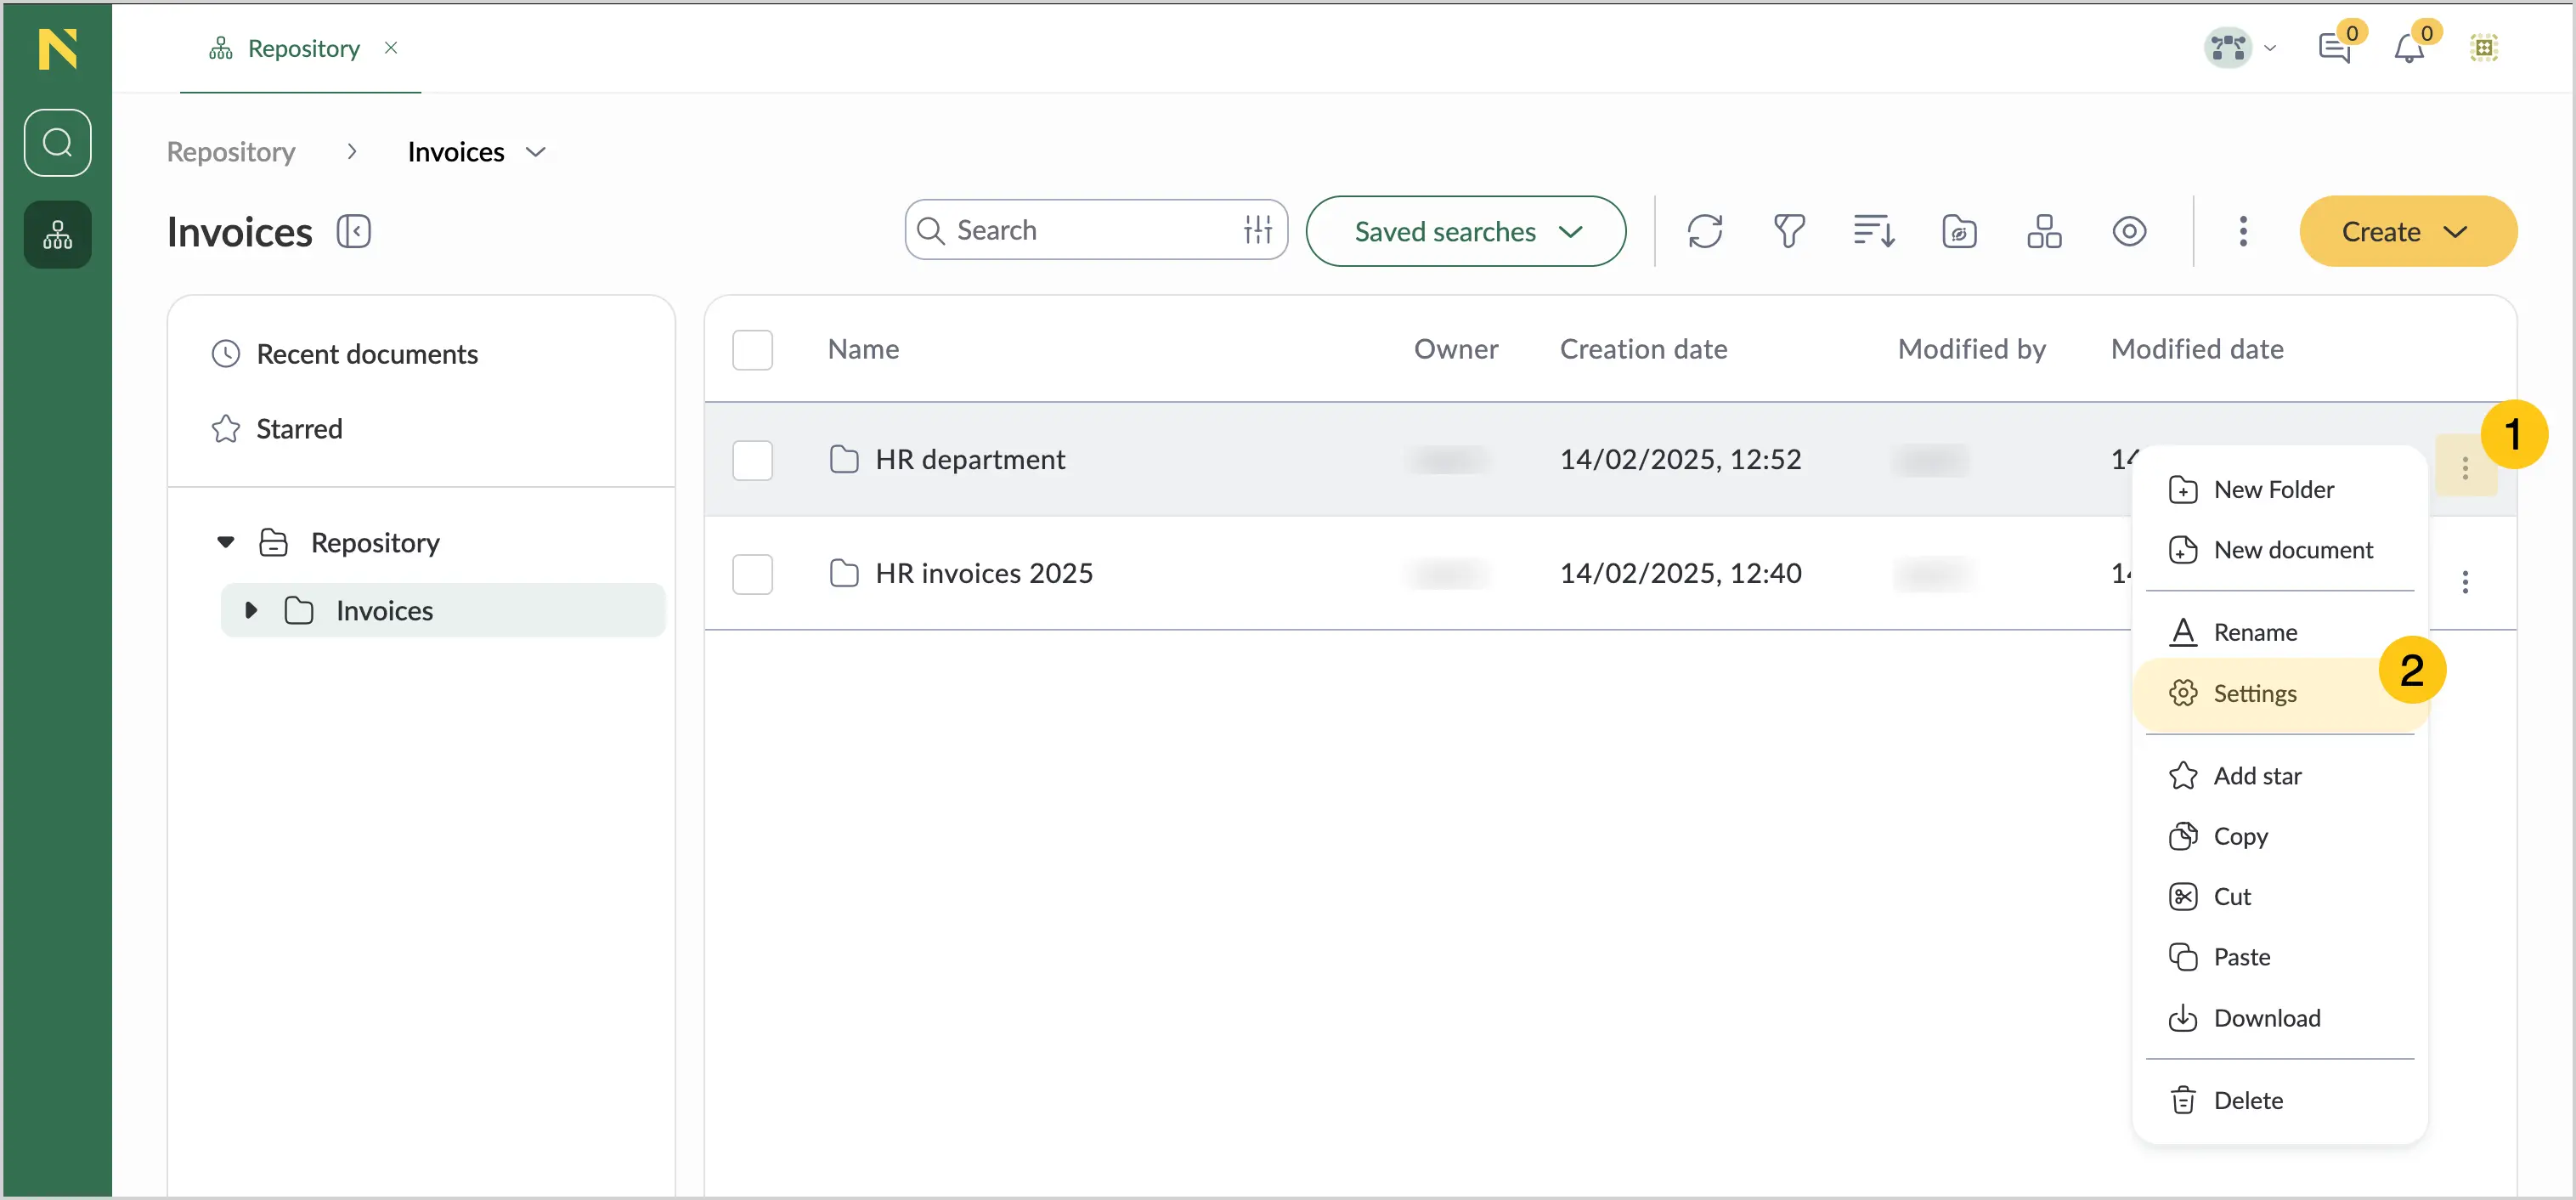
Hover over a folder, and then select 1.
-
Select Settings 2.
-
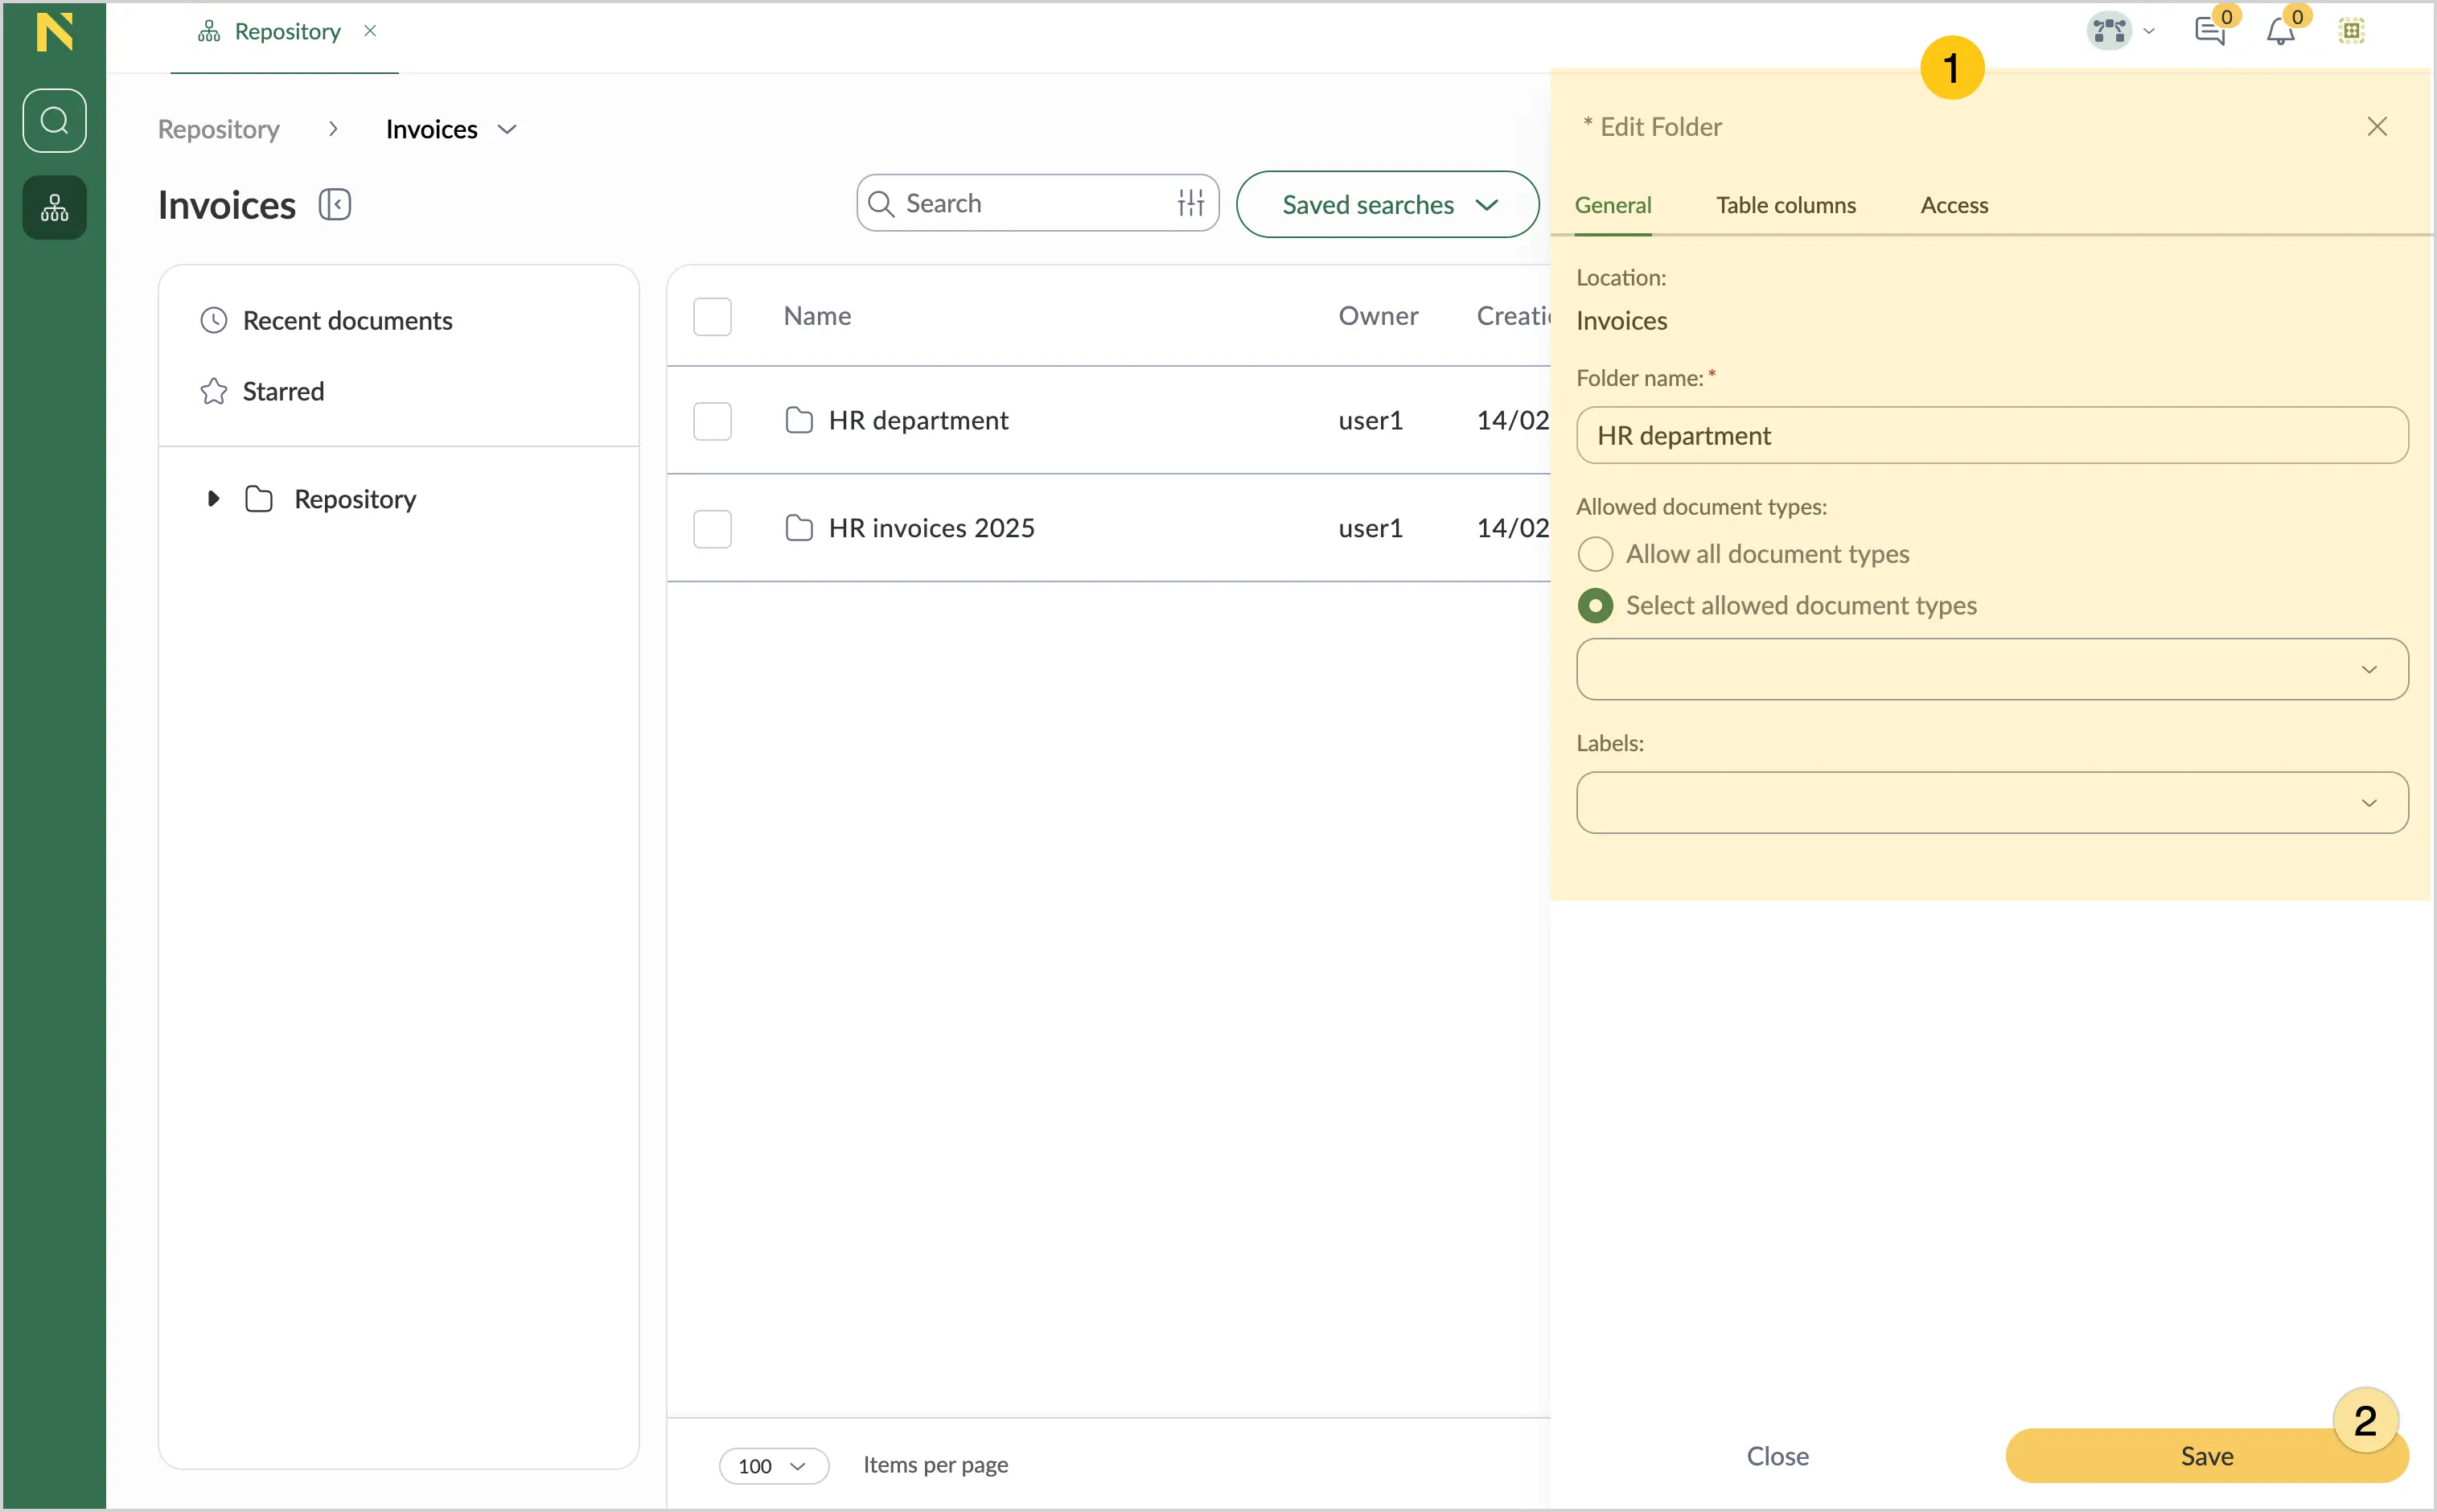
Make the needed changes 1, and then select Save 2.
Multiselect feature
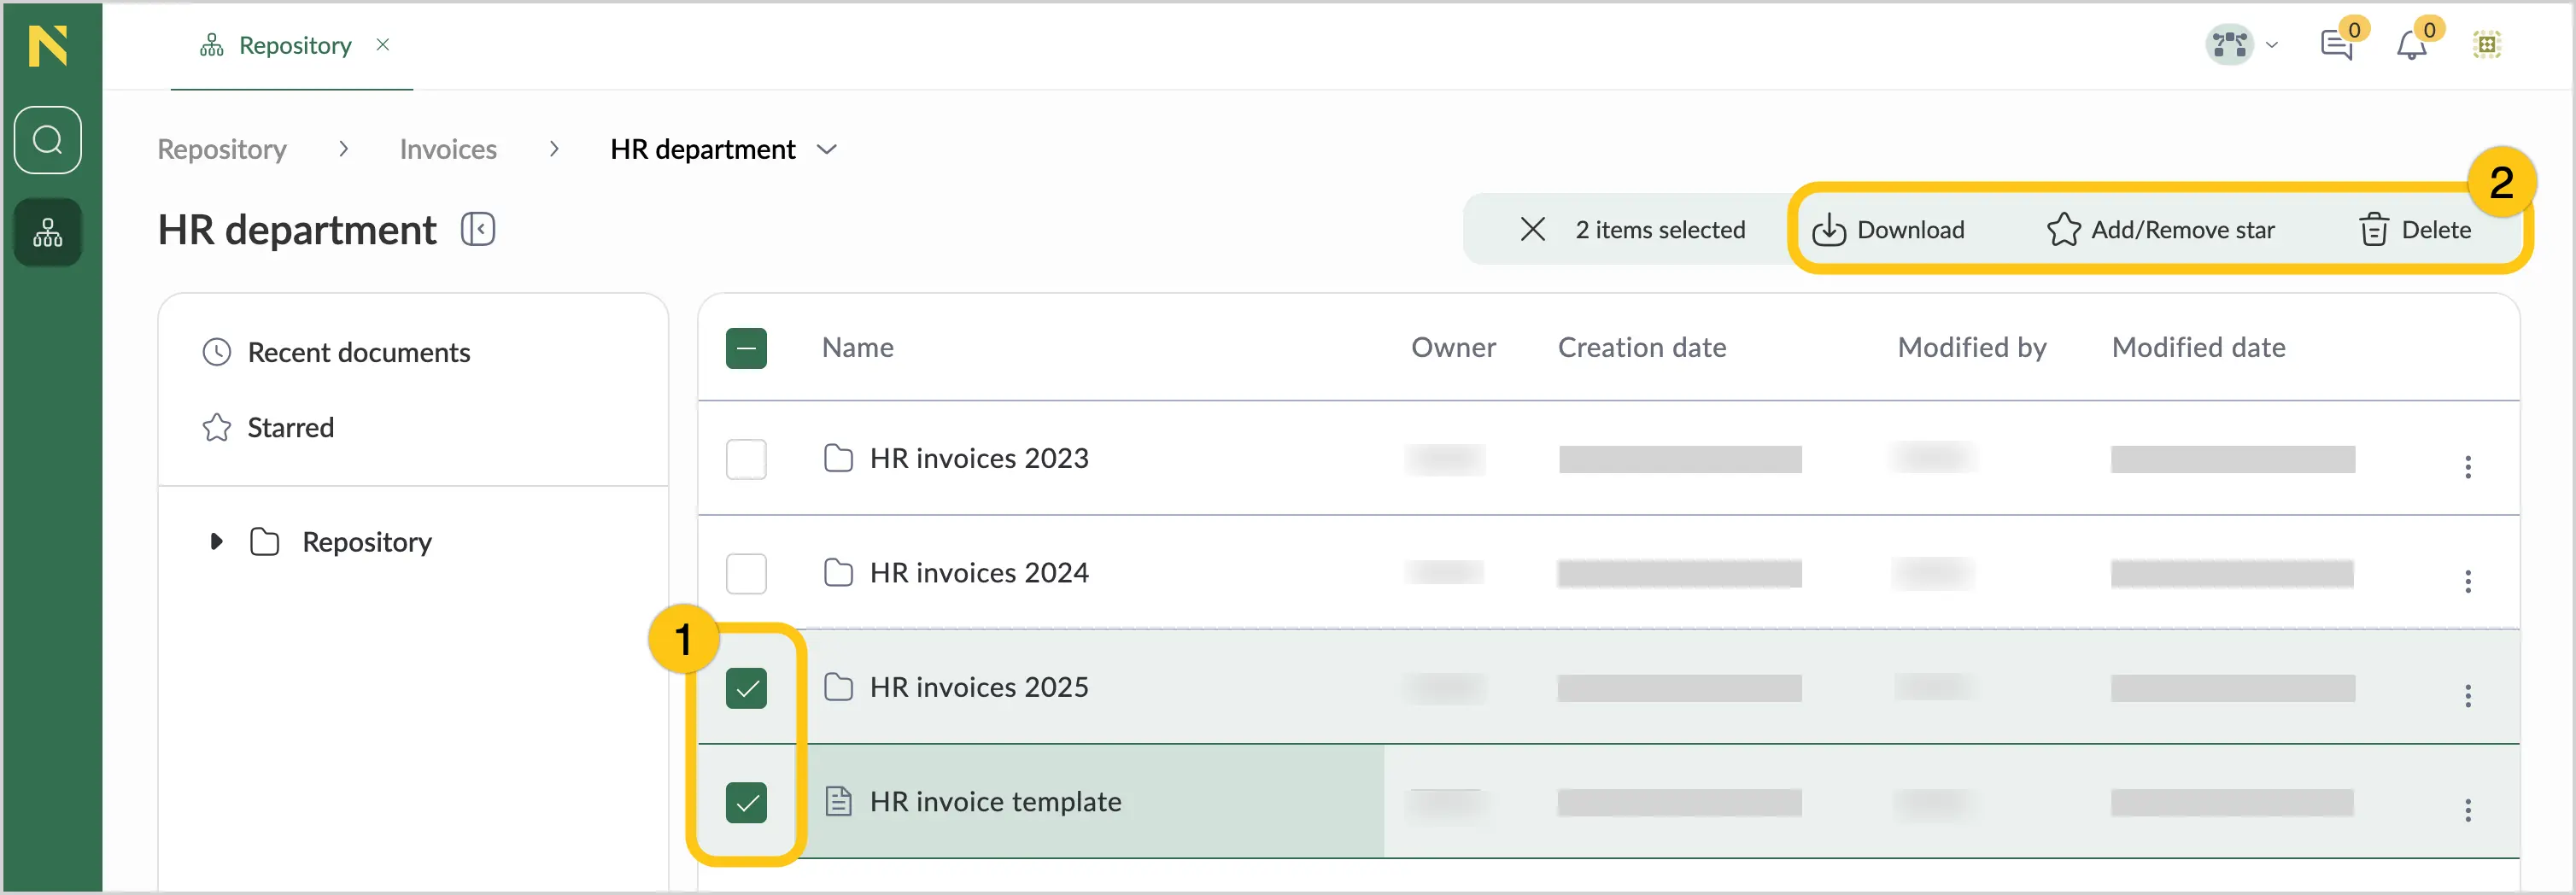
Use the multiselect feature to perform actions with multiple items at once.
-
Select the checkboxes next to the items you want to modify 1.
-
On the action bar 2, select the icon for the desired action.